HTTPS with API Gateway
This guide shows how set up AWS API Gateway for your Cortex APIs, which is the simplest way to enable HTTPS if a custom domain is not required. See here for how to set up a custom domain with SSL certificates instead.
Please note that one limitation of API Gateway is that there is a 30-second time limit for all requests.
If your API load balancer is internet-facing (which is the default, or you set api_load_balancer_scheme: internet-facing in your cluster configuration file before creating your cluster), use the first section of this guide.
If your API load balancer is internal (i.e. you set api_load_balancer_scheme: internal in your cluster configuration file before creating your cluster), use the second section of this guide.
Internet-facing load balancer
This section applies if your API load balancer is internet-facing (which is the default, or you set api_load_balancer_scheme: internet-facing in your cluster configuration file before creating your cluster). If your API load balancer is internal, see the internal load balancer section below.
There are two types of API Gateways that can be used when your load balancer is internet-facing: HTTP and REST. HTTP APIs are faster and less expensive, while REST APIs have more features an allow for more control. See the following section for creating an HTTP API, or skip to the next section for creating a REST API.
HTTP API
Create an API Gateway
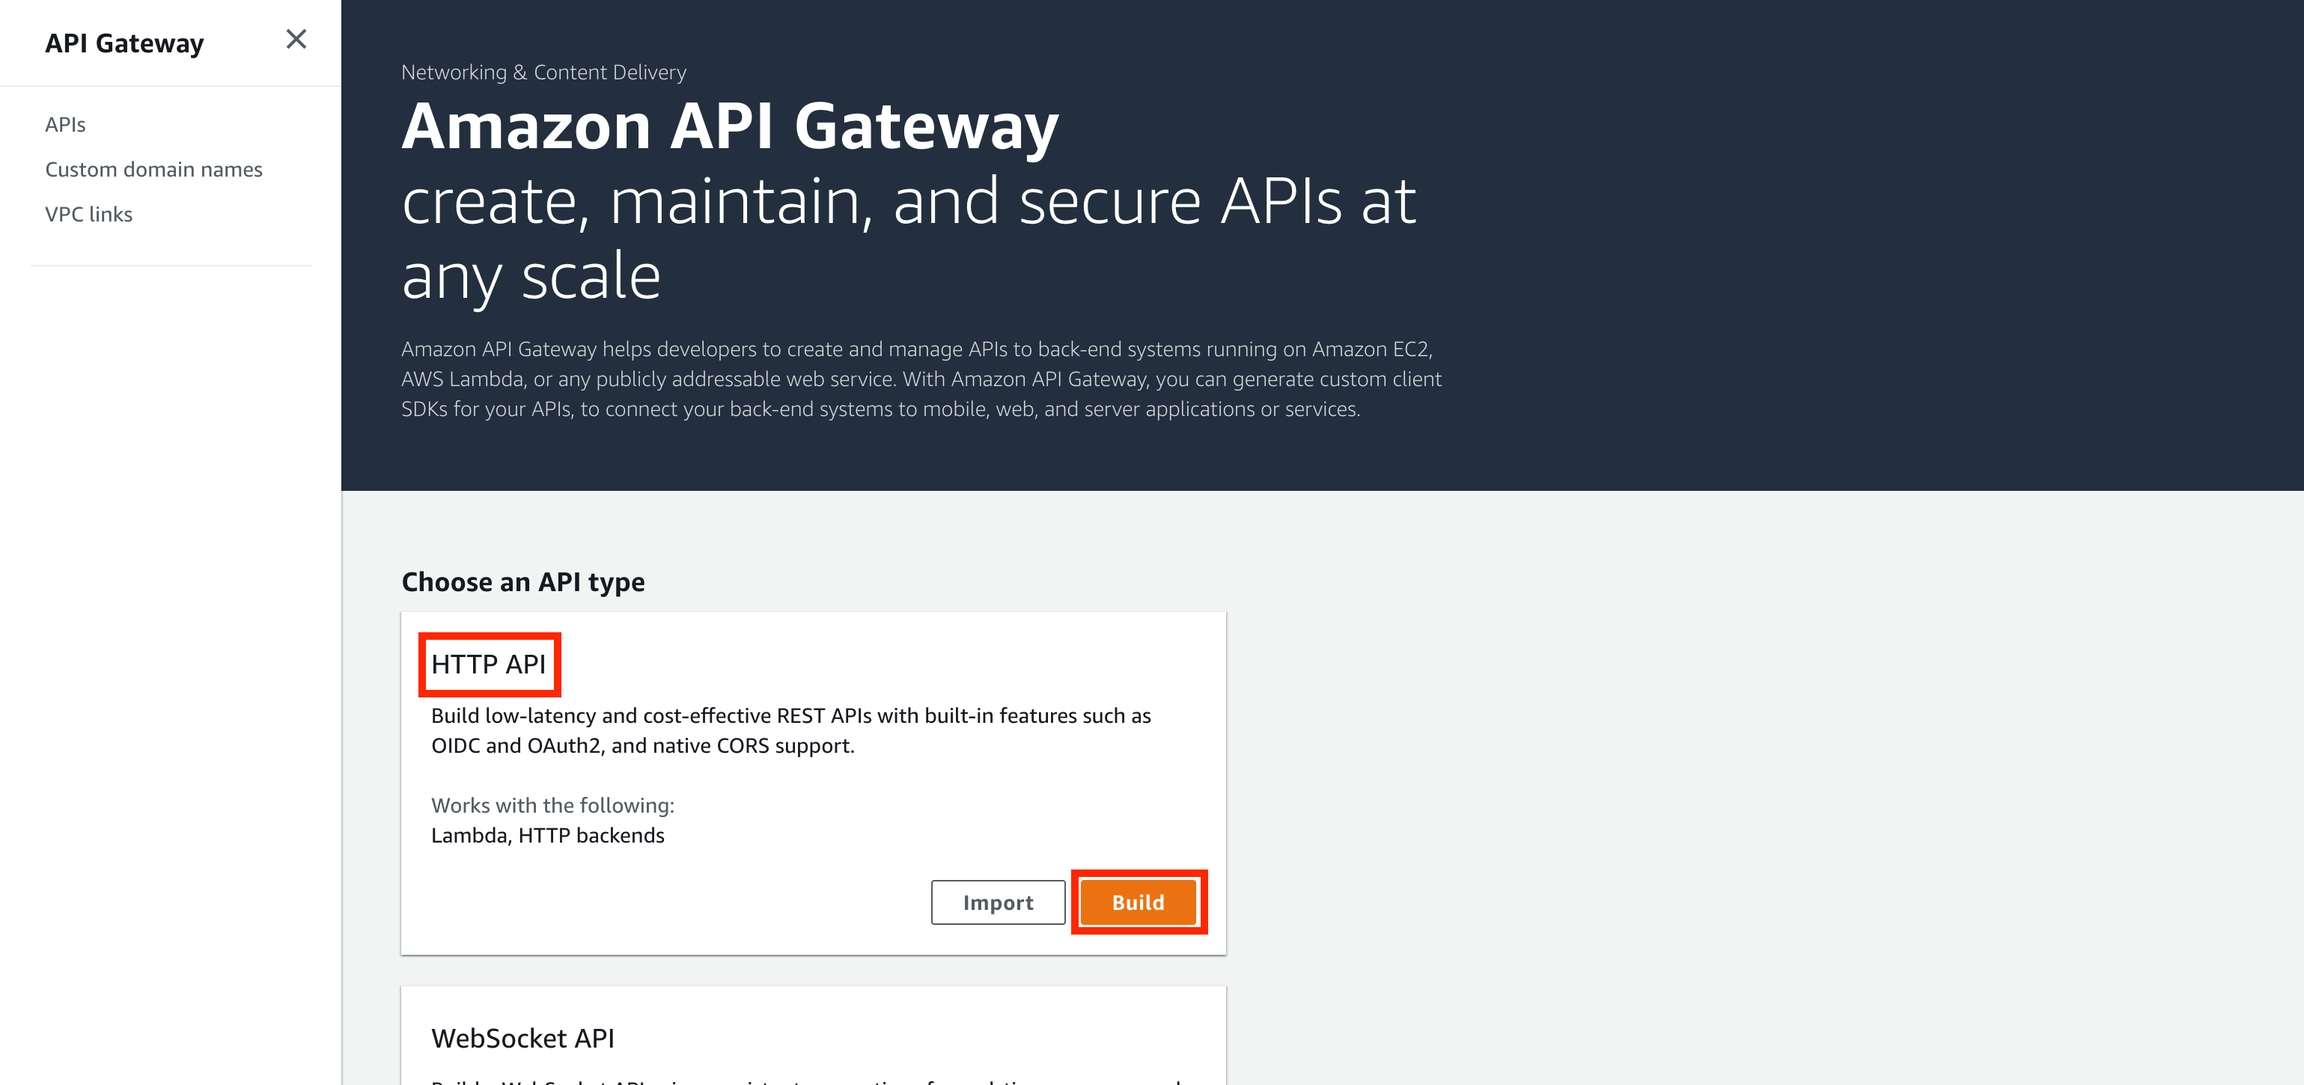
Go to the API Gateway console, select "HTTP API" under "Choose an API type", and click "Build".
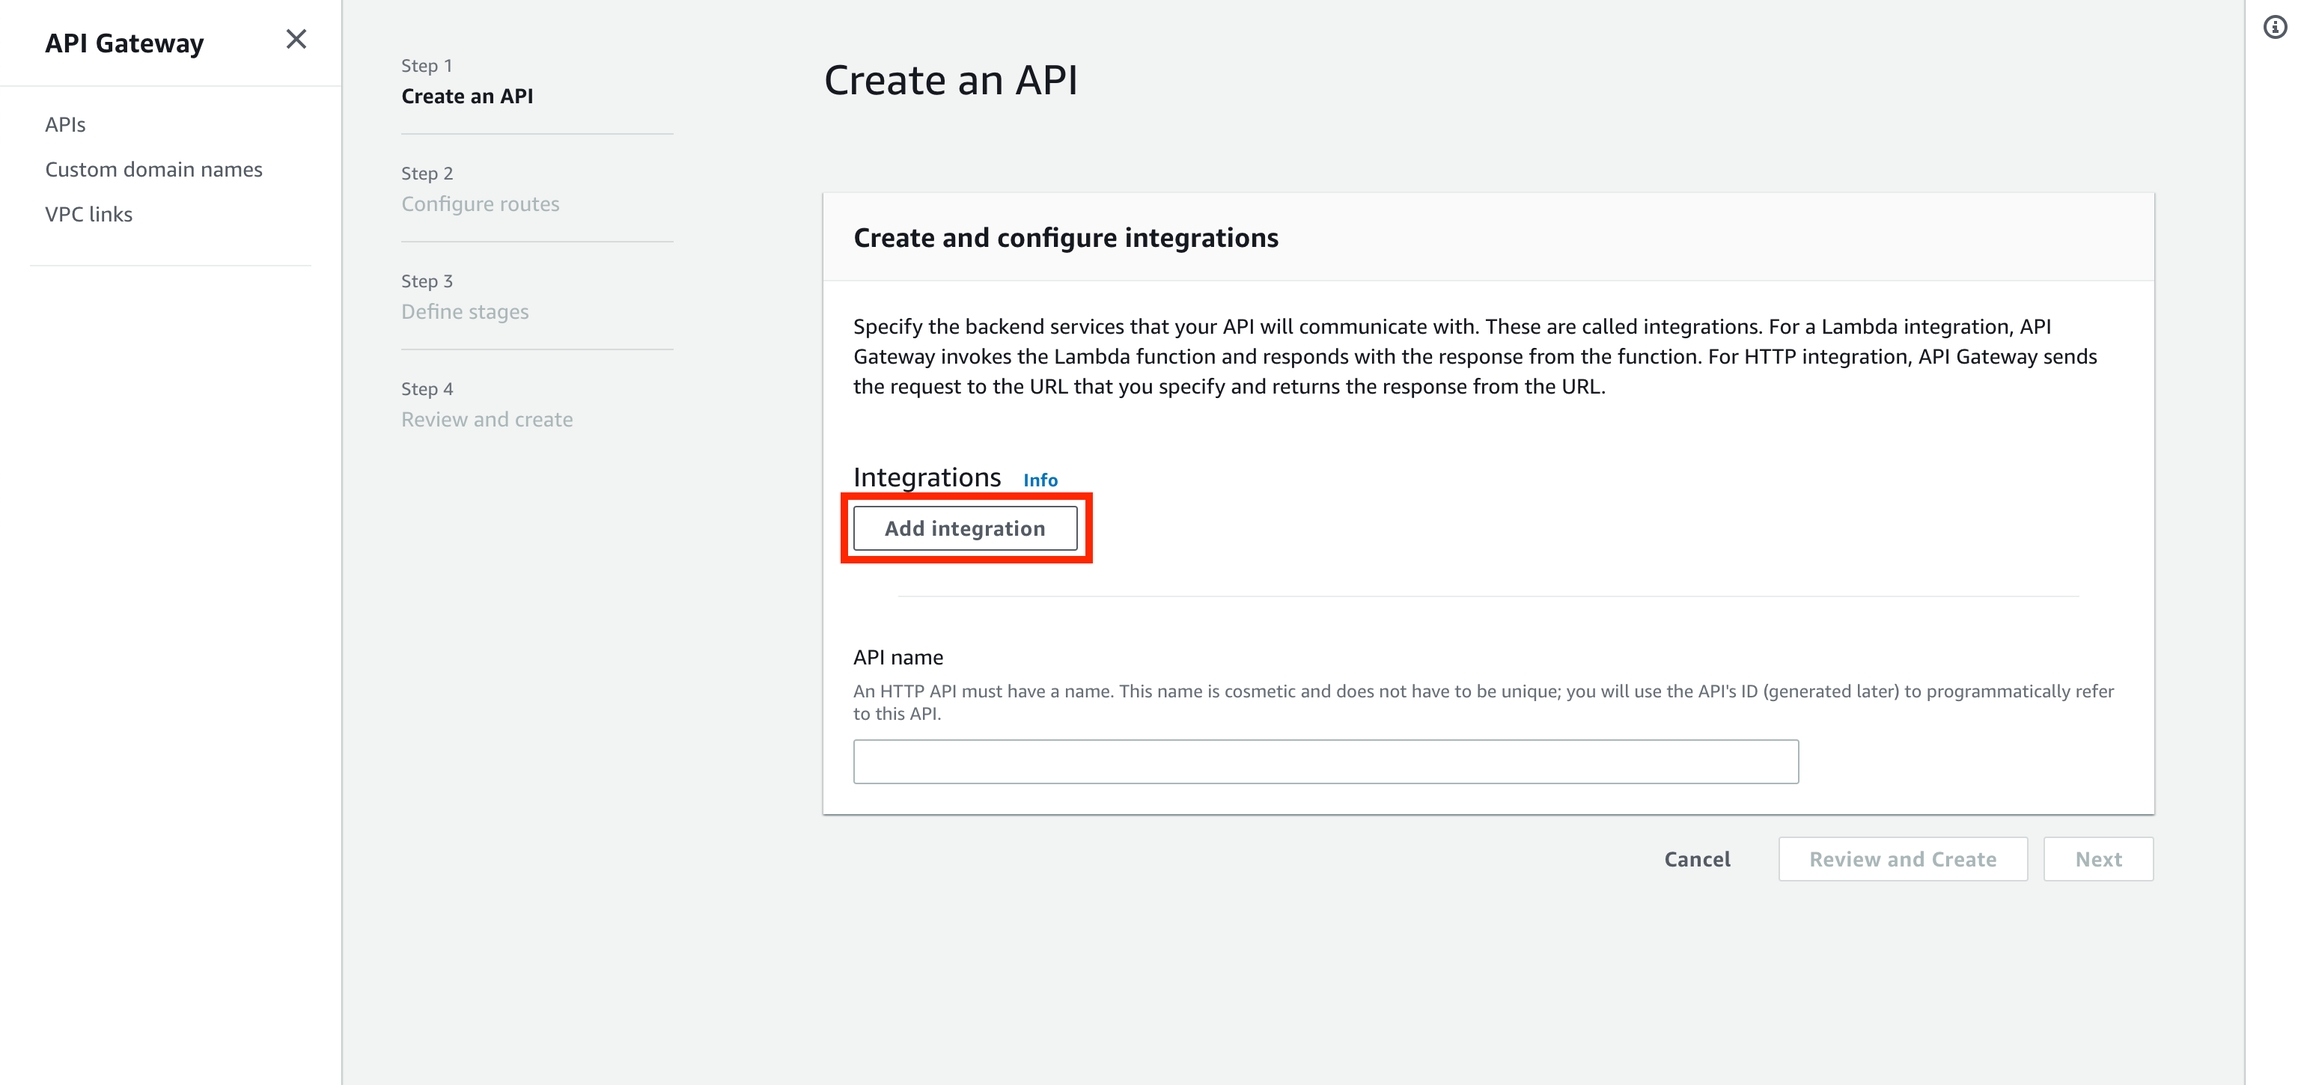
Click "Add integration".
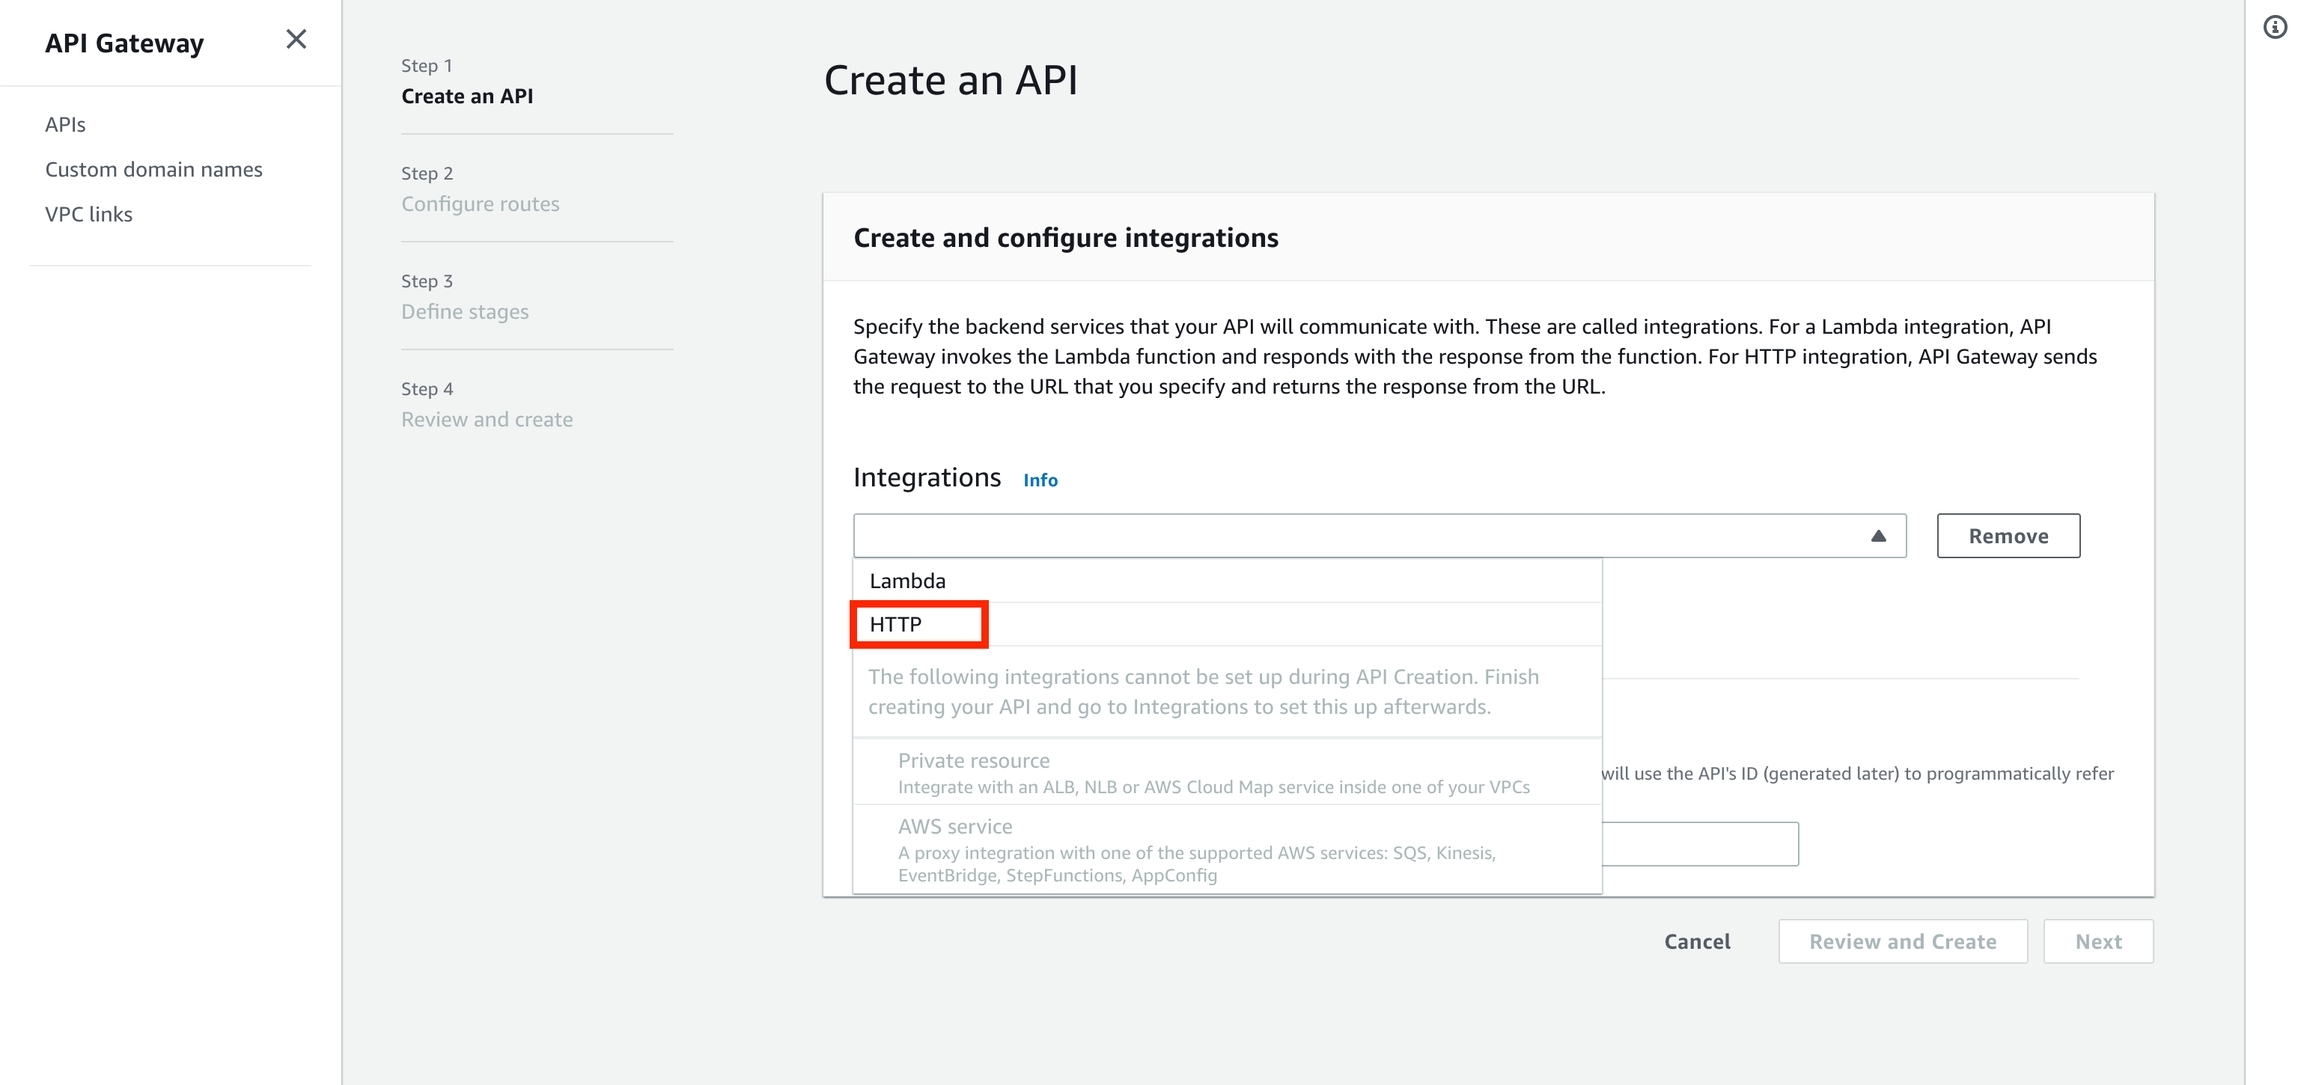
Click the drop-down menu, and select "HTTP".
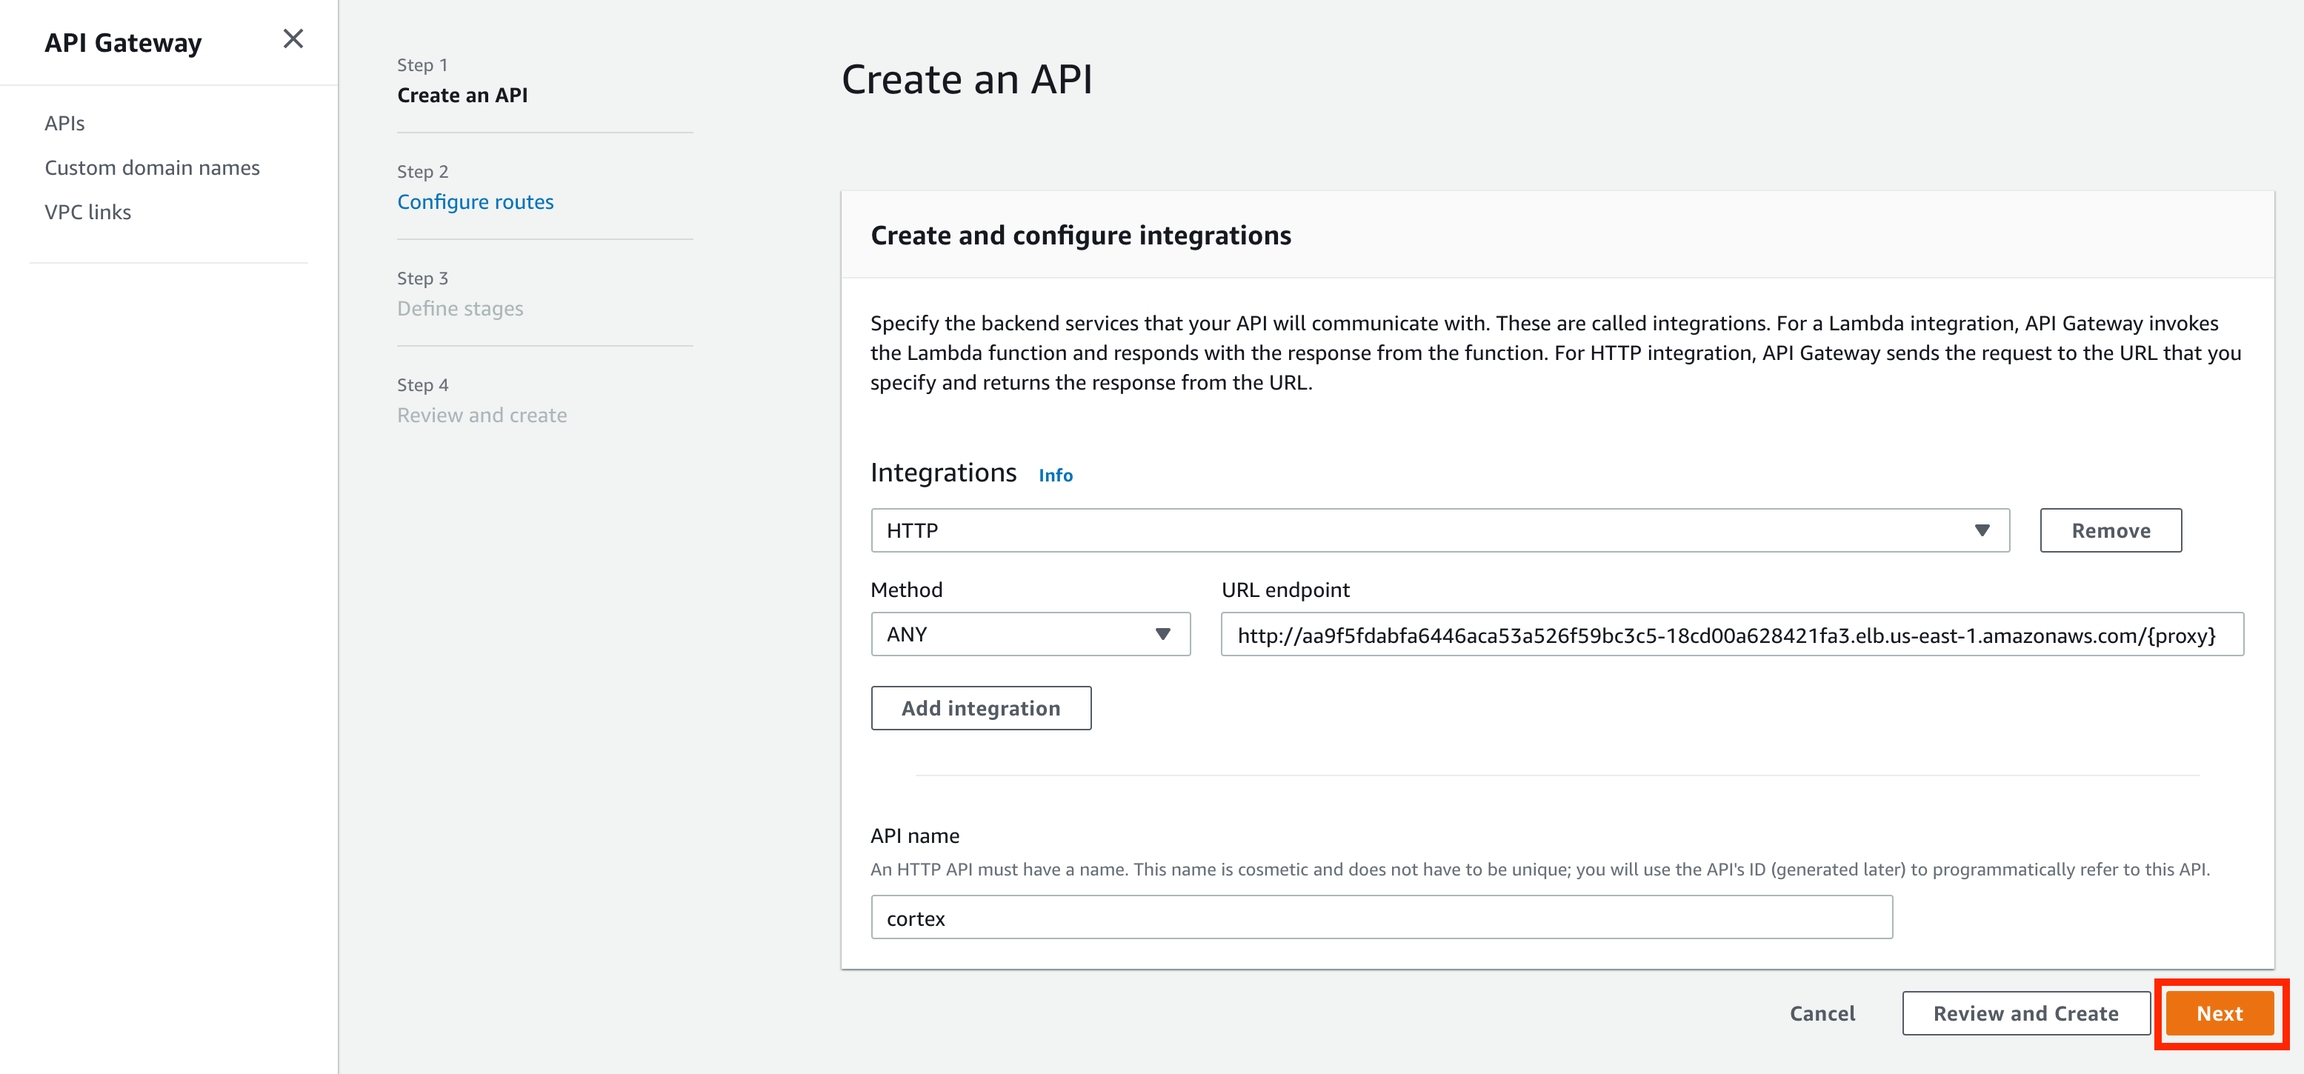
Set the "URL endpoint" to http://API_LOAD_BALANCER_ENDPOINT/{proxy}. You can get your API load balancer endpoint via cortex cluster info; make sure to prepend http:// and append /{proxy}. For example, mine is: http://aa9f5fdabfa6446aca53a526f59bc3c5-18cd00a628421fa3.elb.us-east-1.amazonaws.com/{proxy}.
Choose a name for your API (e.g. "cortex"), and click "Next".
On the next page, update the pre-populated route's resource path to /{proxy+}, and click "Next".
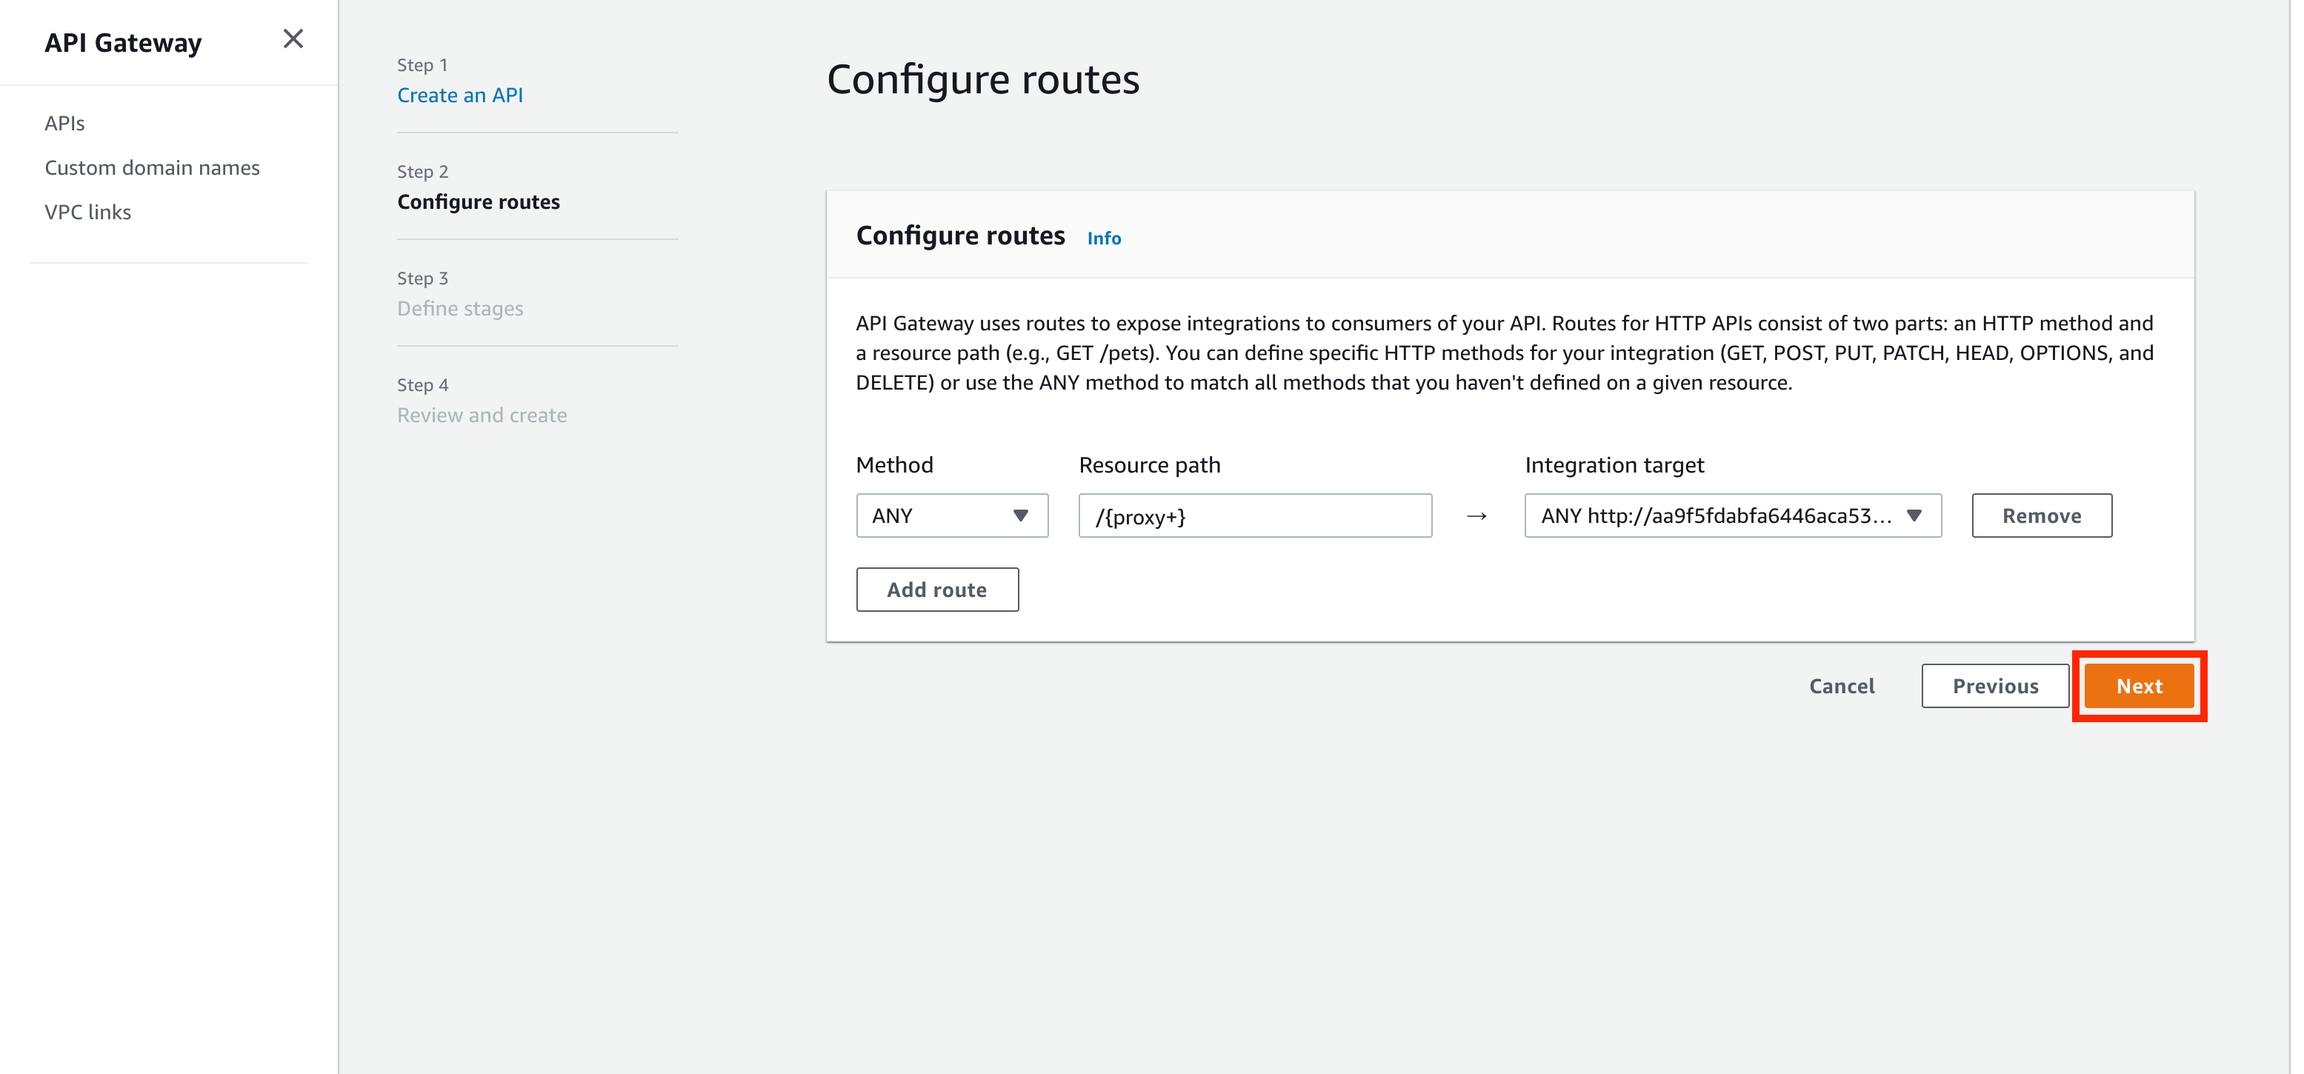
Click "Next" again.
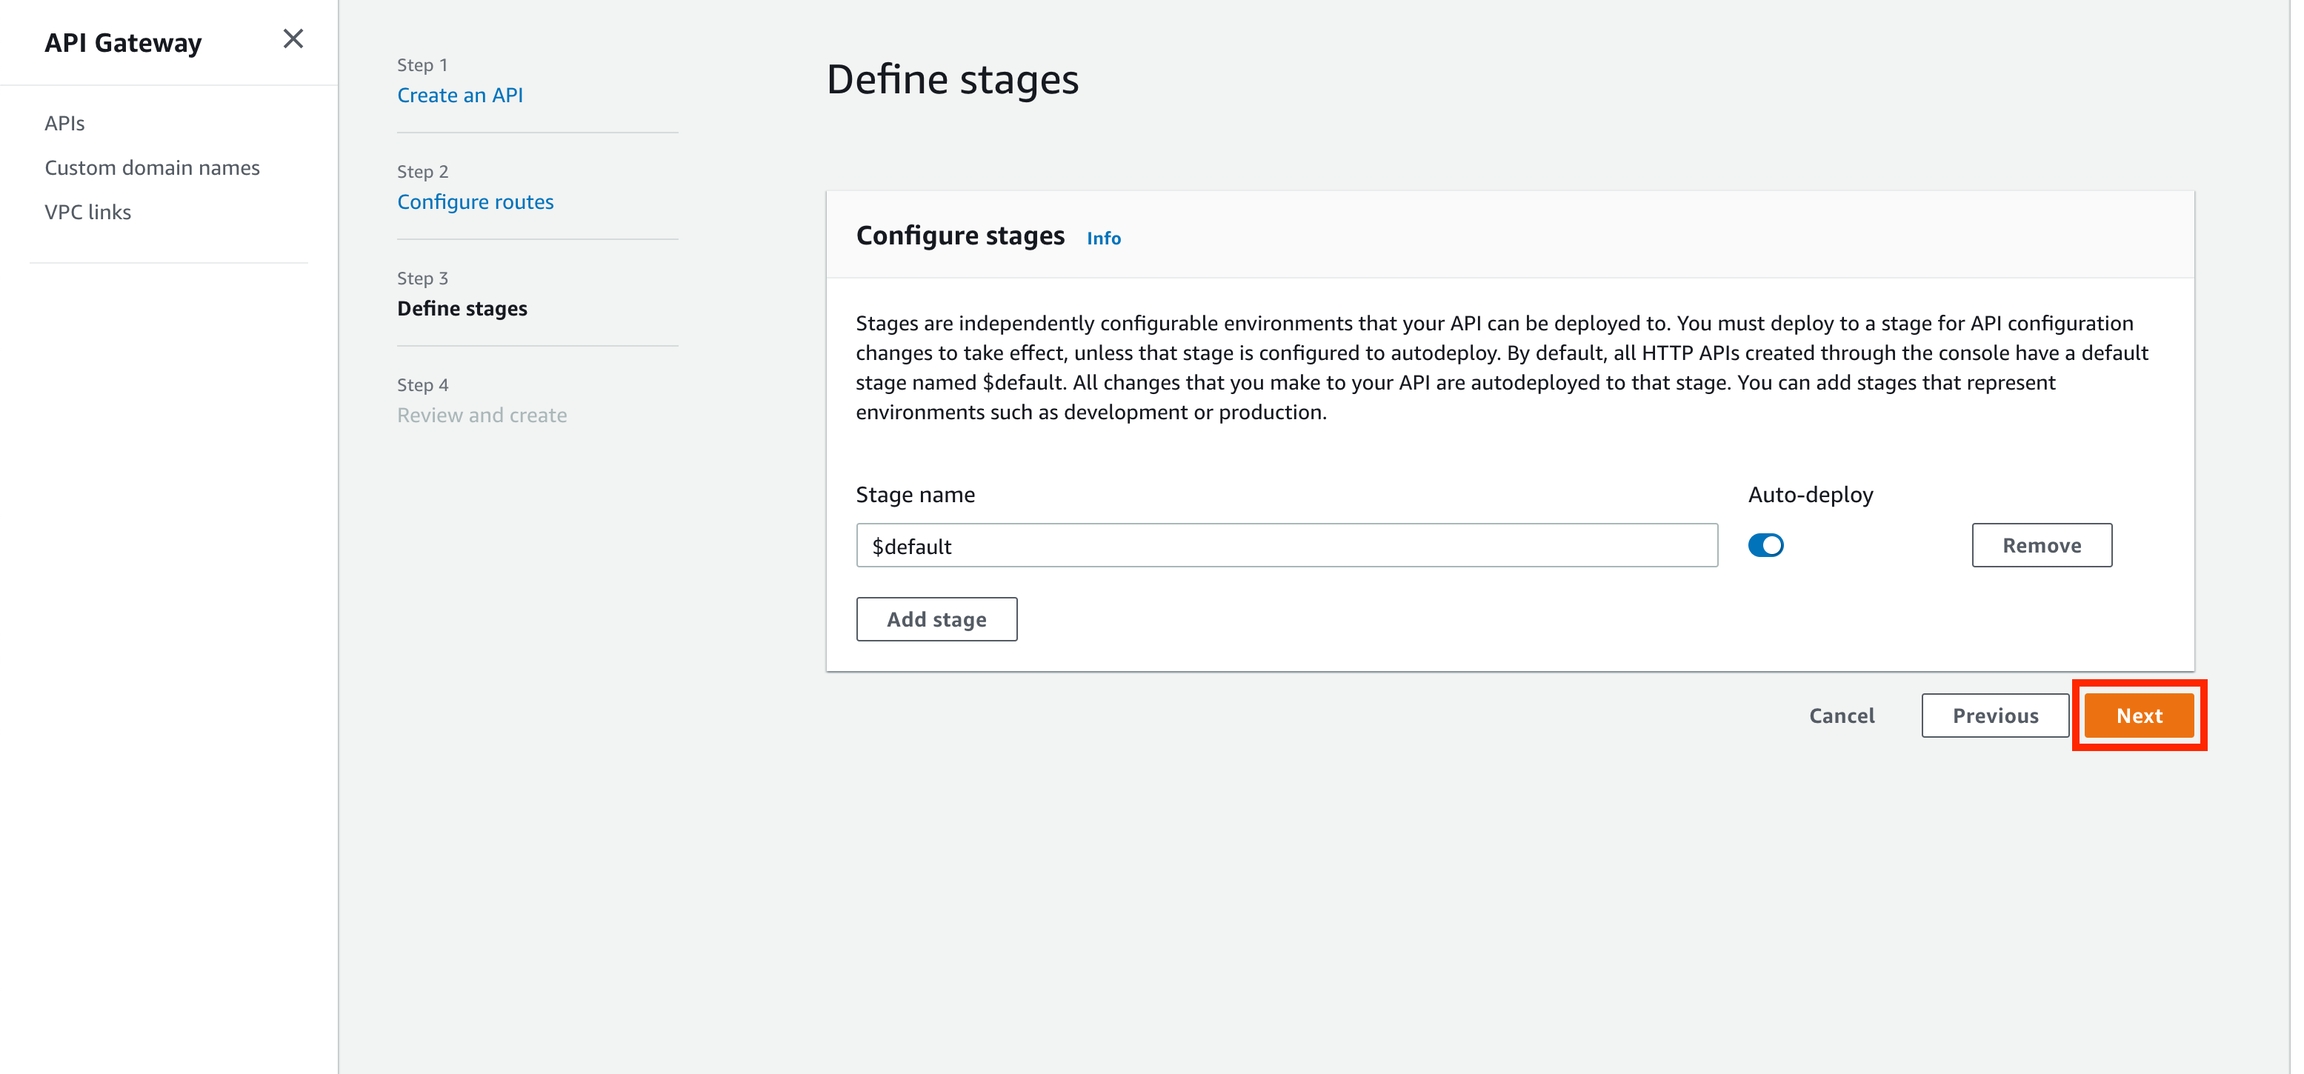
Click "Create".
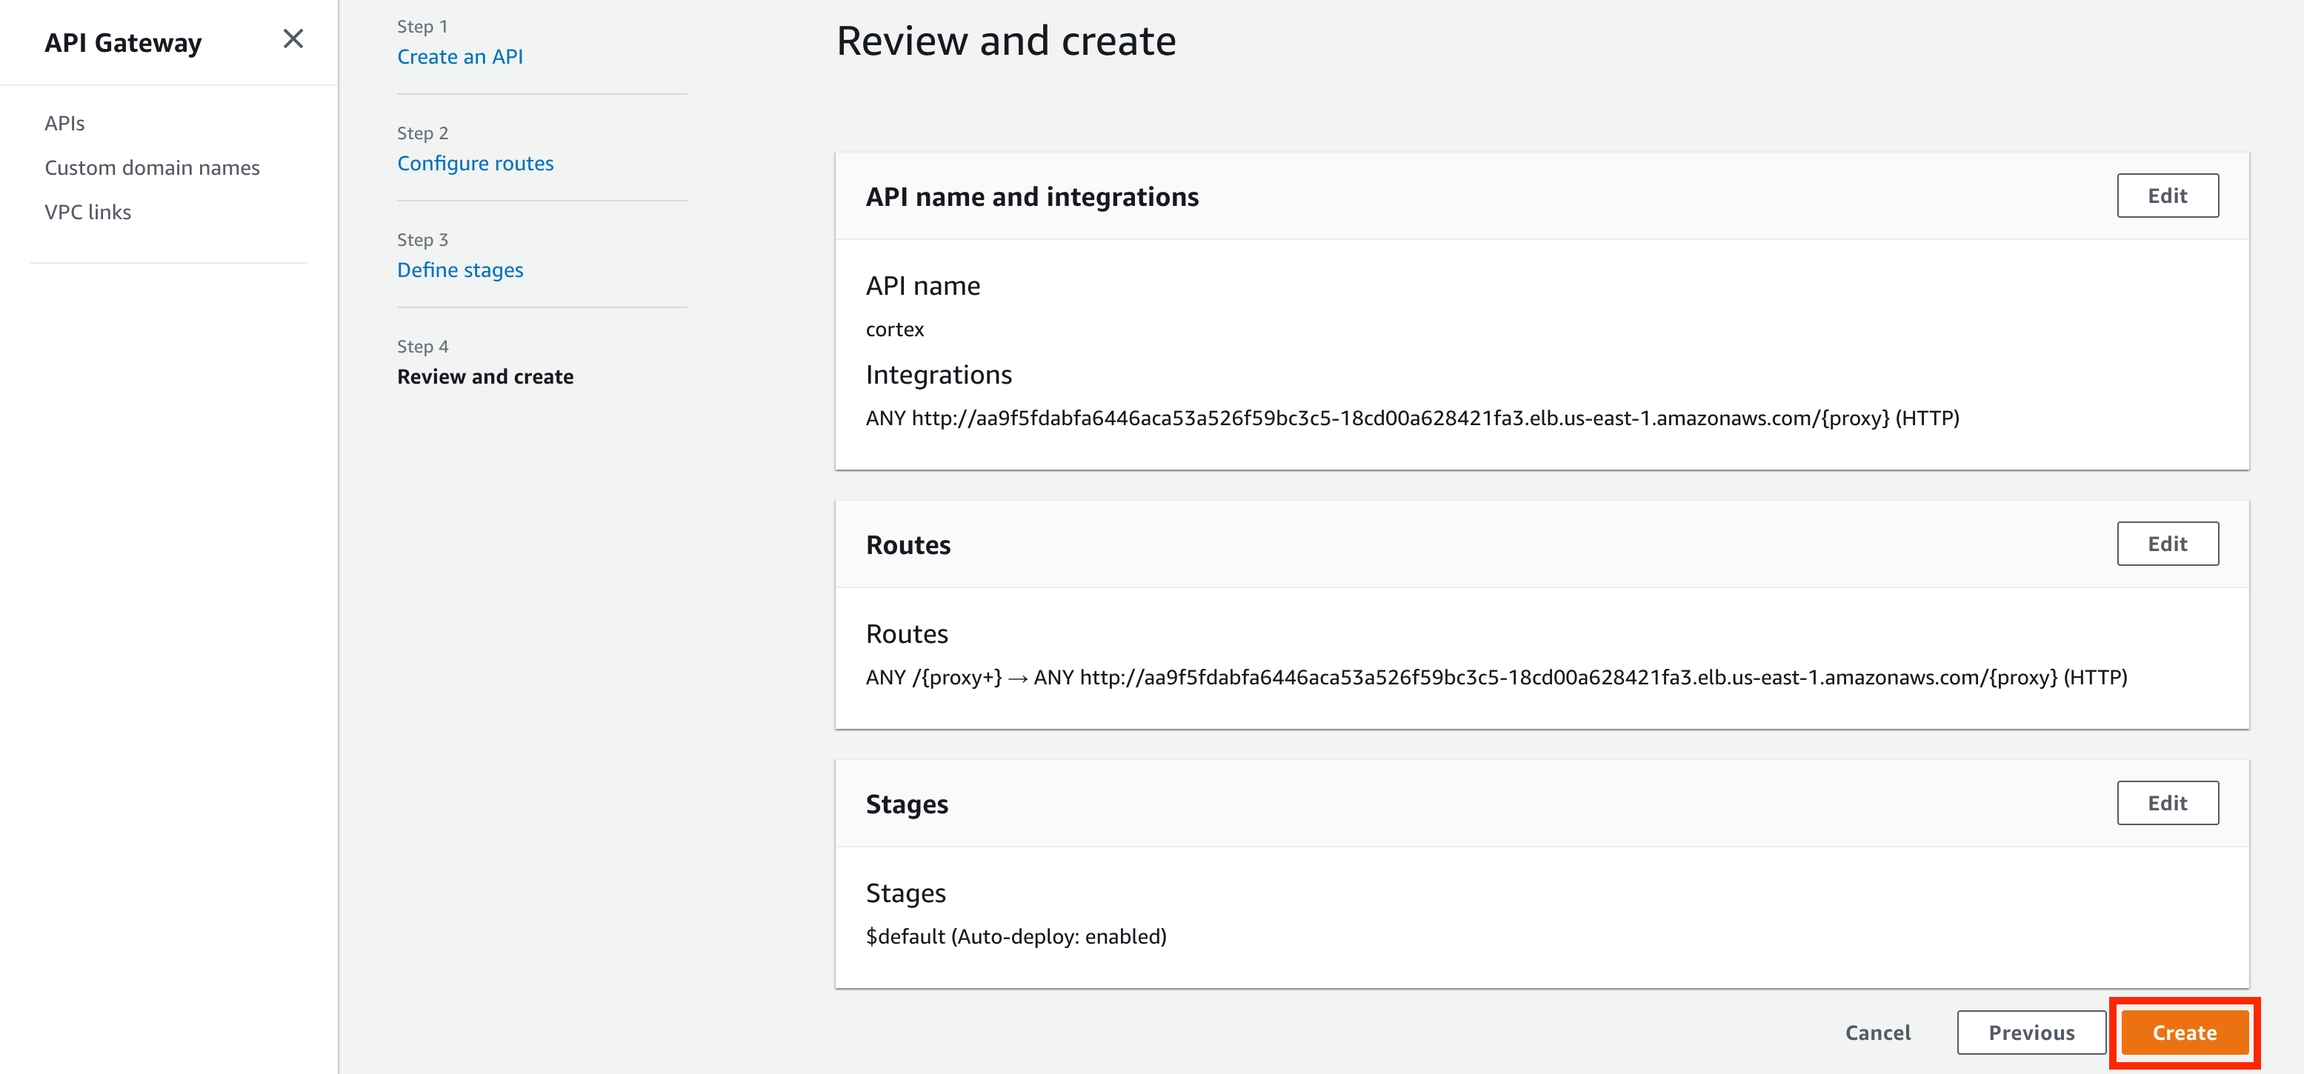
Copy your "Invoke URL" for the $default stage
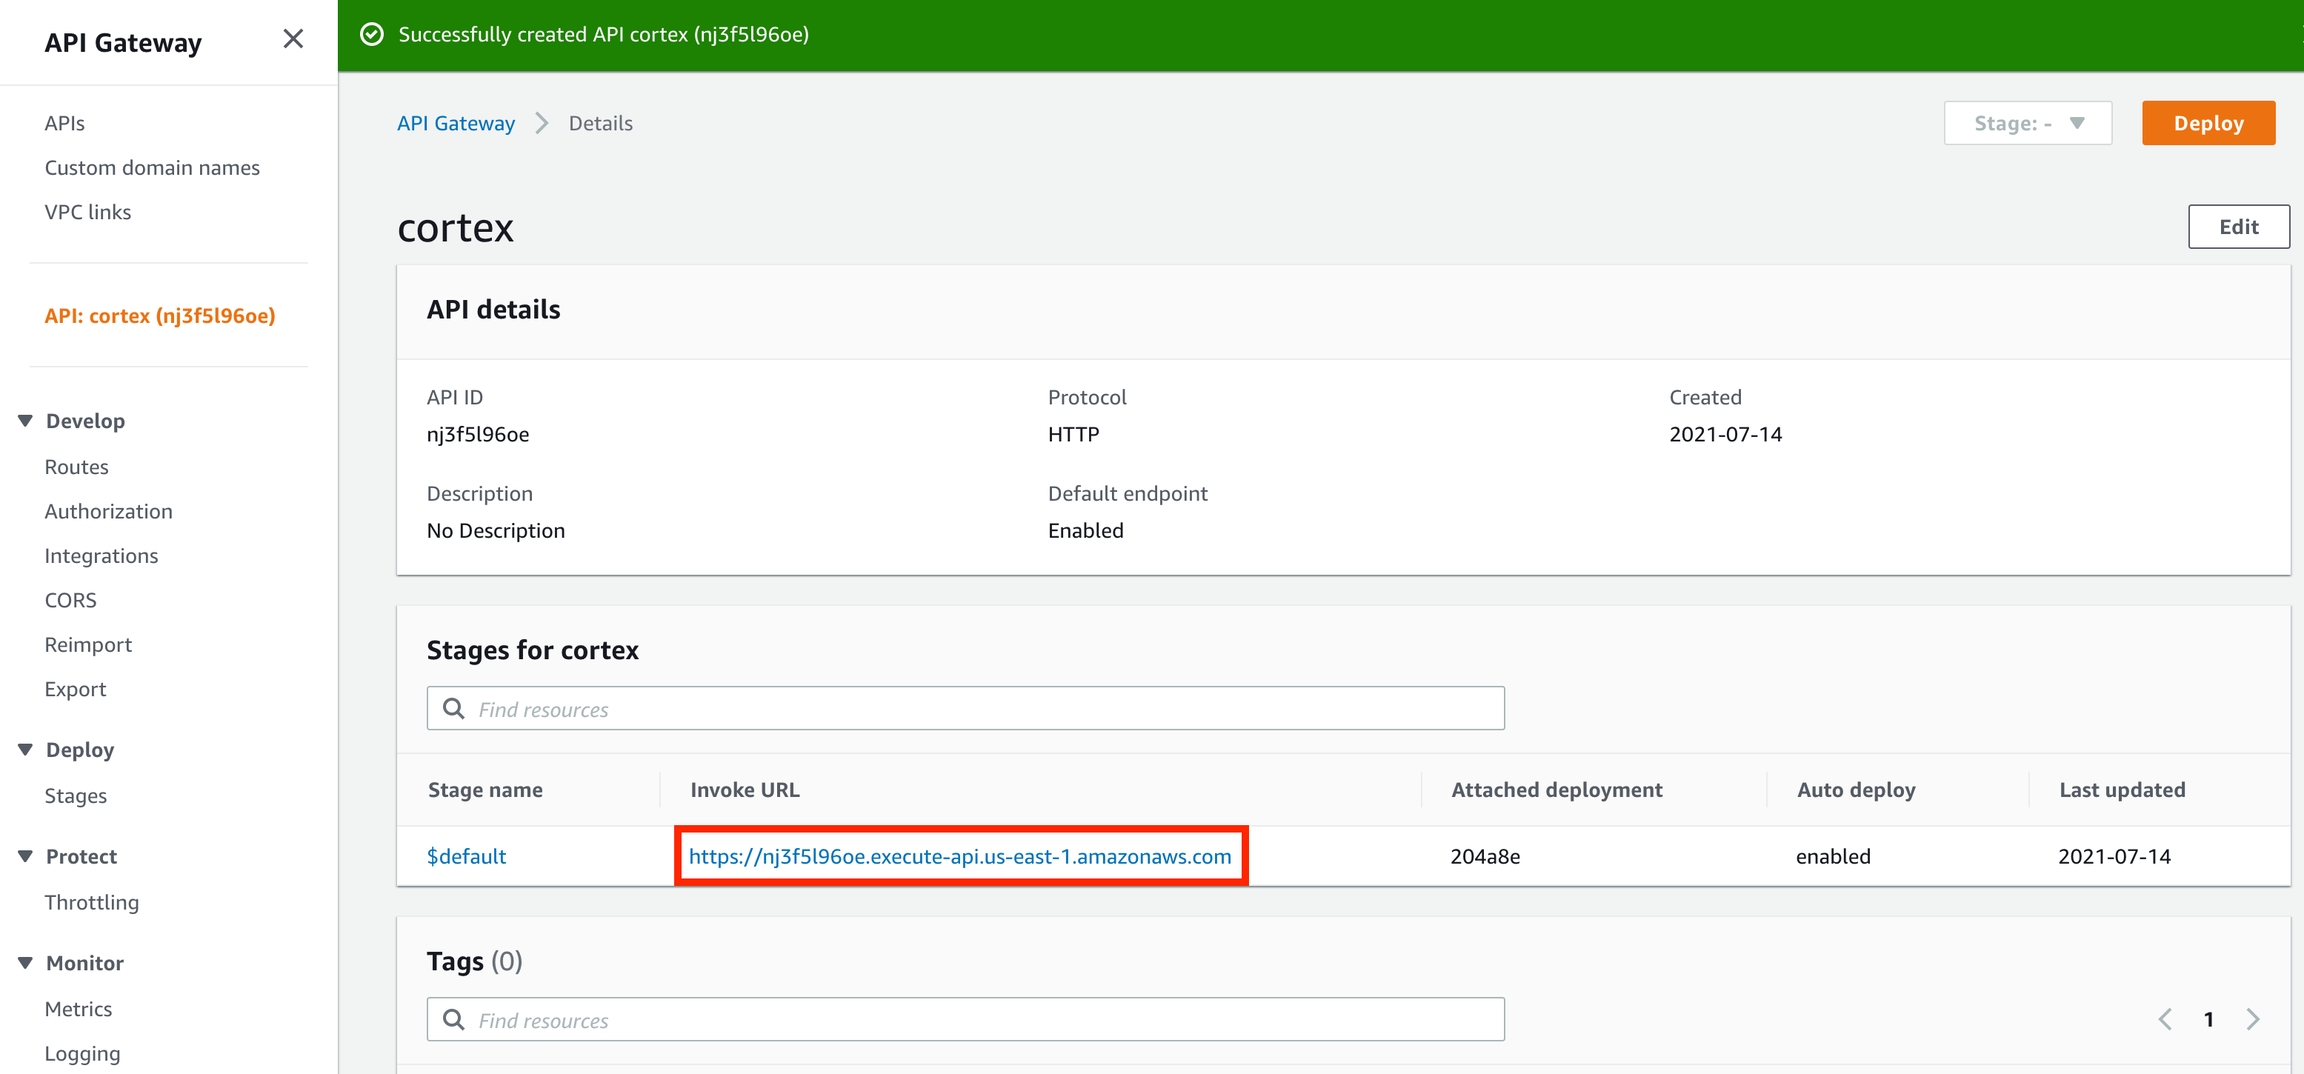
Use your new endpoint
You may now use the "Invoke URL" in place of your API load balancer endpoint in your client. For example, this curl request:
Would become:
Cleanup
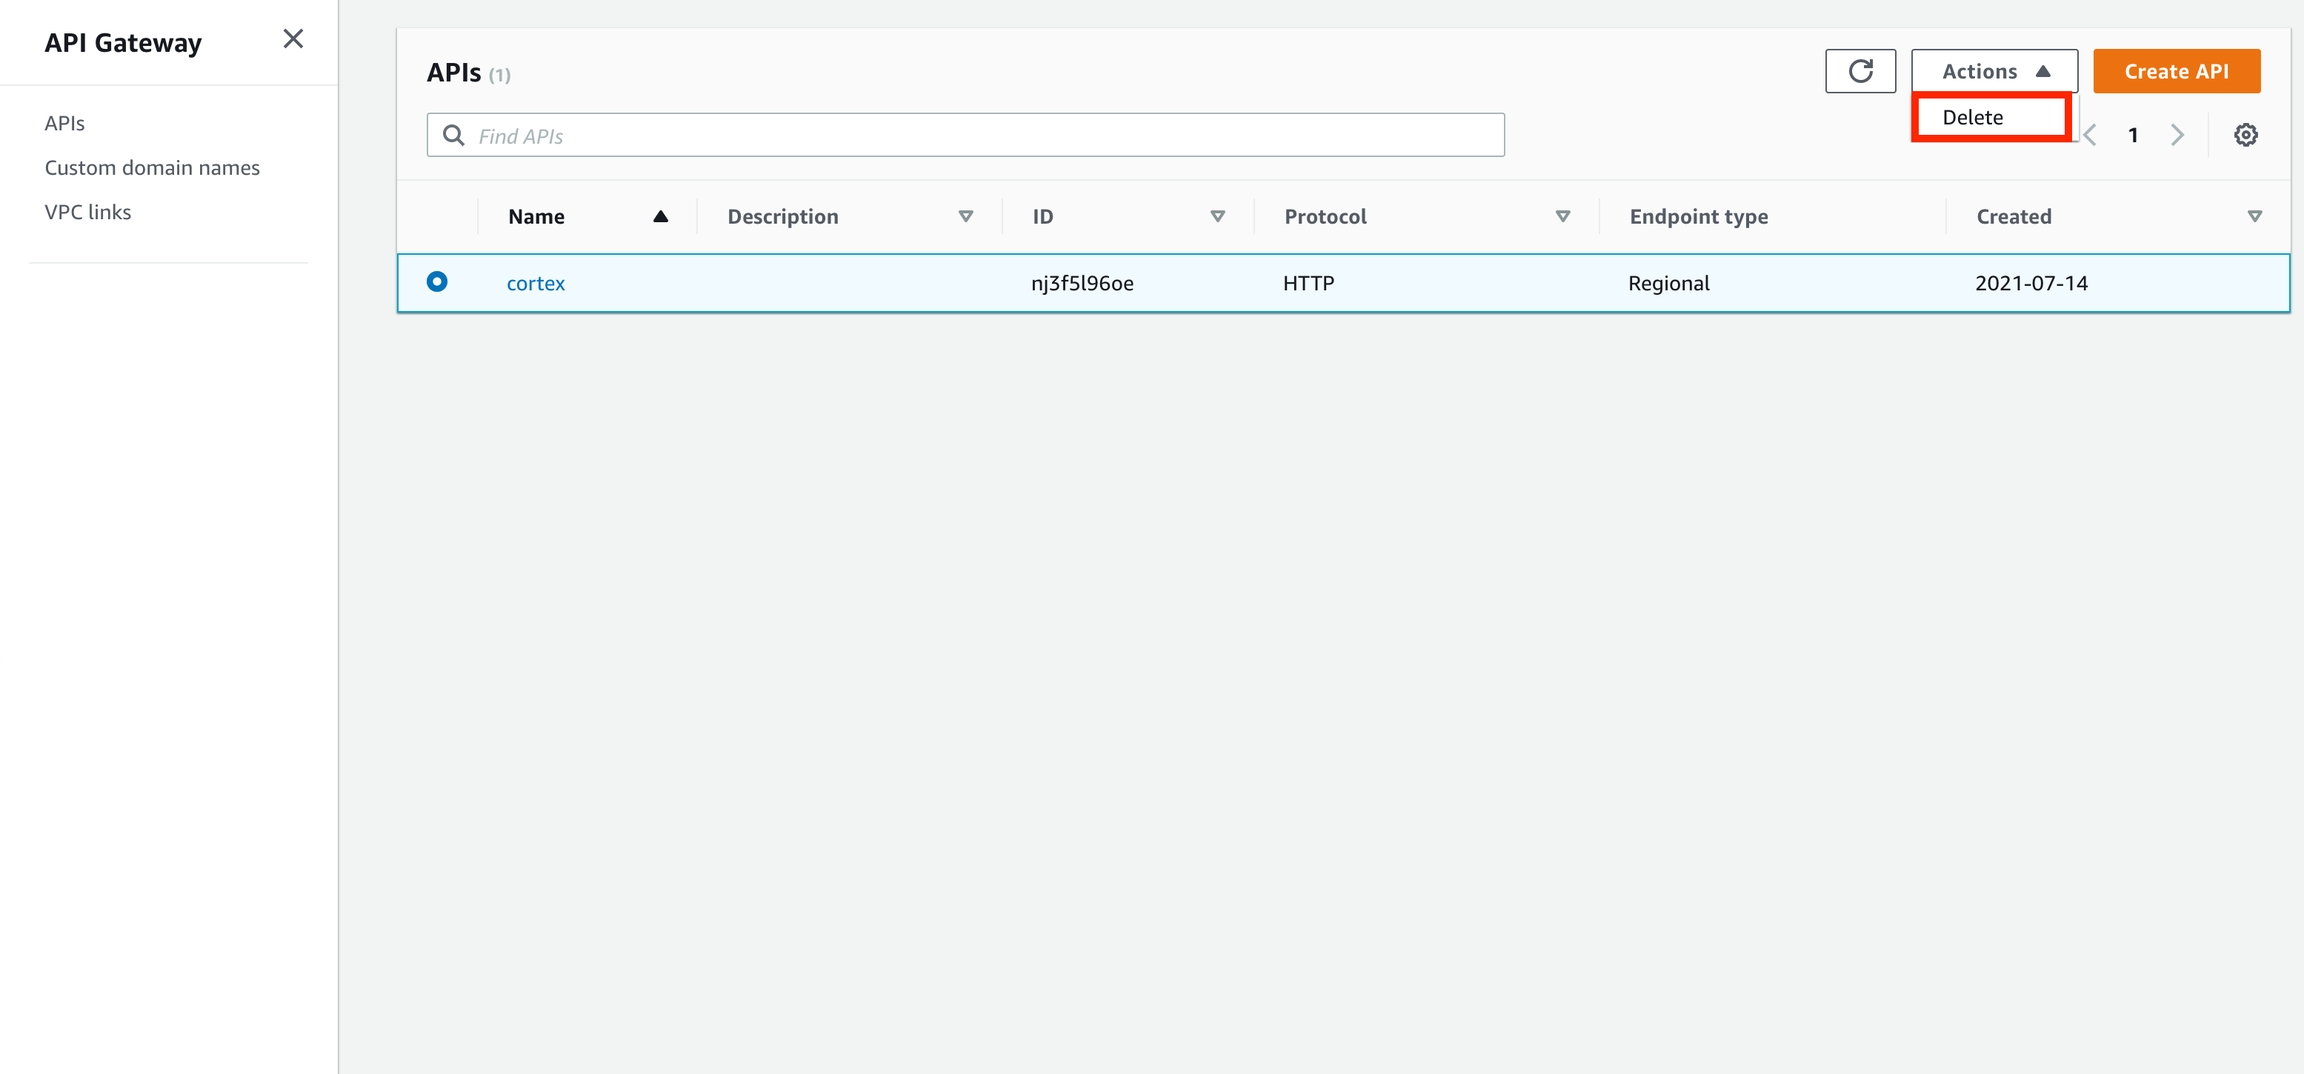
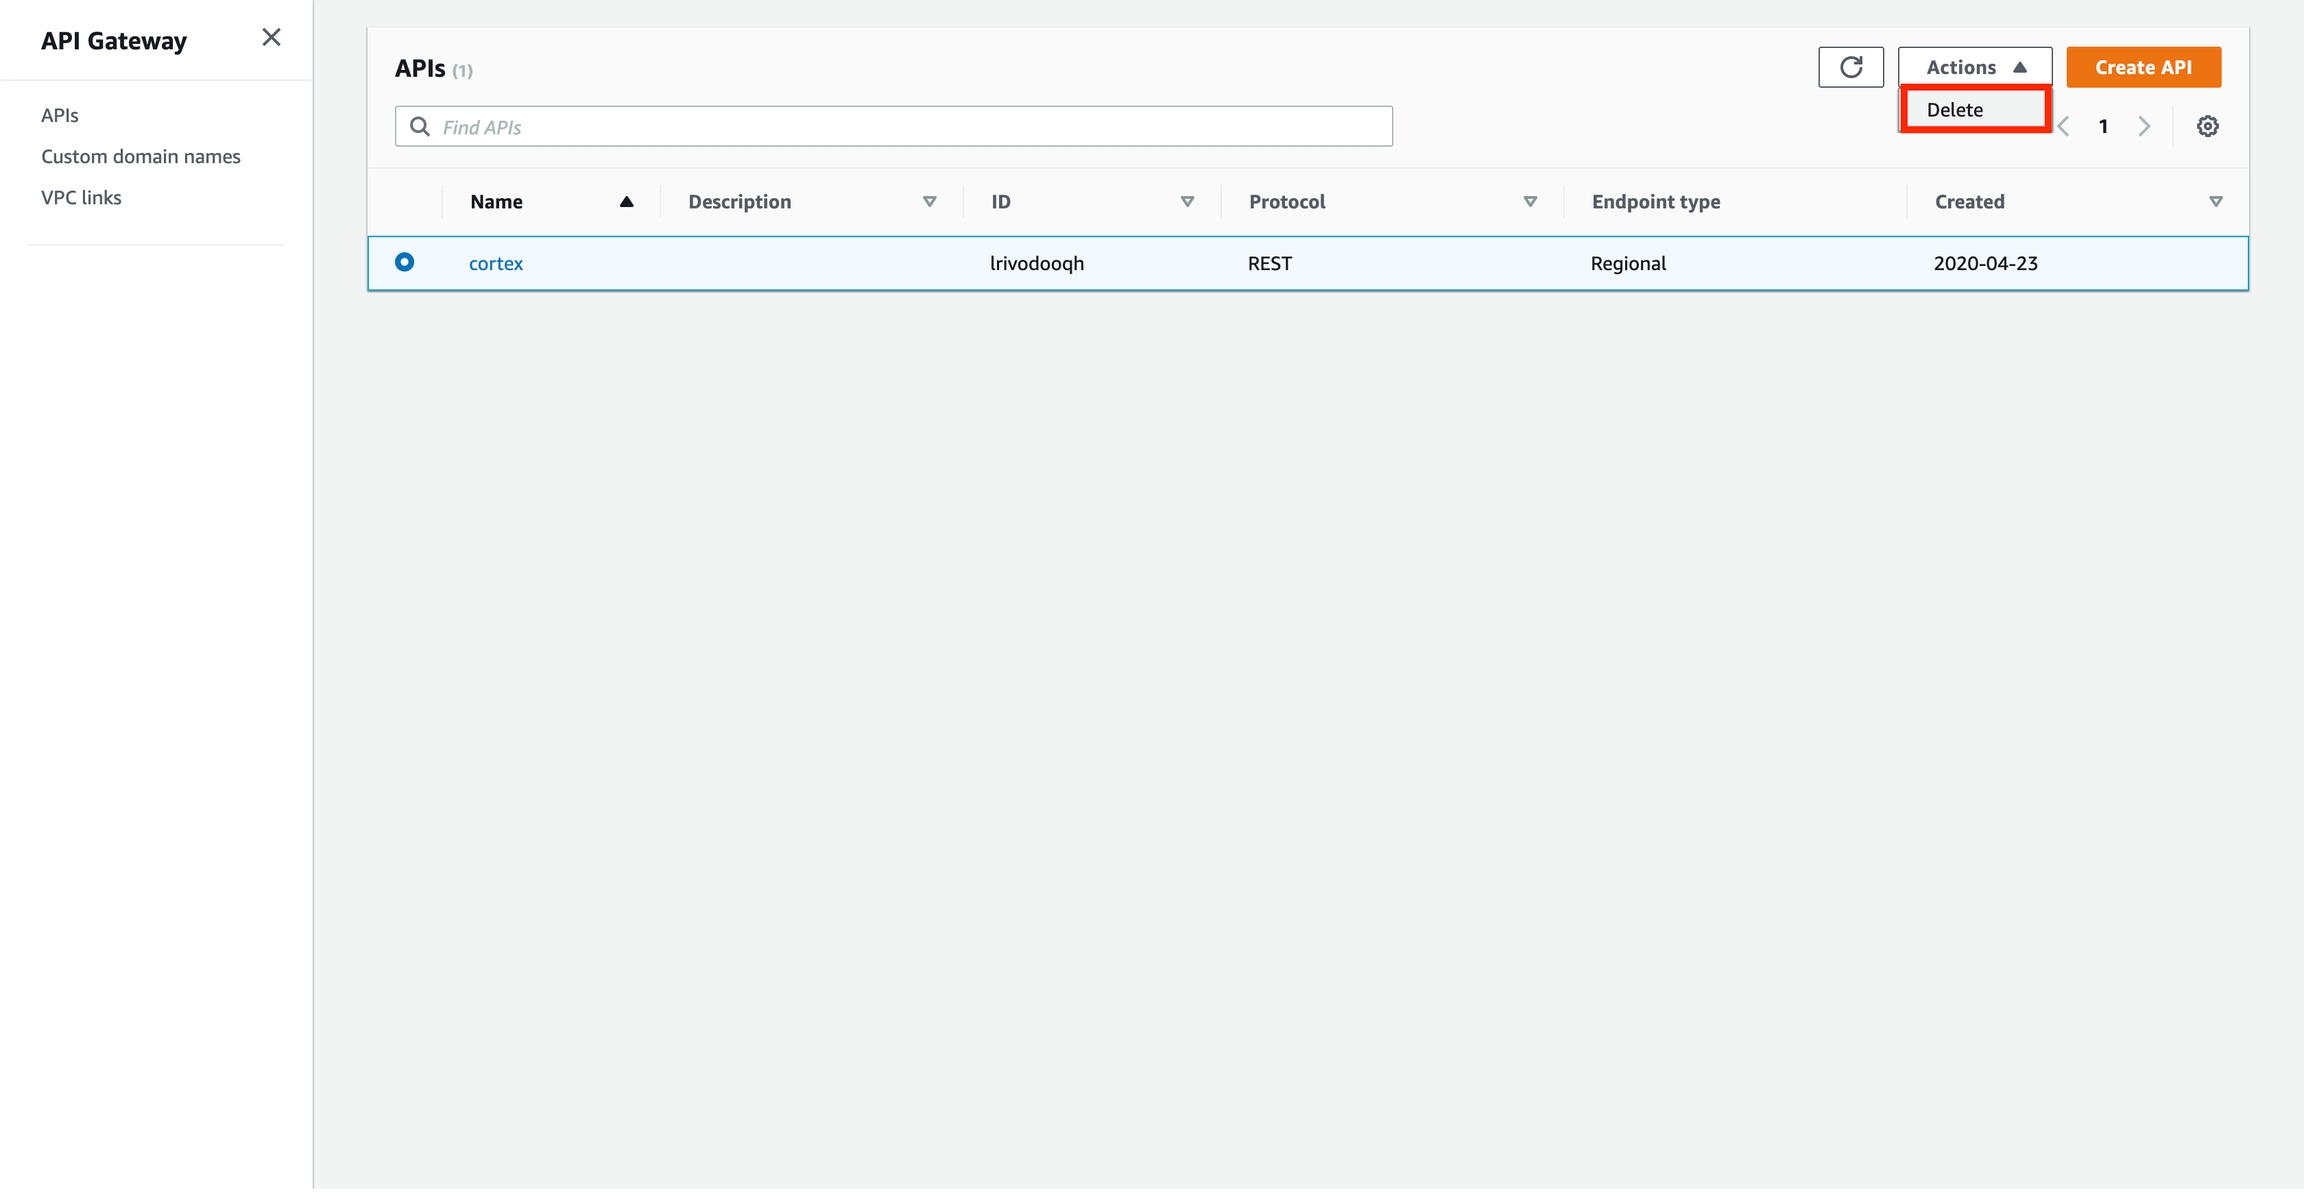
Delete the API Gateway before spinning down your Cortex cluster:
REST API
Create an API Gateway
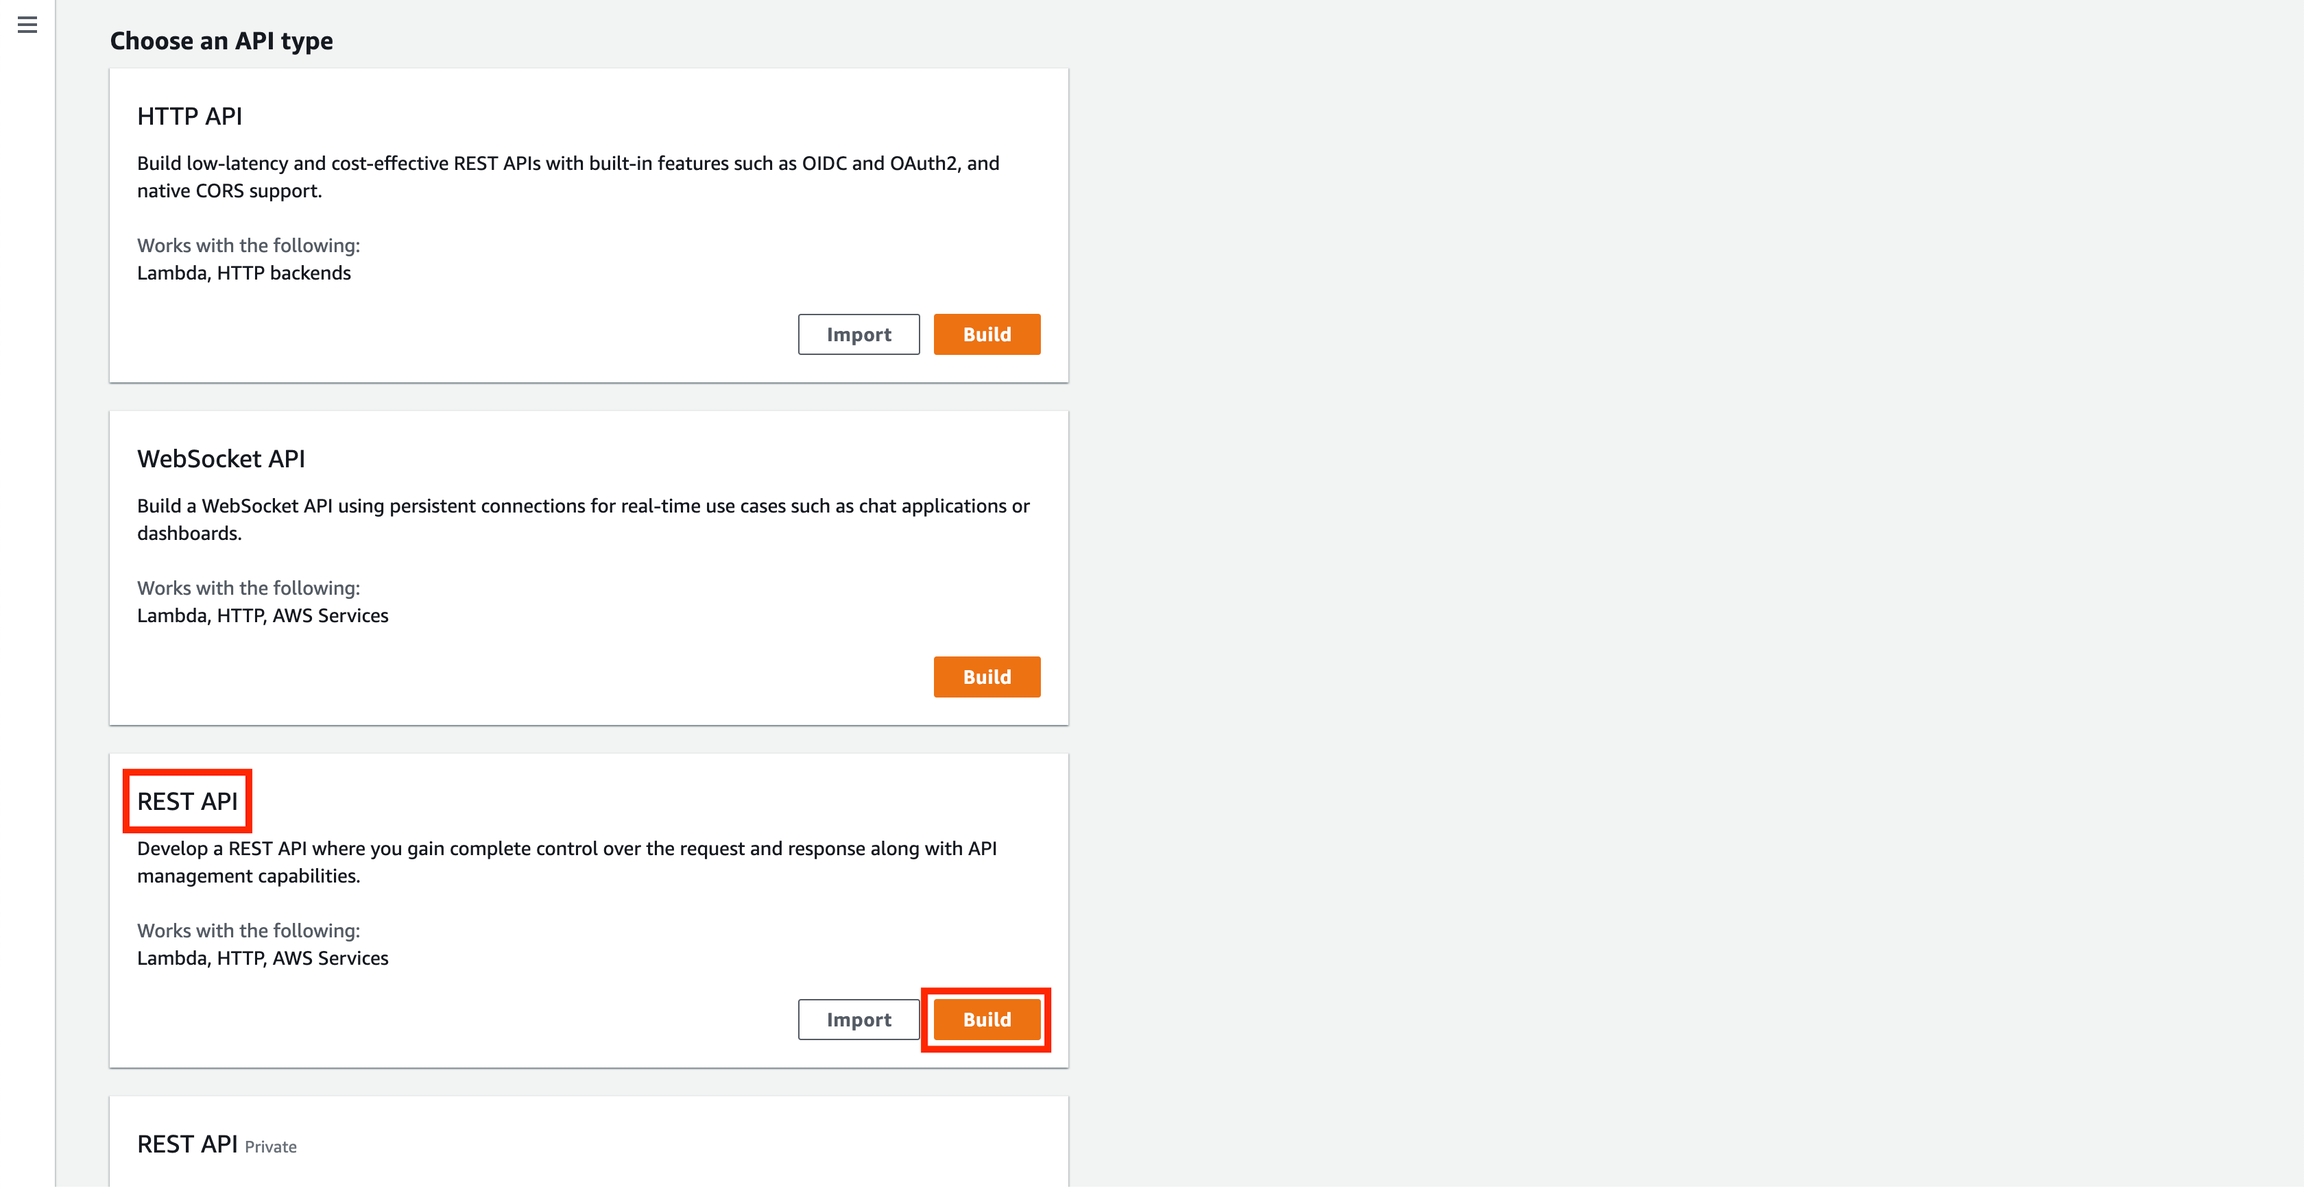
Go to the API Gateway console, select "REST API" under "Choose an API type", and click "Build".
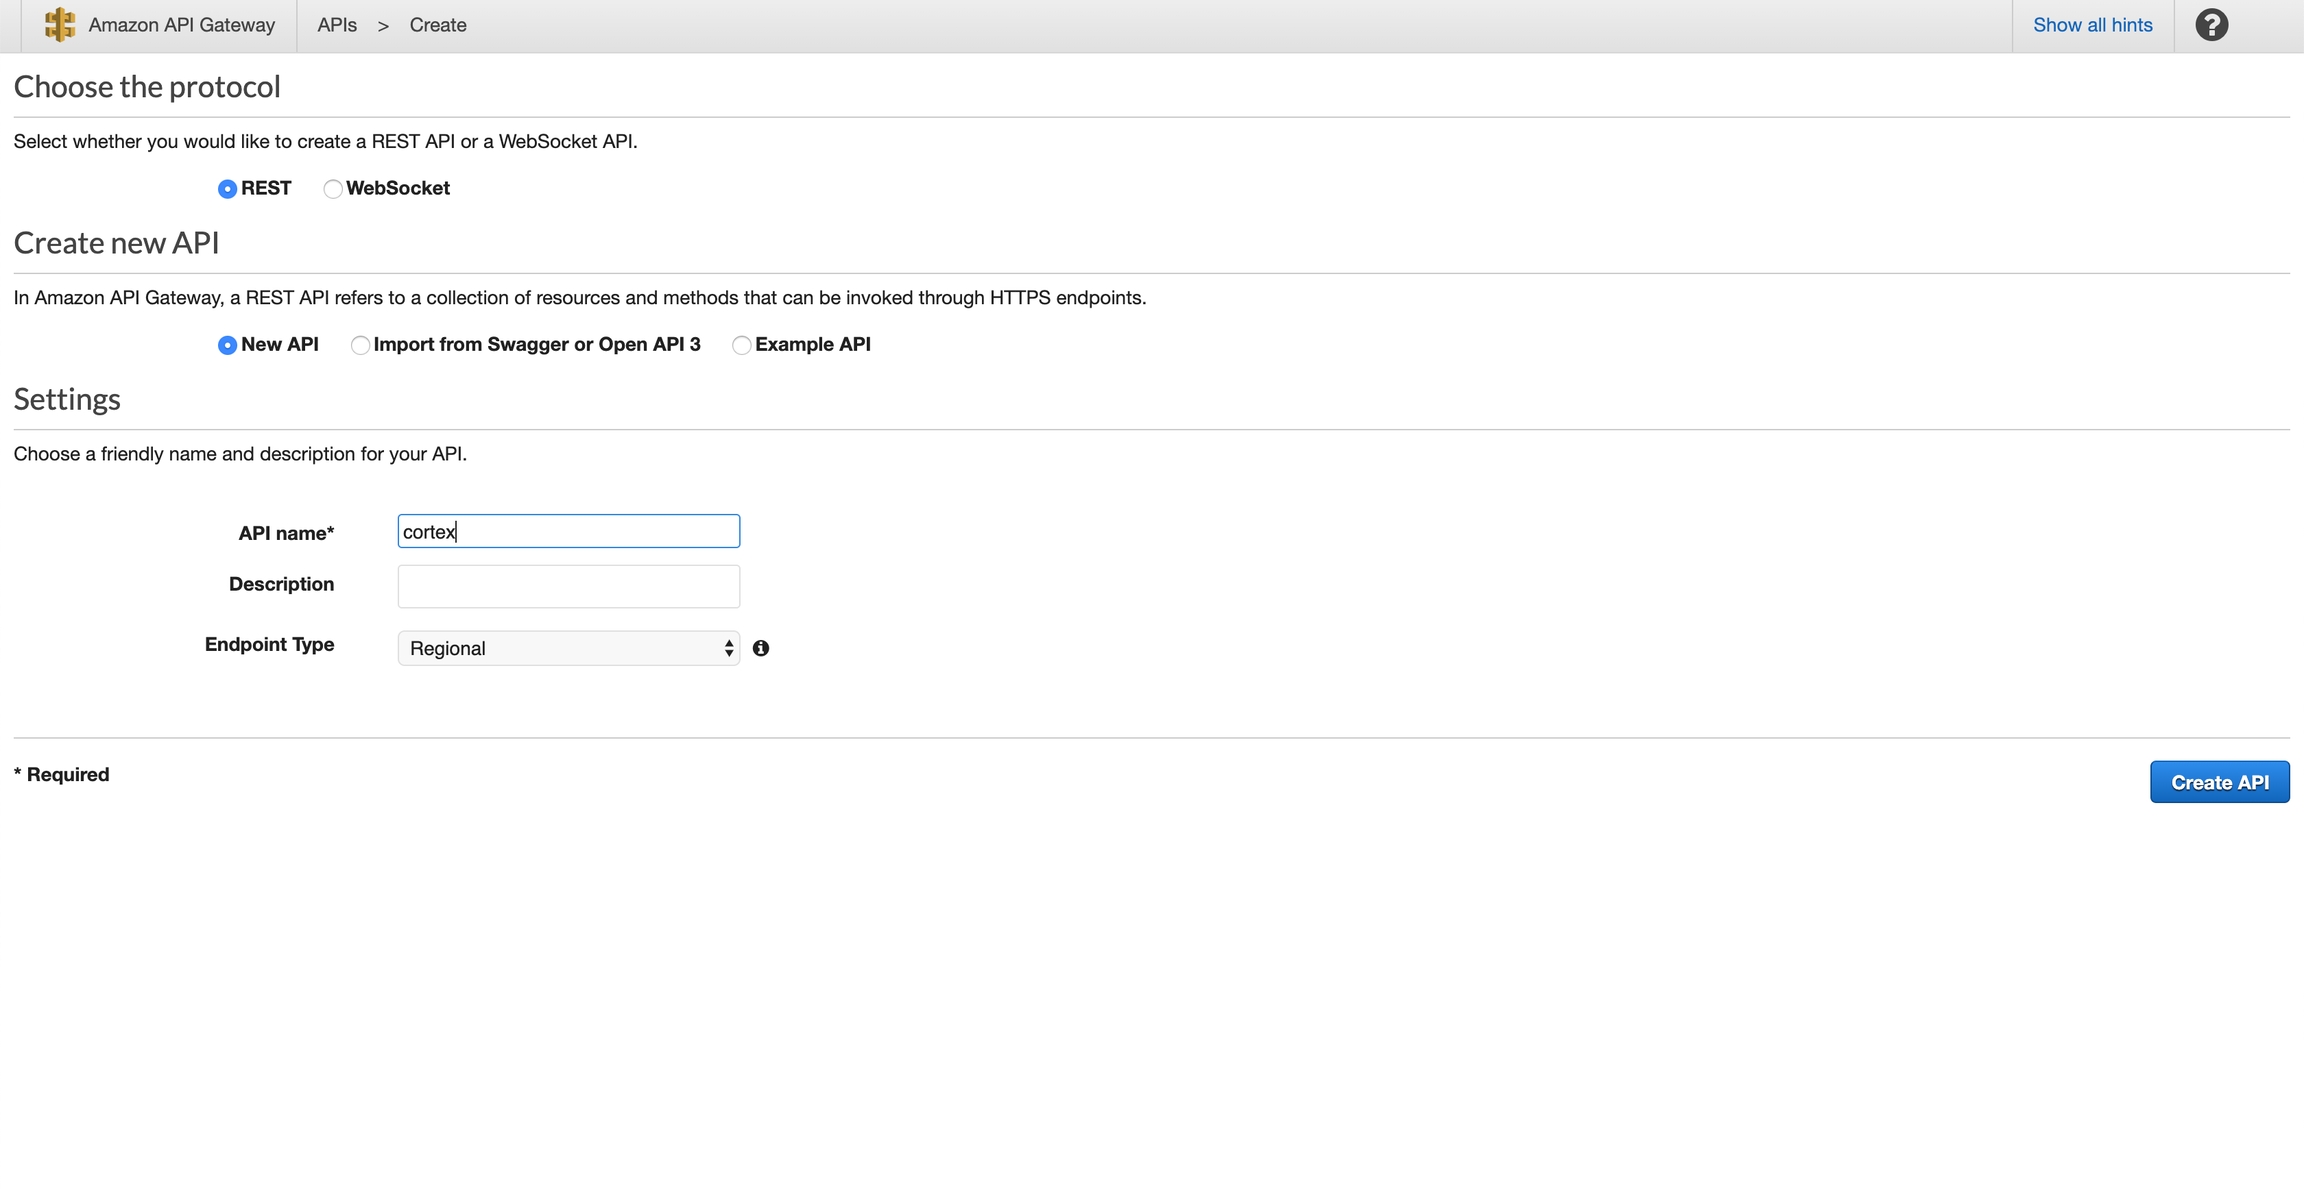
Select "REST" and "New API", name your API (e.g. "cortex"), select either "Regional" or "Edge optimized" (depending on your preference), and click "Create API".
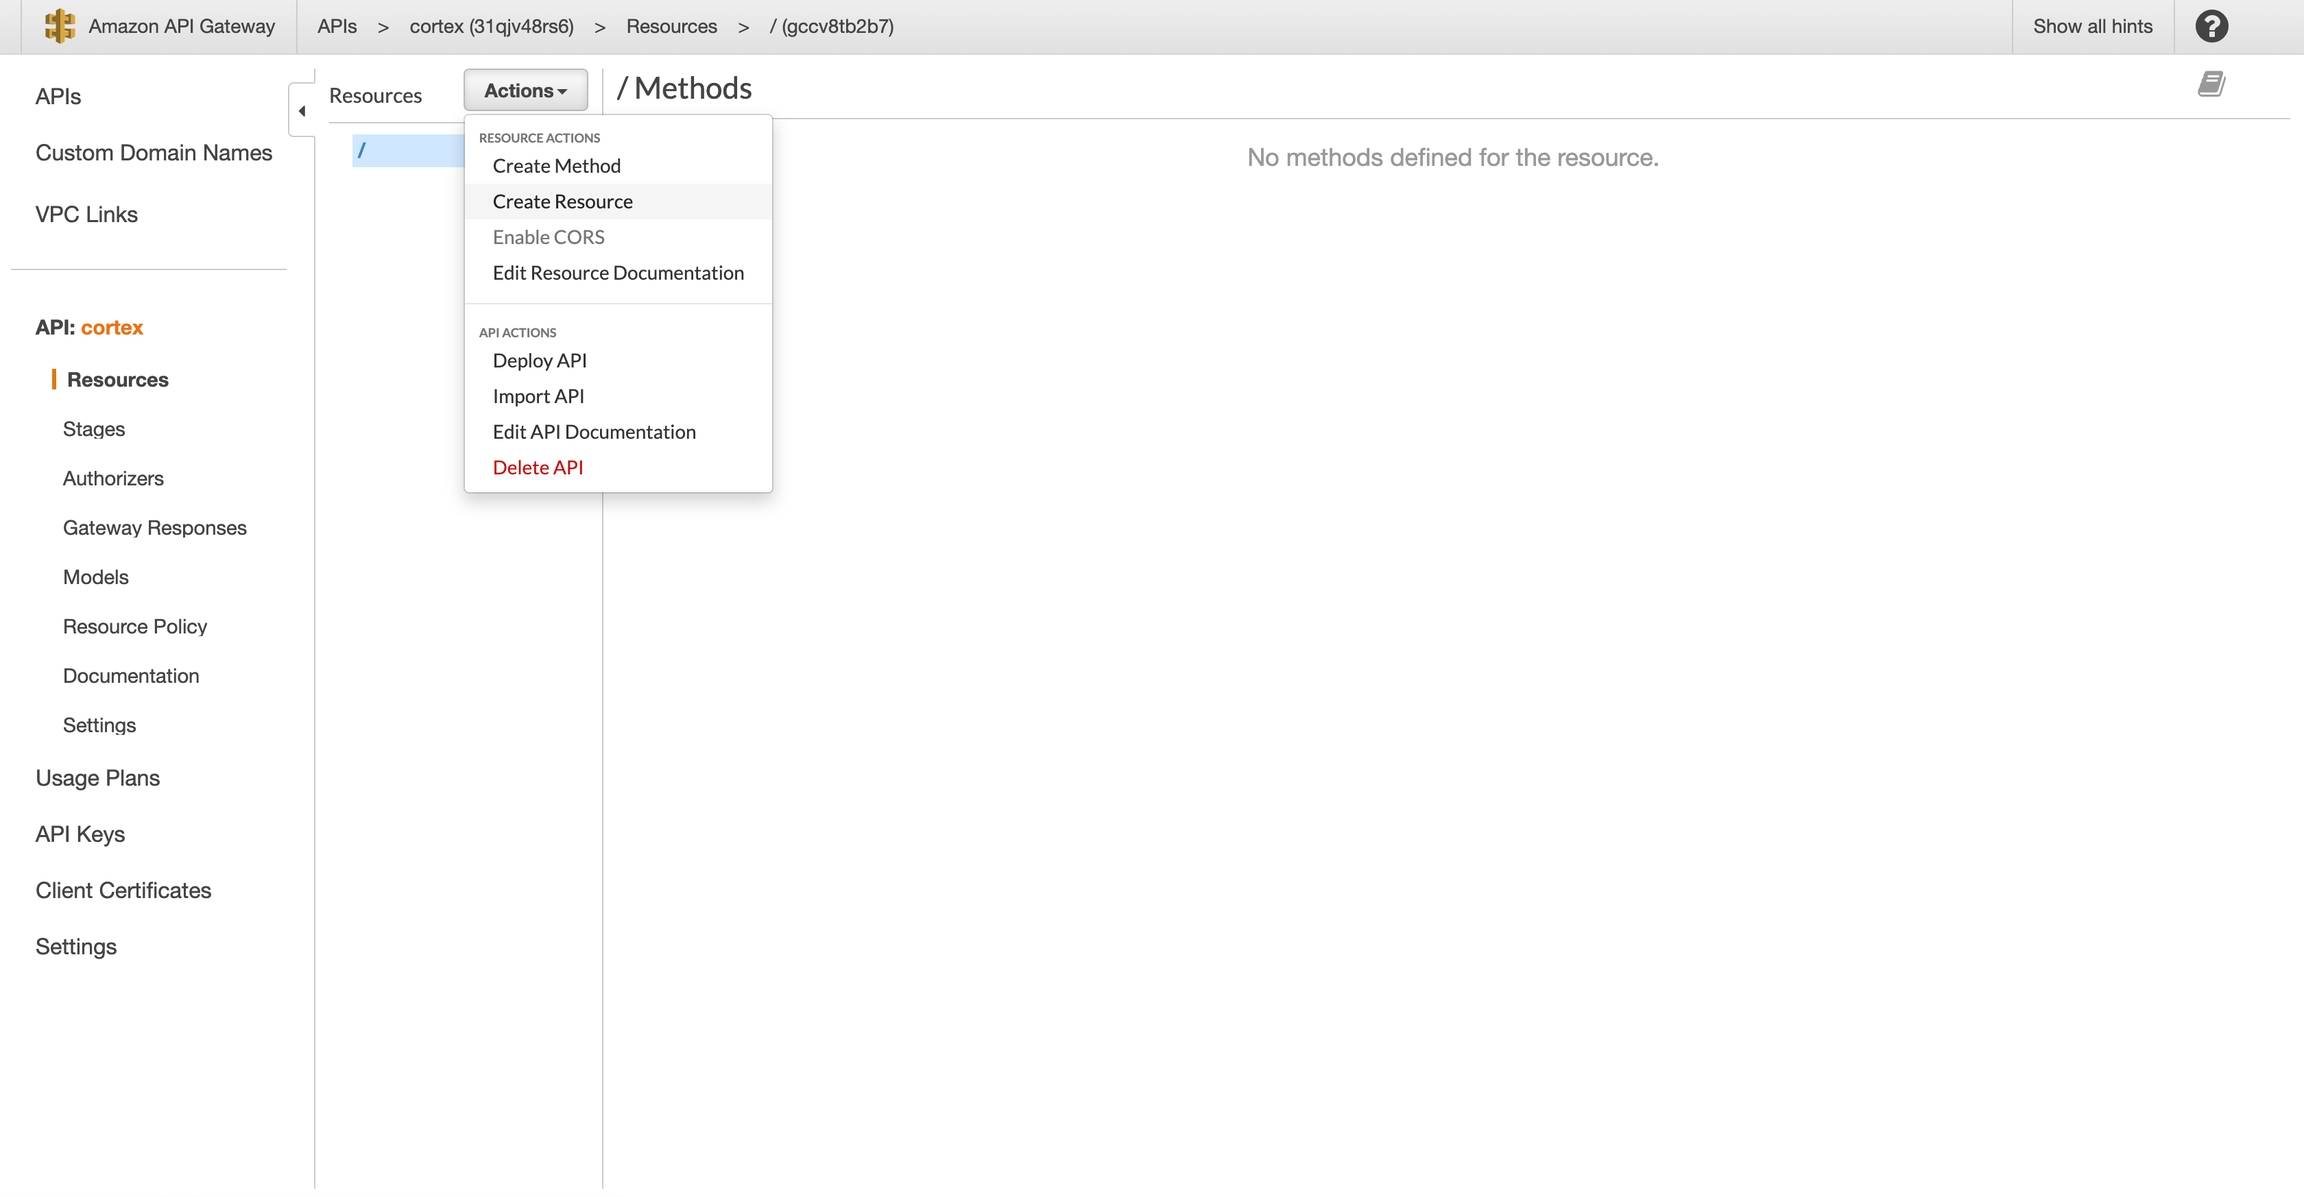
Select "Actions" > "Create Resource":
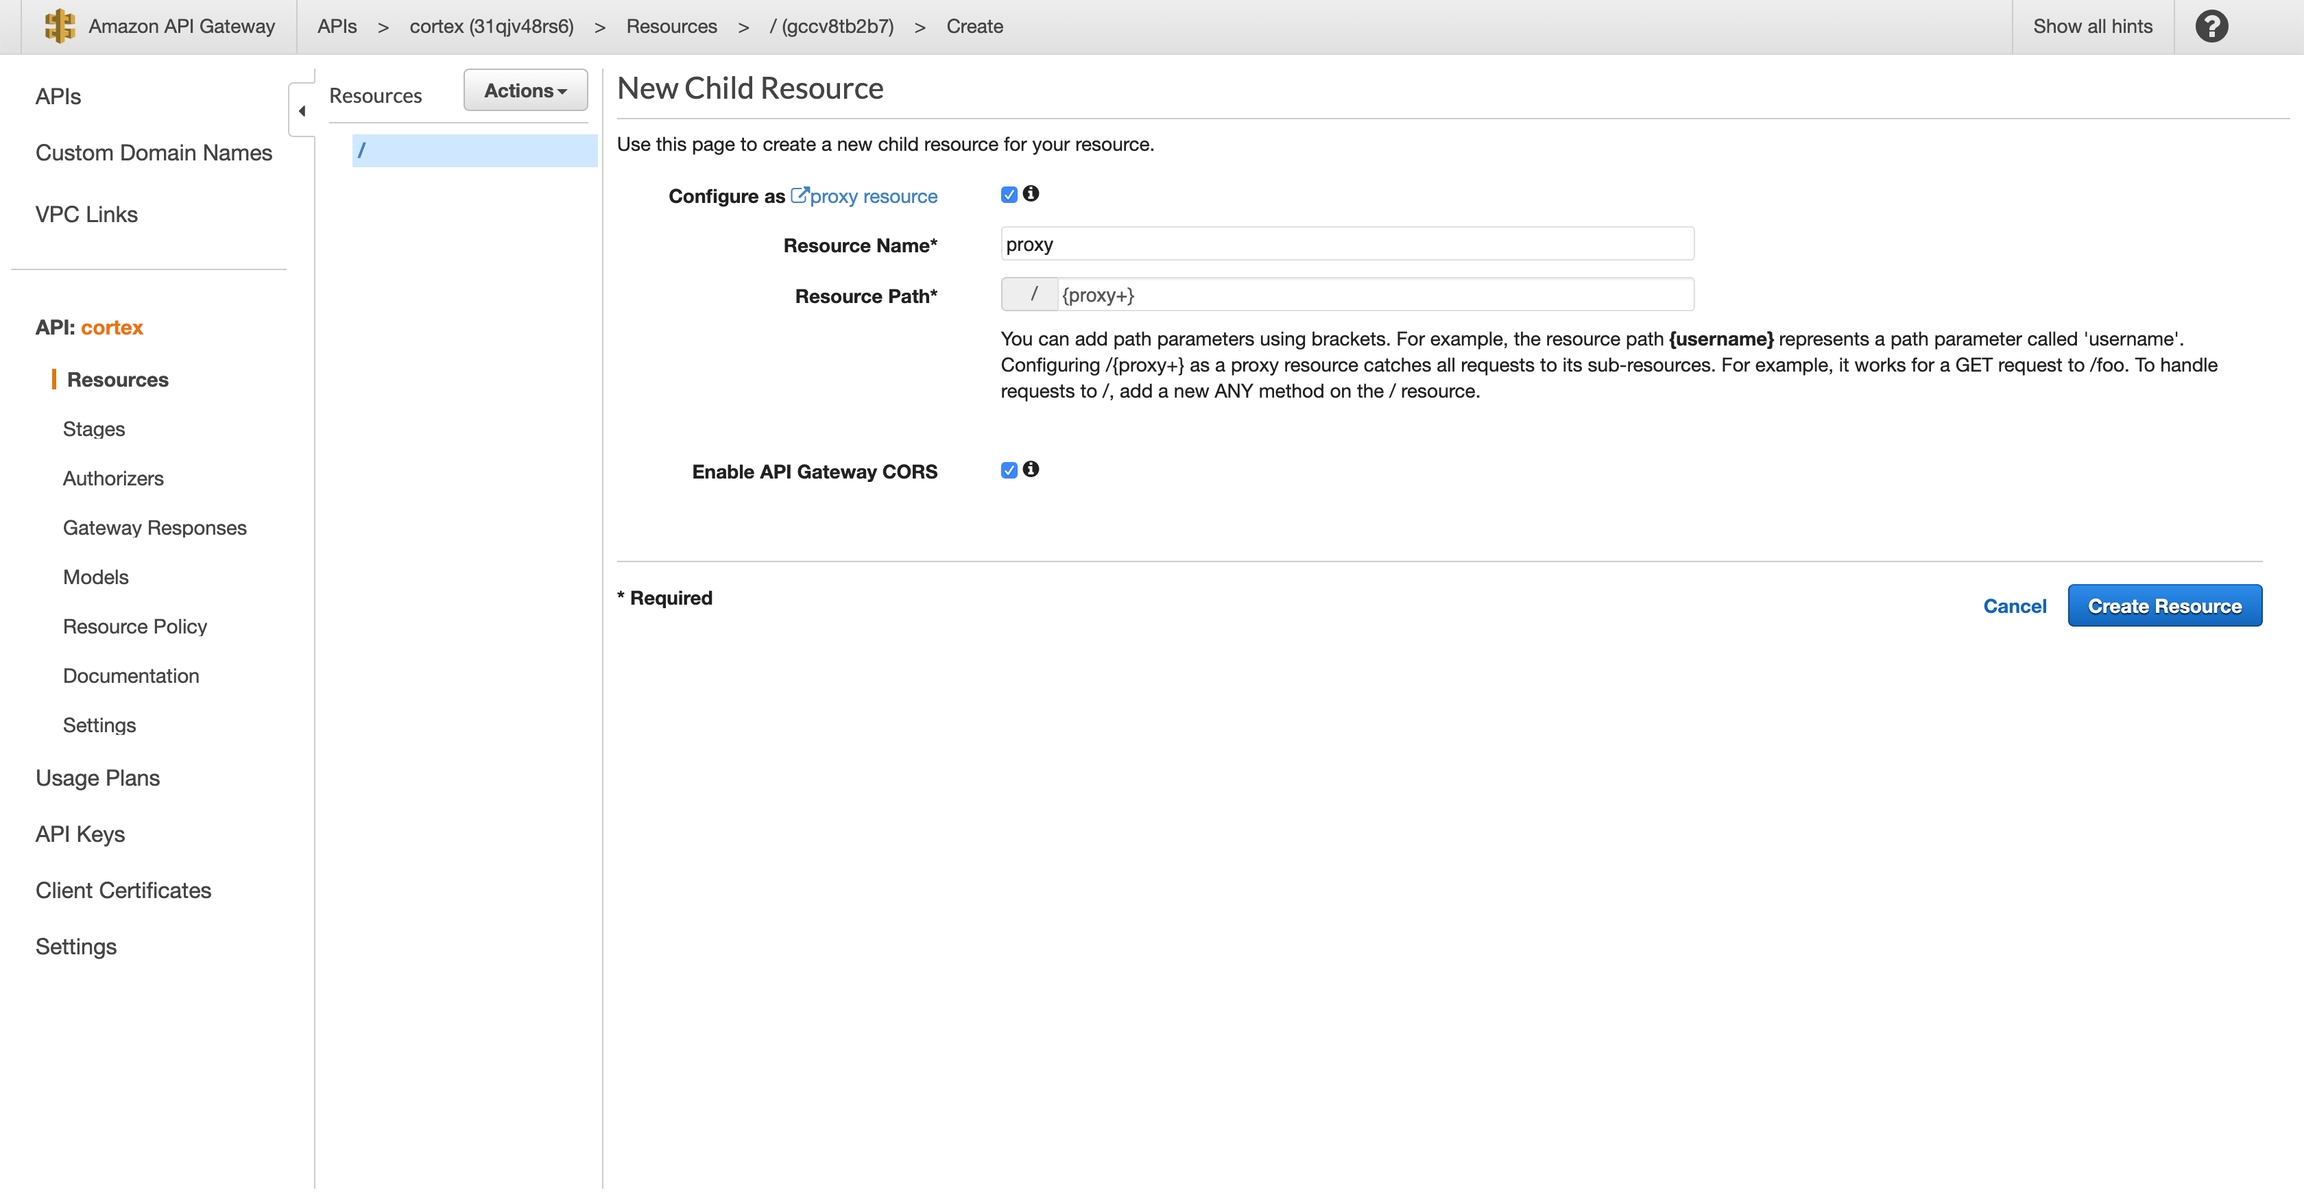
Select "Configure as proxy resource" and "Enable API Gateway CORS", and click "Create Resource"
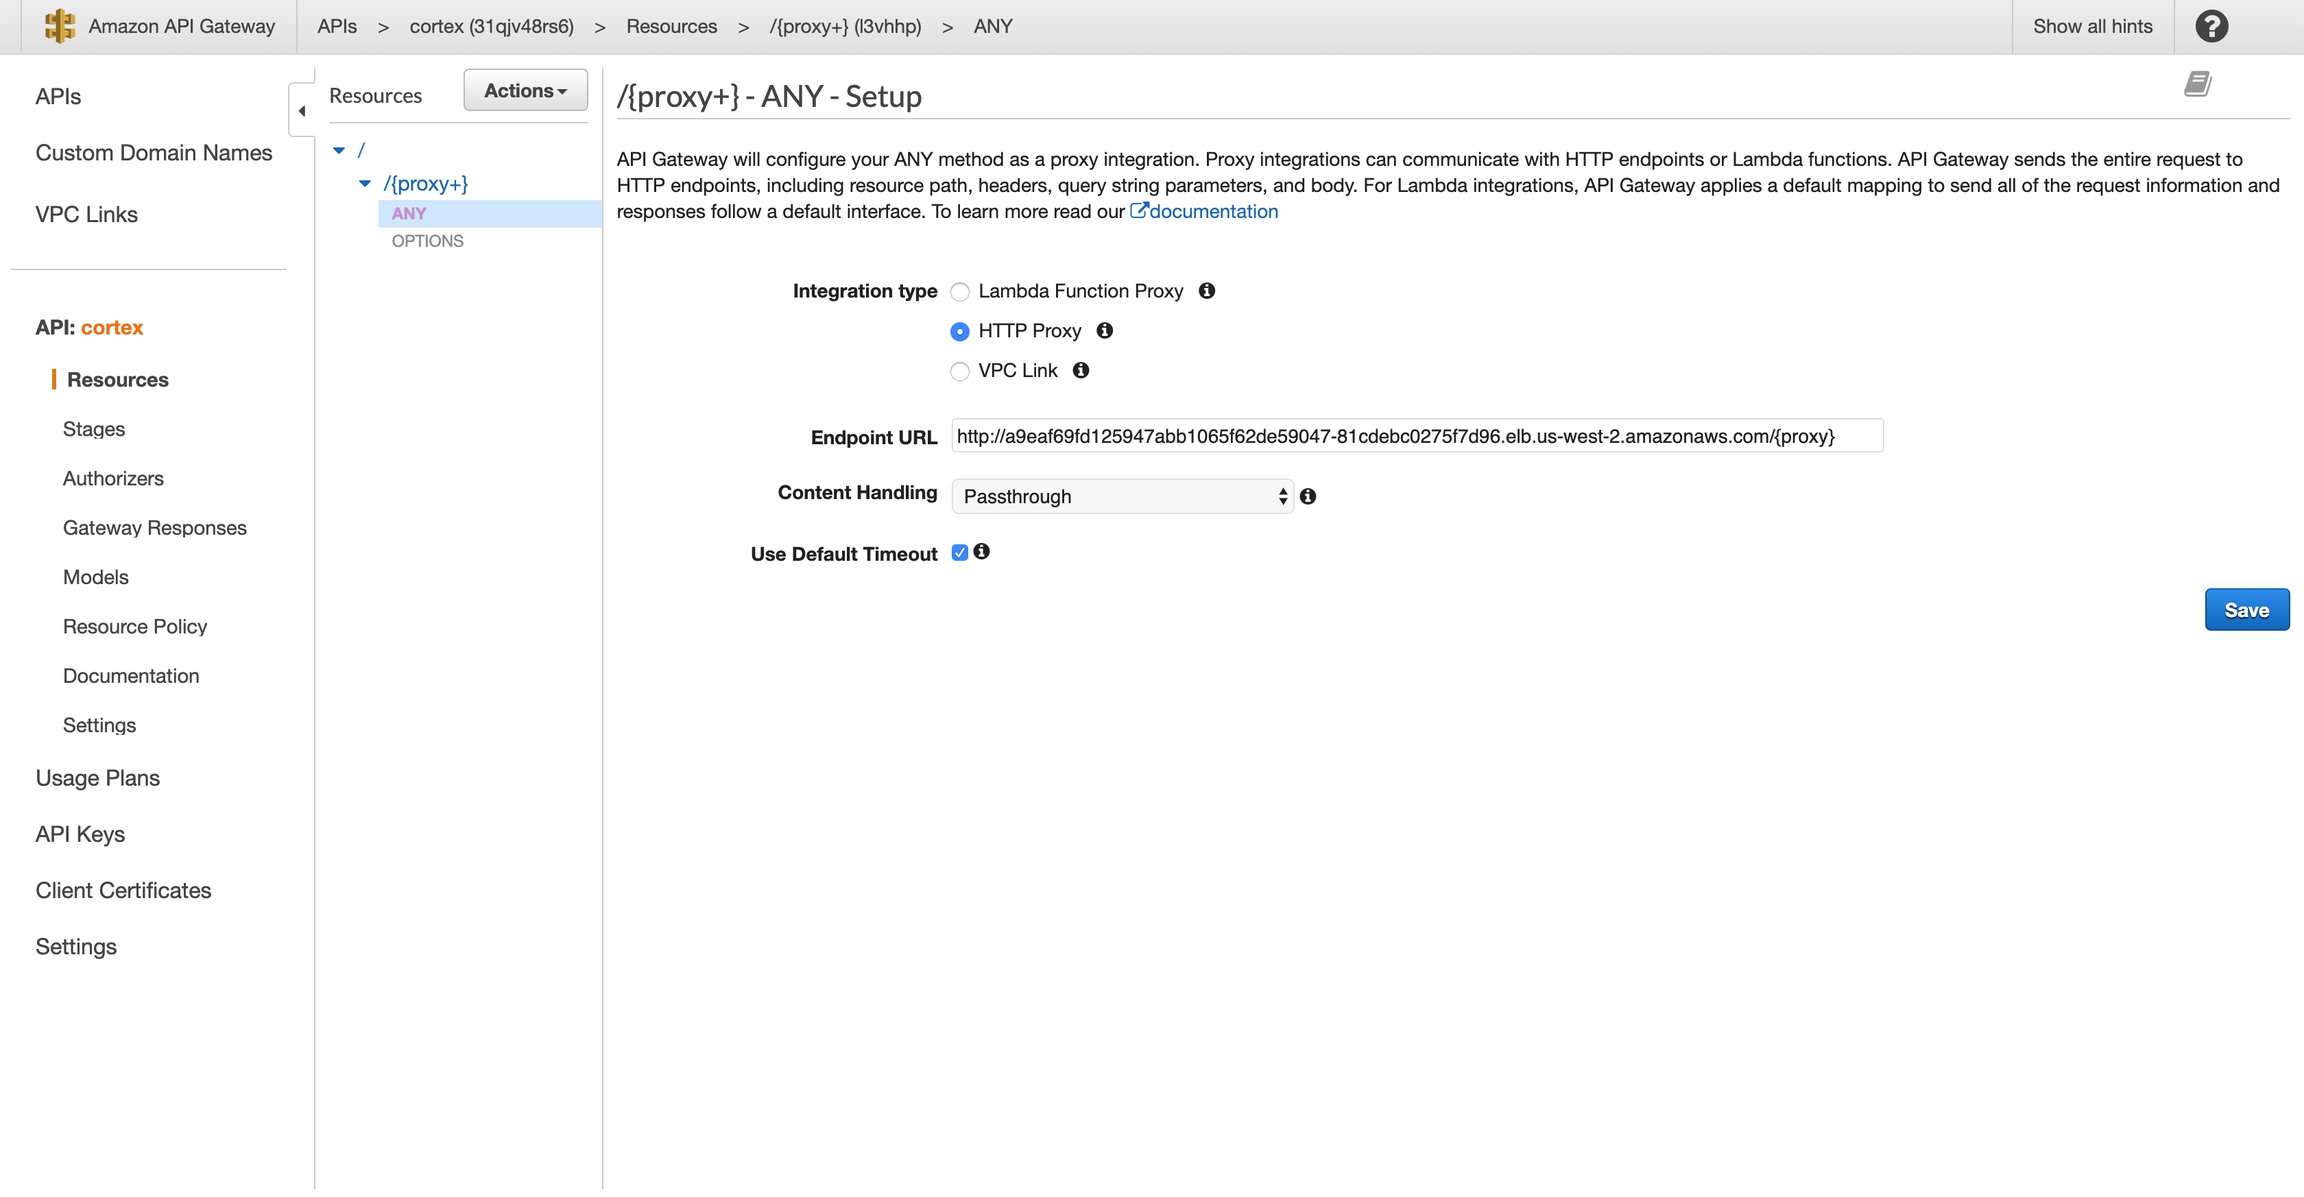
Select "HTTP Proxy" and set "Endpoint URL" to http://API_LOAD_BALANCER_ENDPOINT/{proxy}. You can get your API load balancer endpoint via cortex cluster info; make sure to prepend http:// and append /{proxy}. For example, mine is: http://a9eaf69fd125947abb1065f62de59047-81cdebc0275f7d96.elb.us-west-2.amazonaws.com/{proxy}.
Leave "Content Handling" set to "Passthrough" and Click "Save".
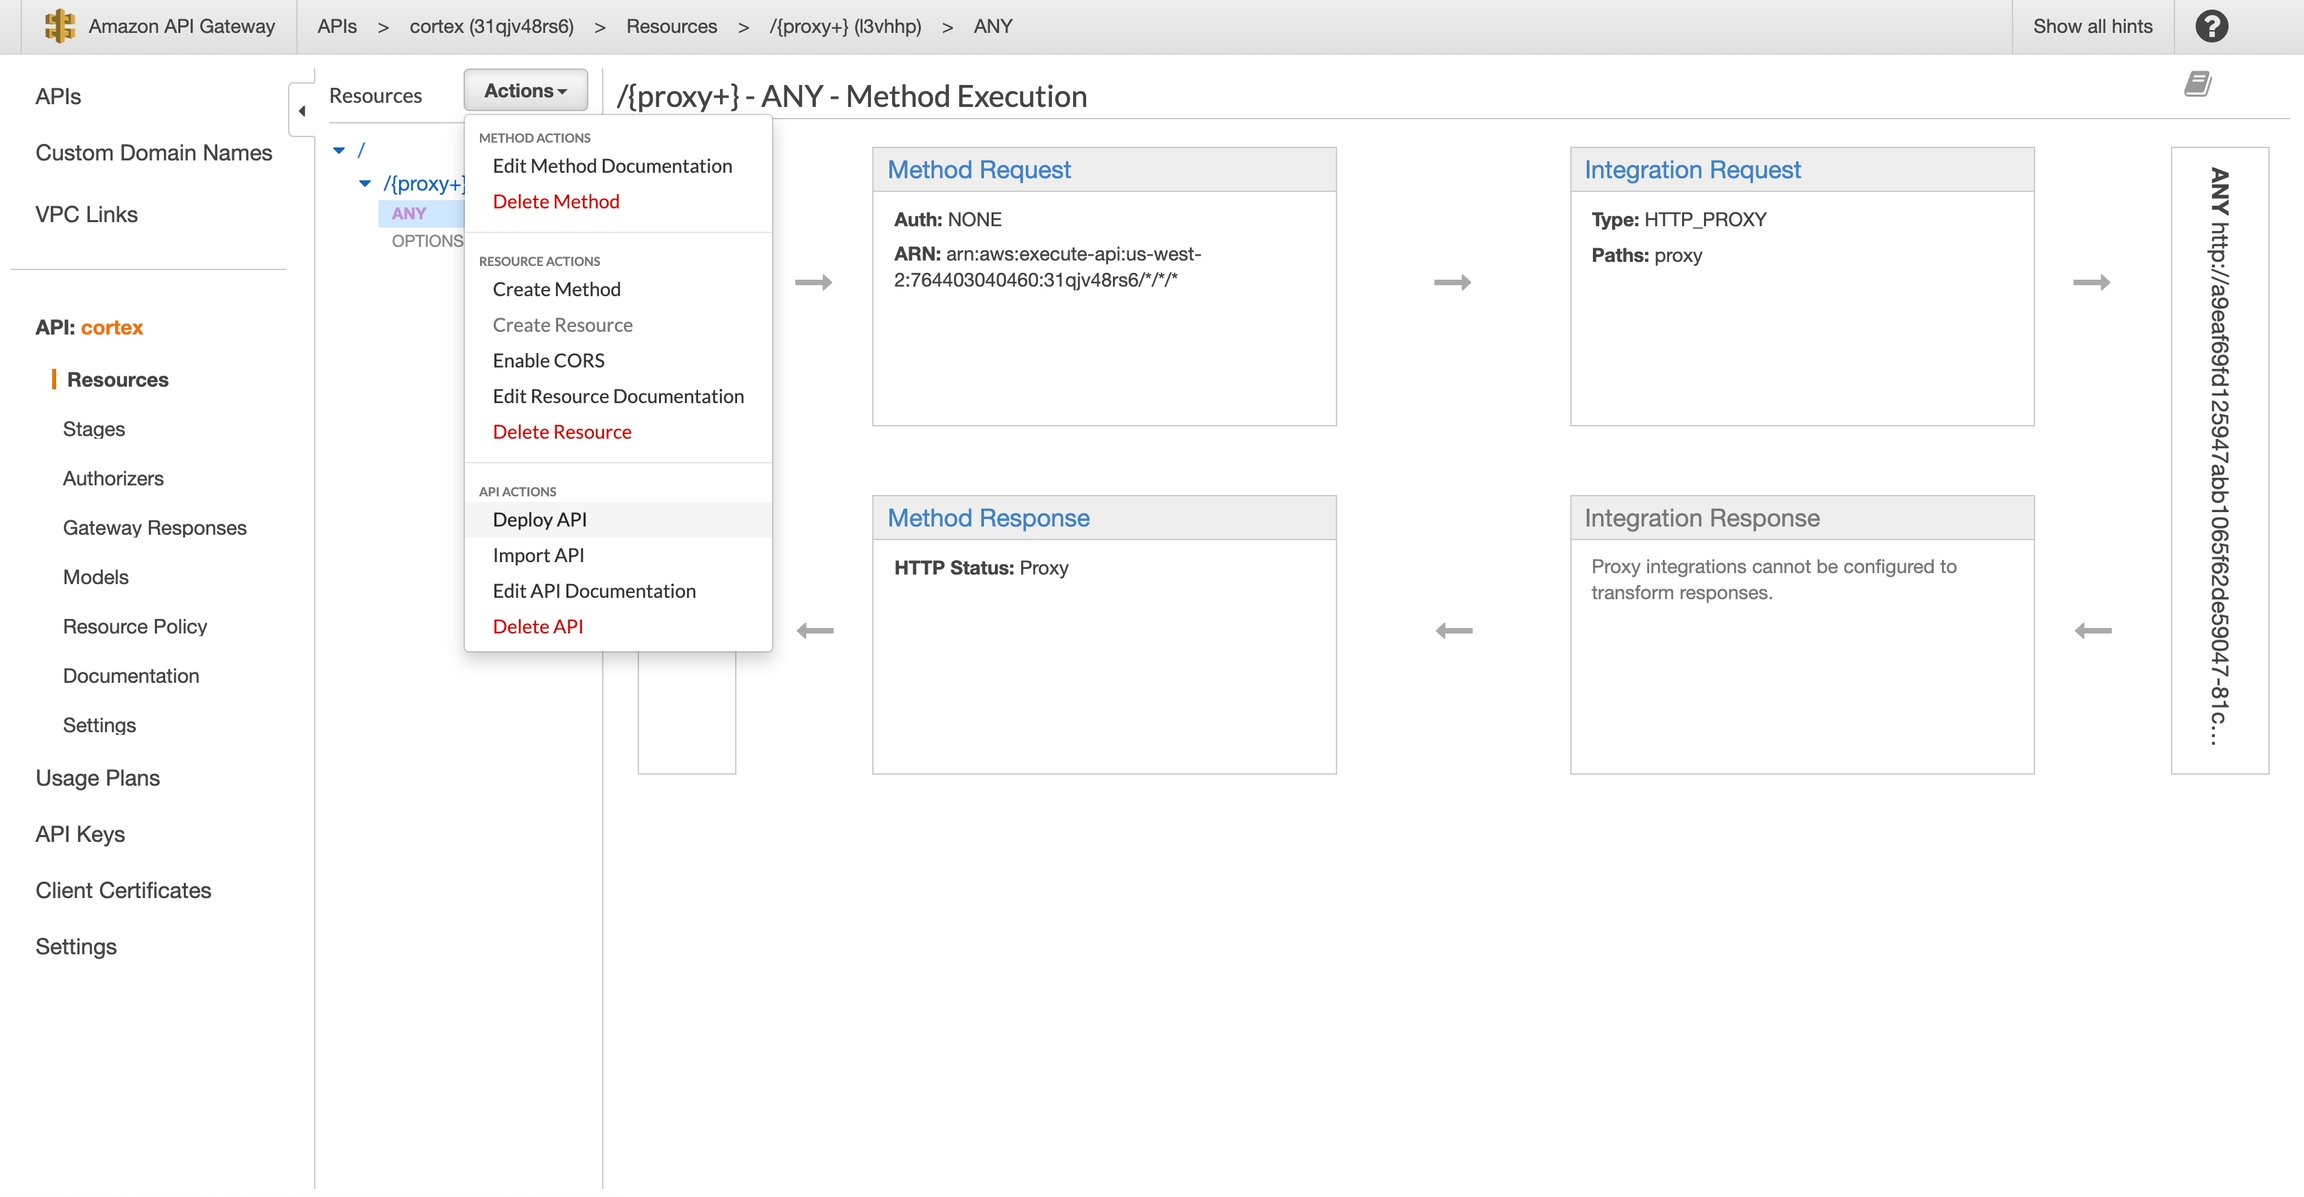
Select "Actions" > "Deploy API"
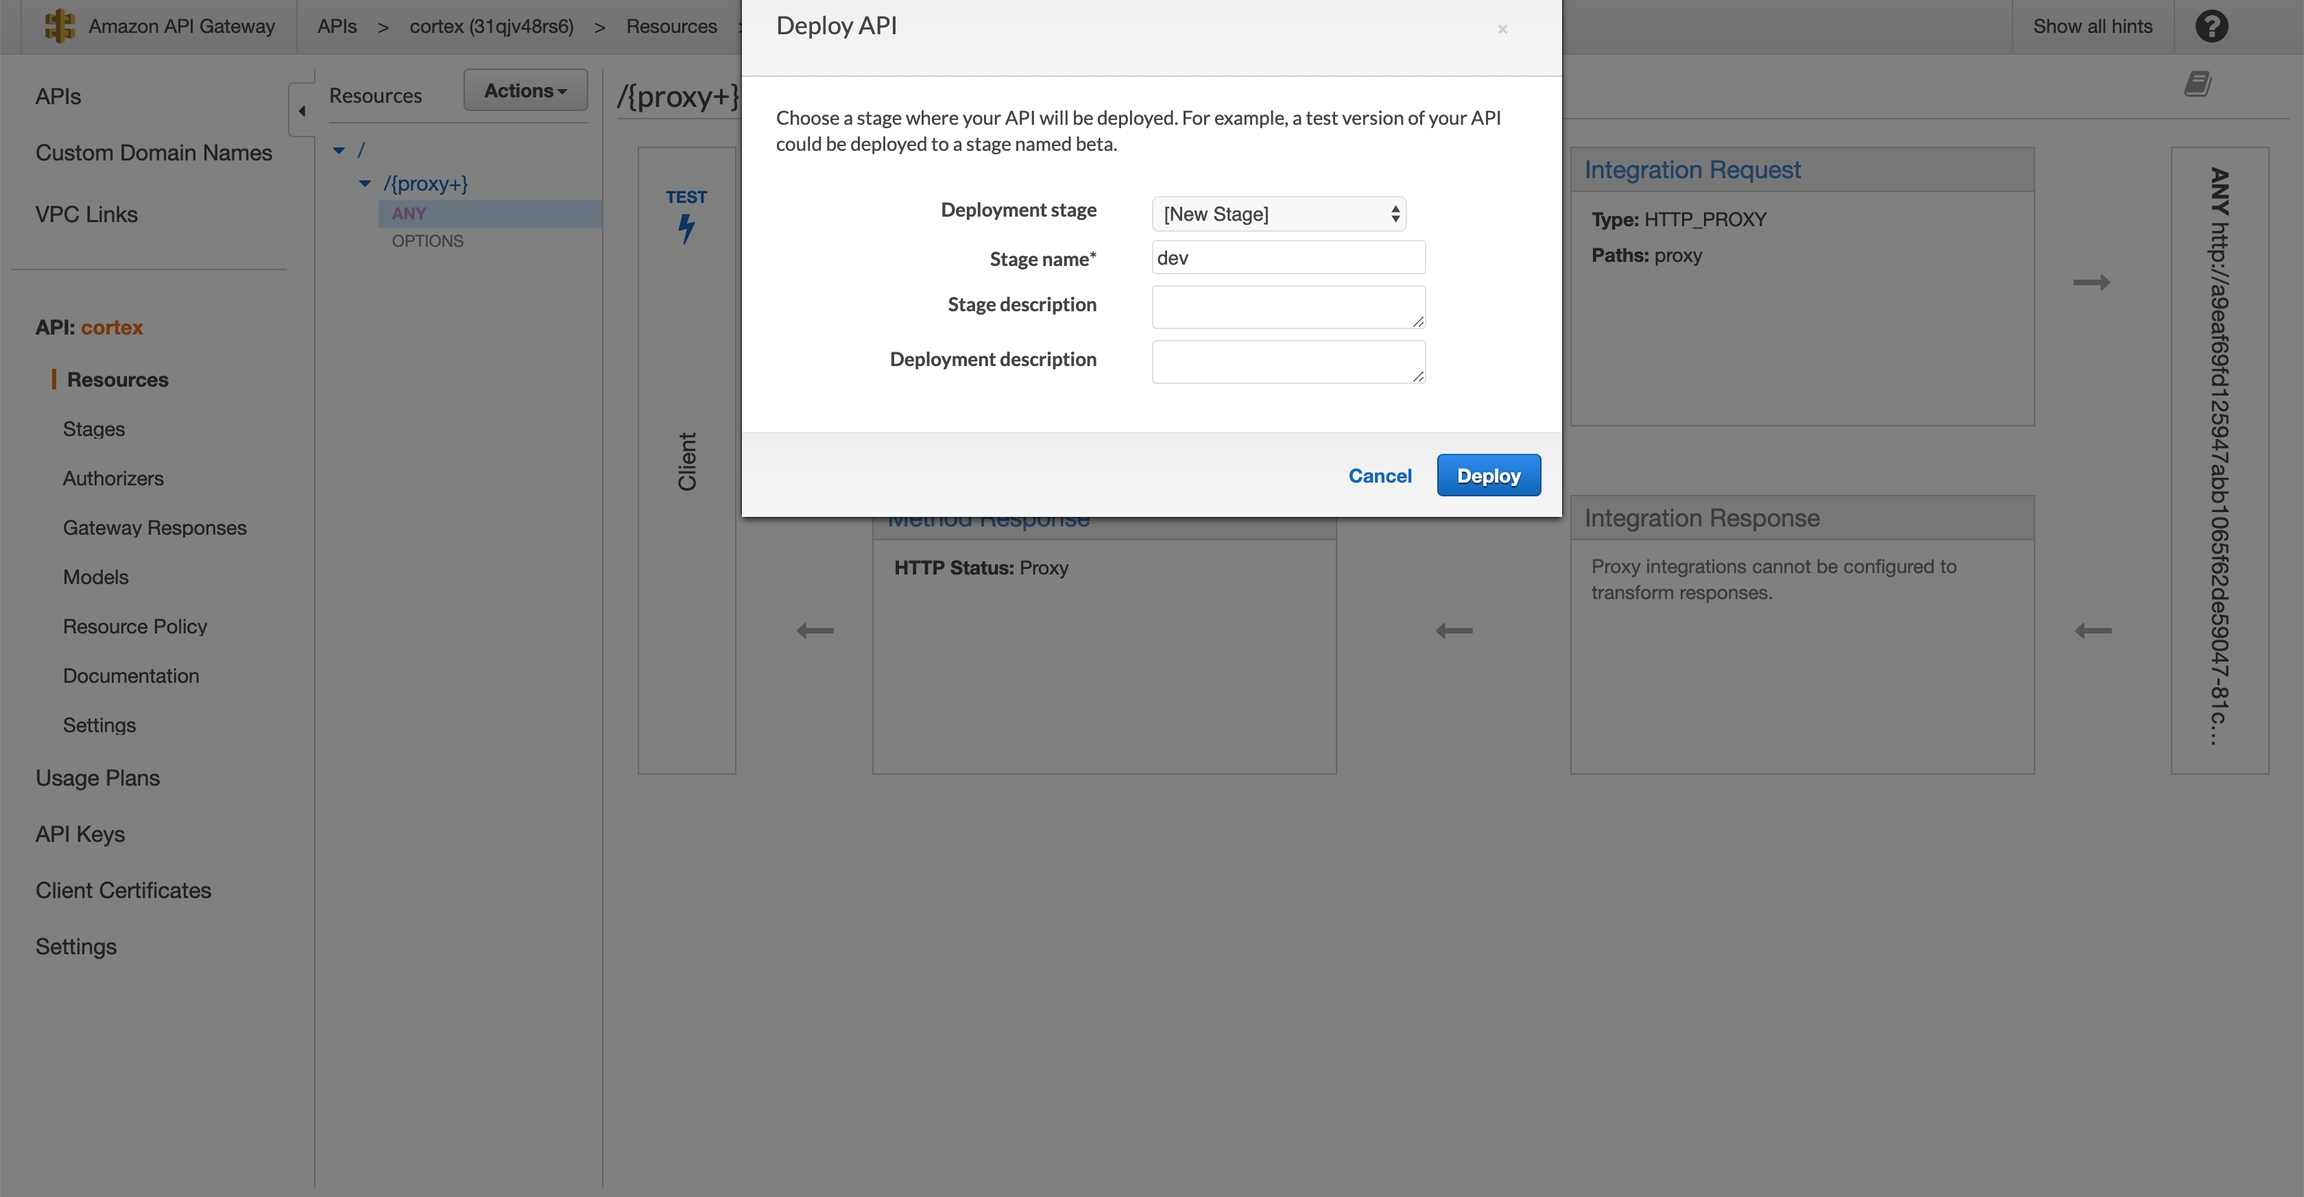
Create a new stage (e.g. "dev") and click "Deploy"
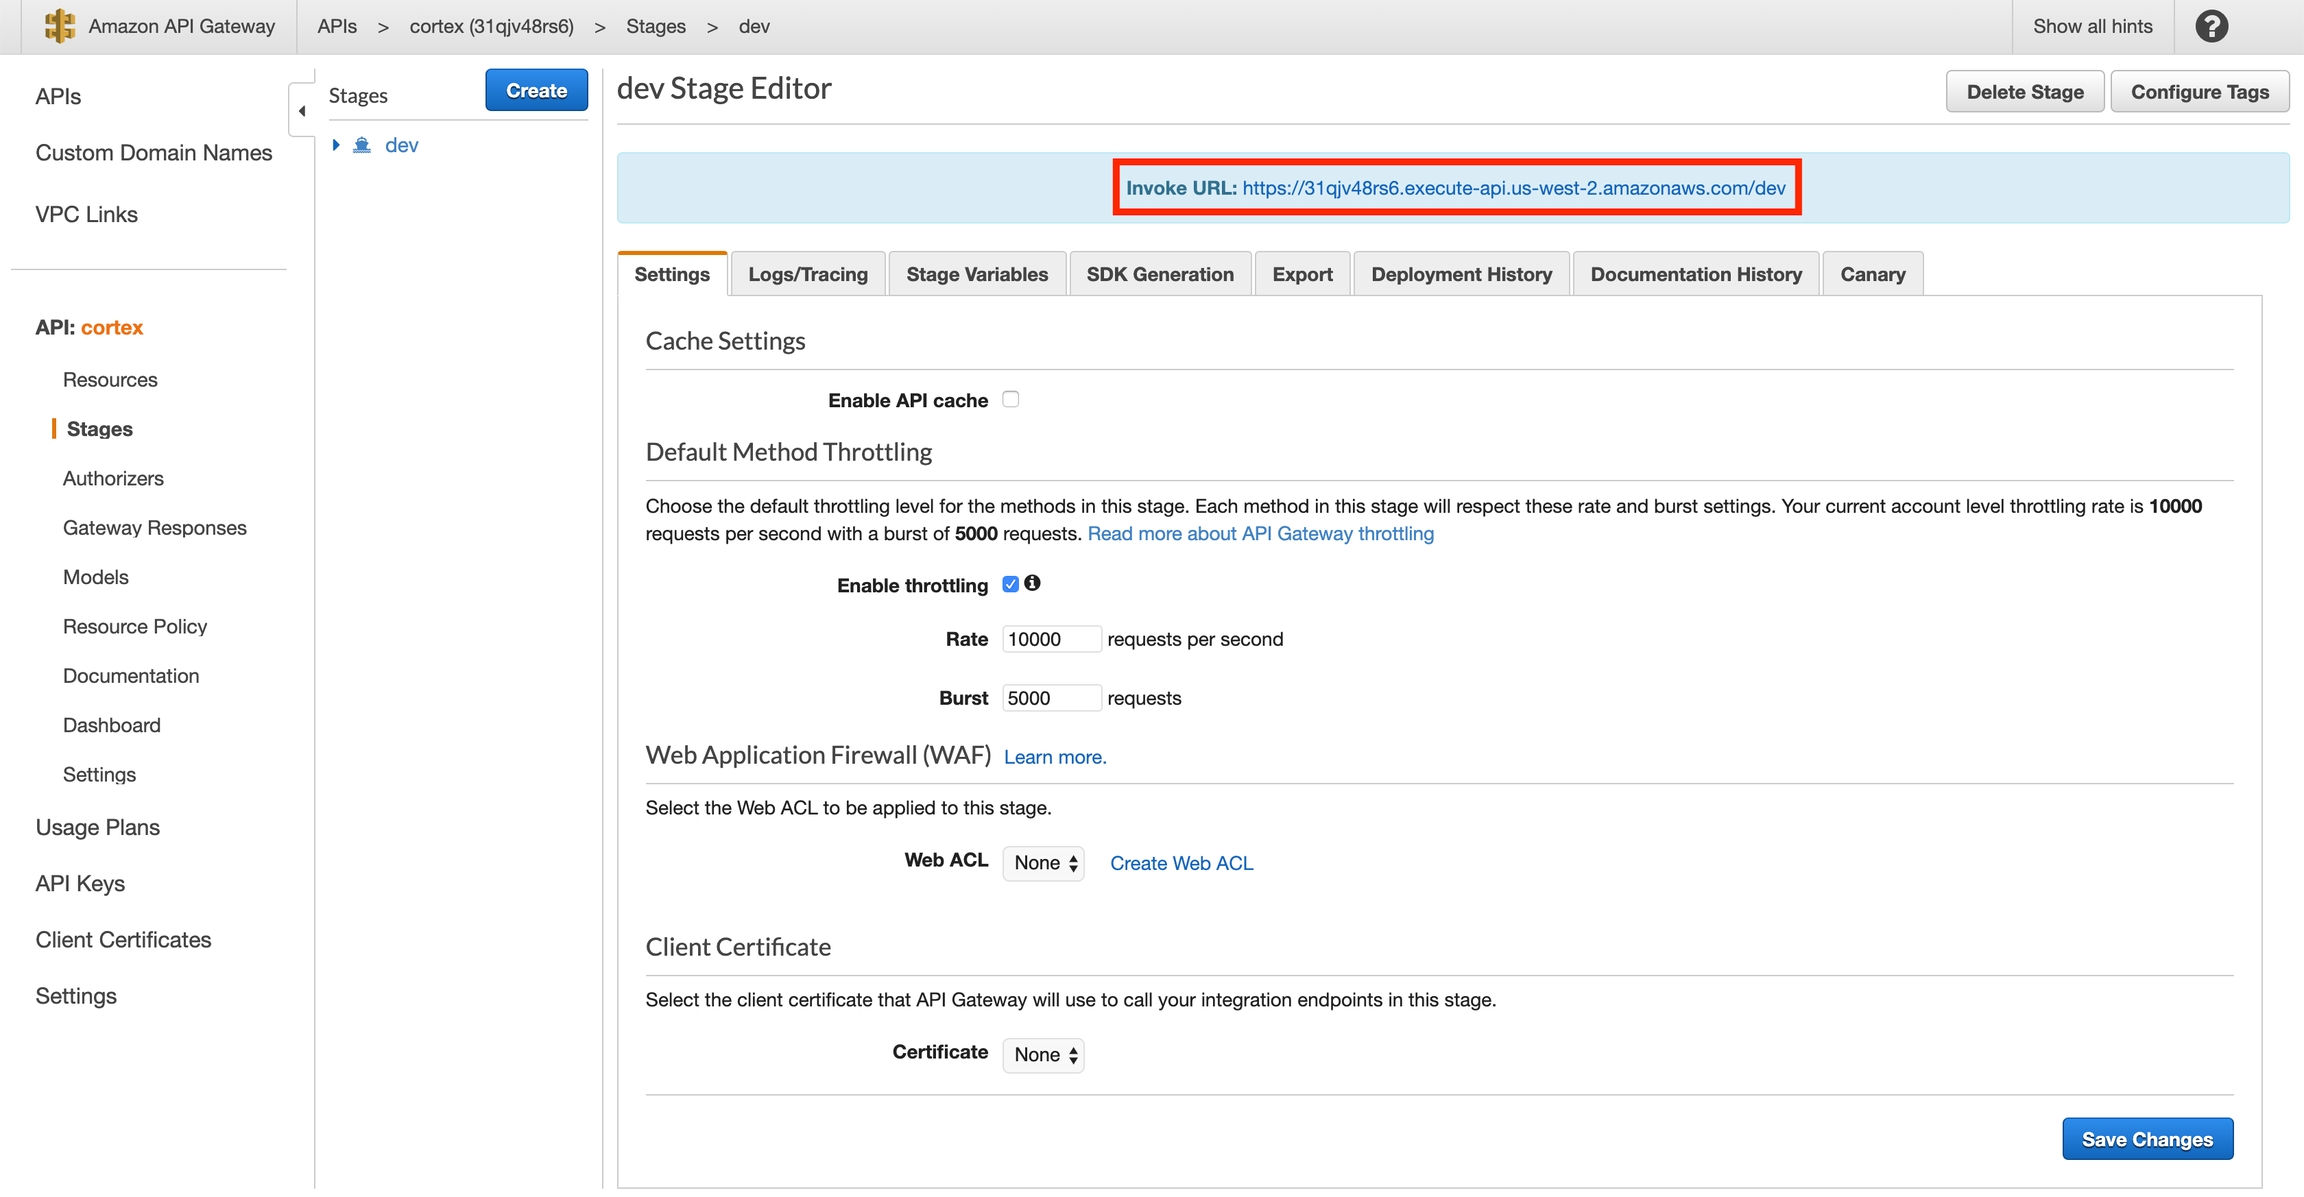
Copy your "Invoke URL"
Use your new endpoint
You may now use the "Invoke URL" in place of your API load balancer endpoint in your client. For example, this curl request:
Would become:
Cleanup
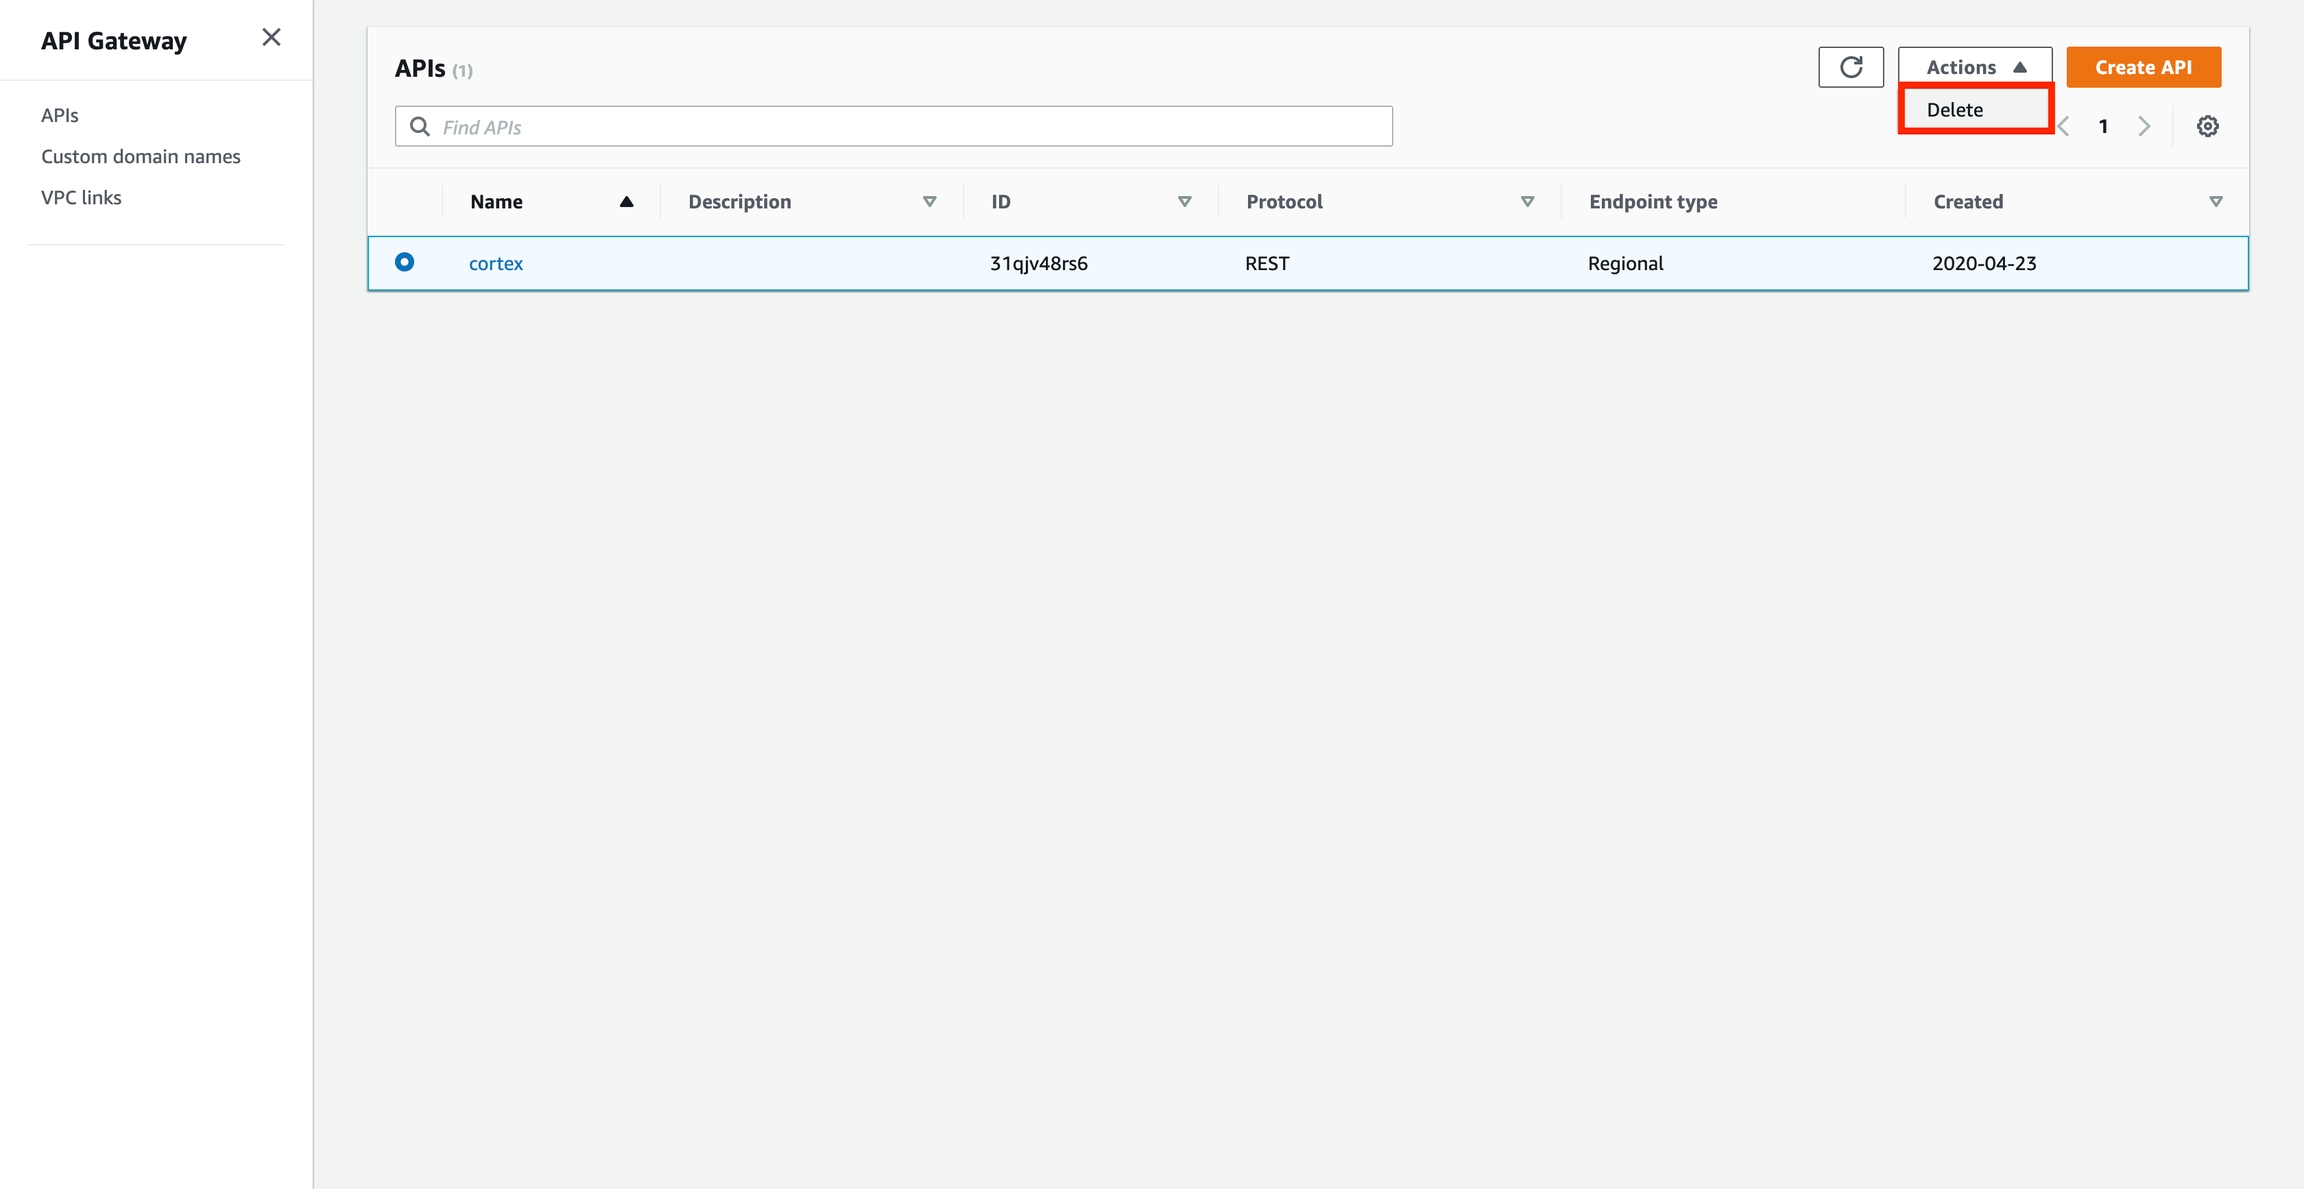
Delete the API Gateway before spinning down your Cortex cluster:
Internal load balancer
This section applies if your API load balancer is internal (i.e. you set api_load_balancer_scheme: internal in your cluster configuration file before creating your cluster). If your API load balancer is internet-facing, see the internet-facing load balancer section above.
Create a VPC Link
Navigate to AWS's EC2 Load Balancer dashboard and locate the Cortex API load balancer. You can determine which is the API load balancer by inspecting the kubernetes.io/service-name tag:
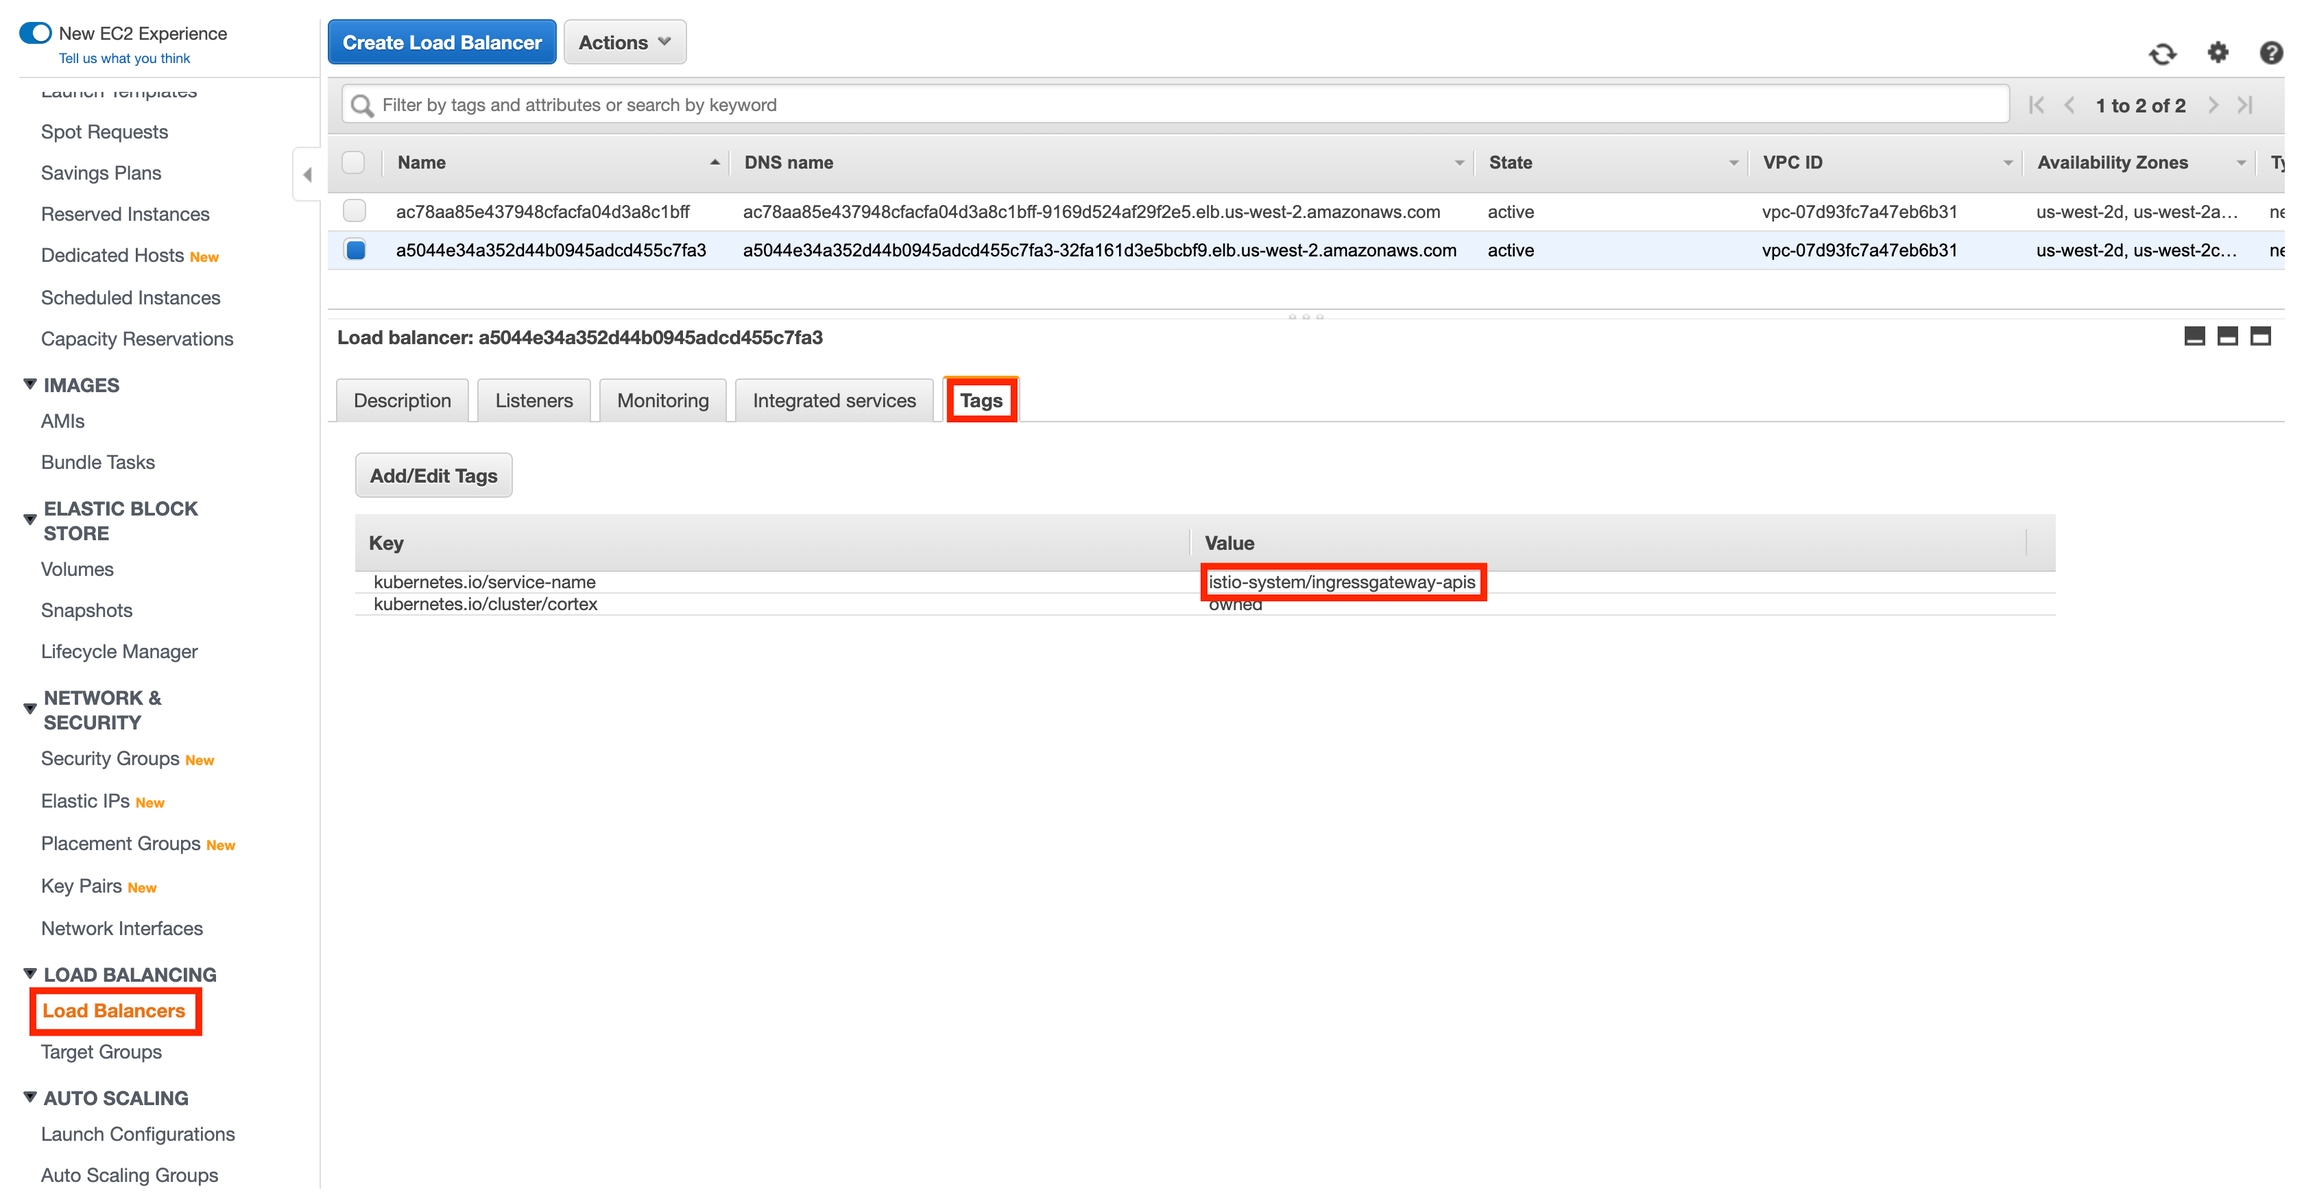
Take note of the load balancer's name.
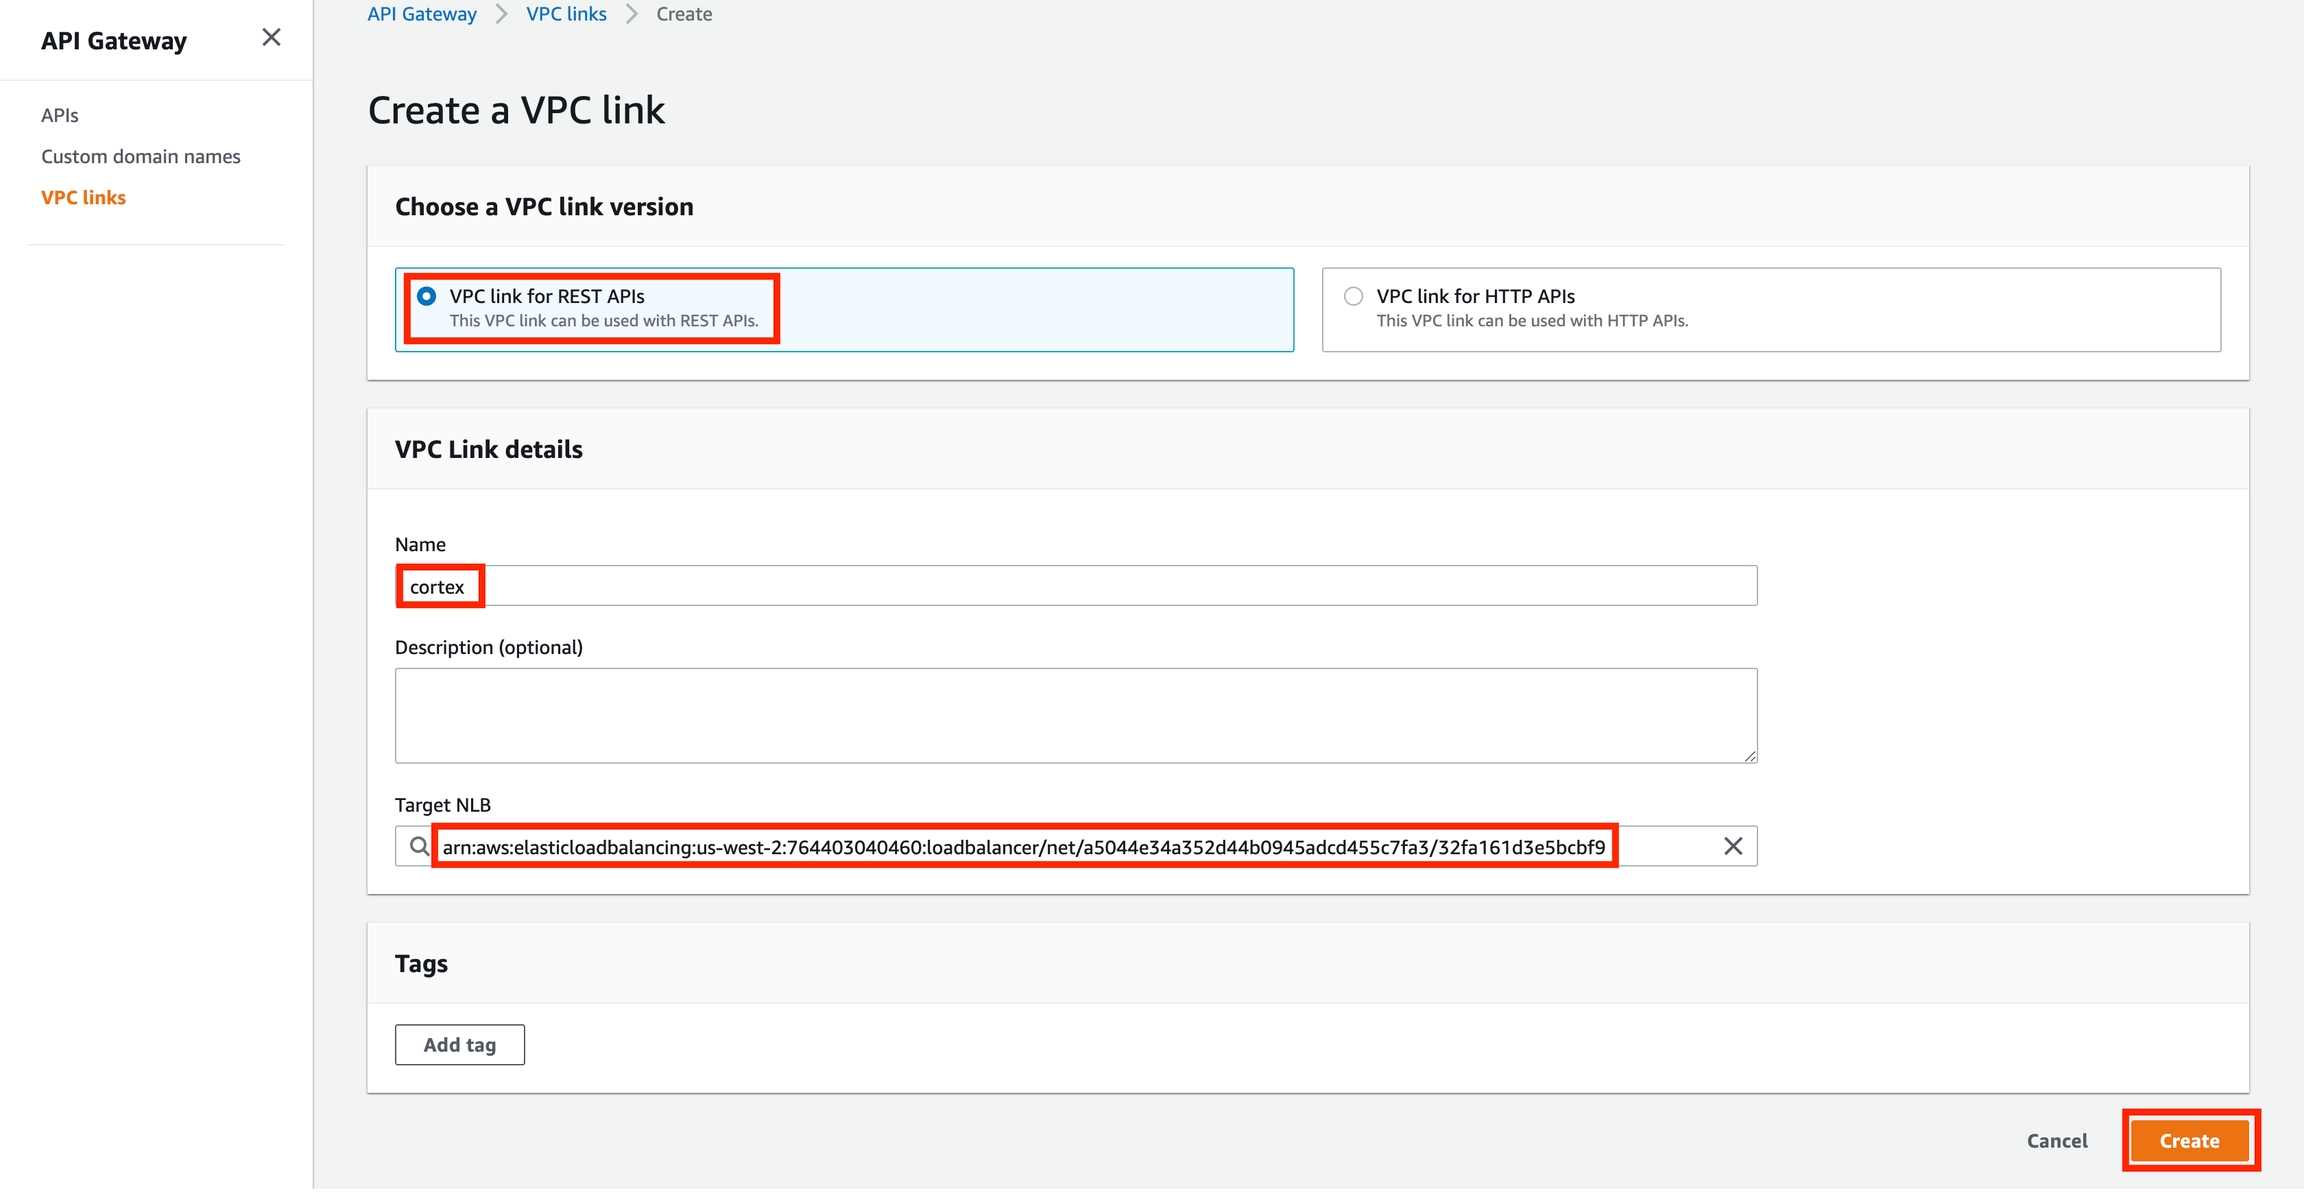
Go to the API Gateway console, click "VPC Links" on the left sidebar, and click "Create"
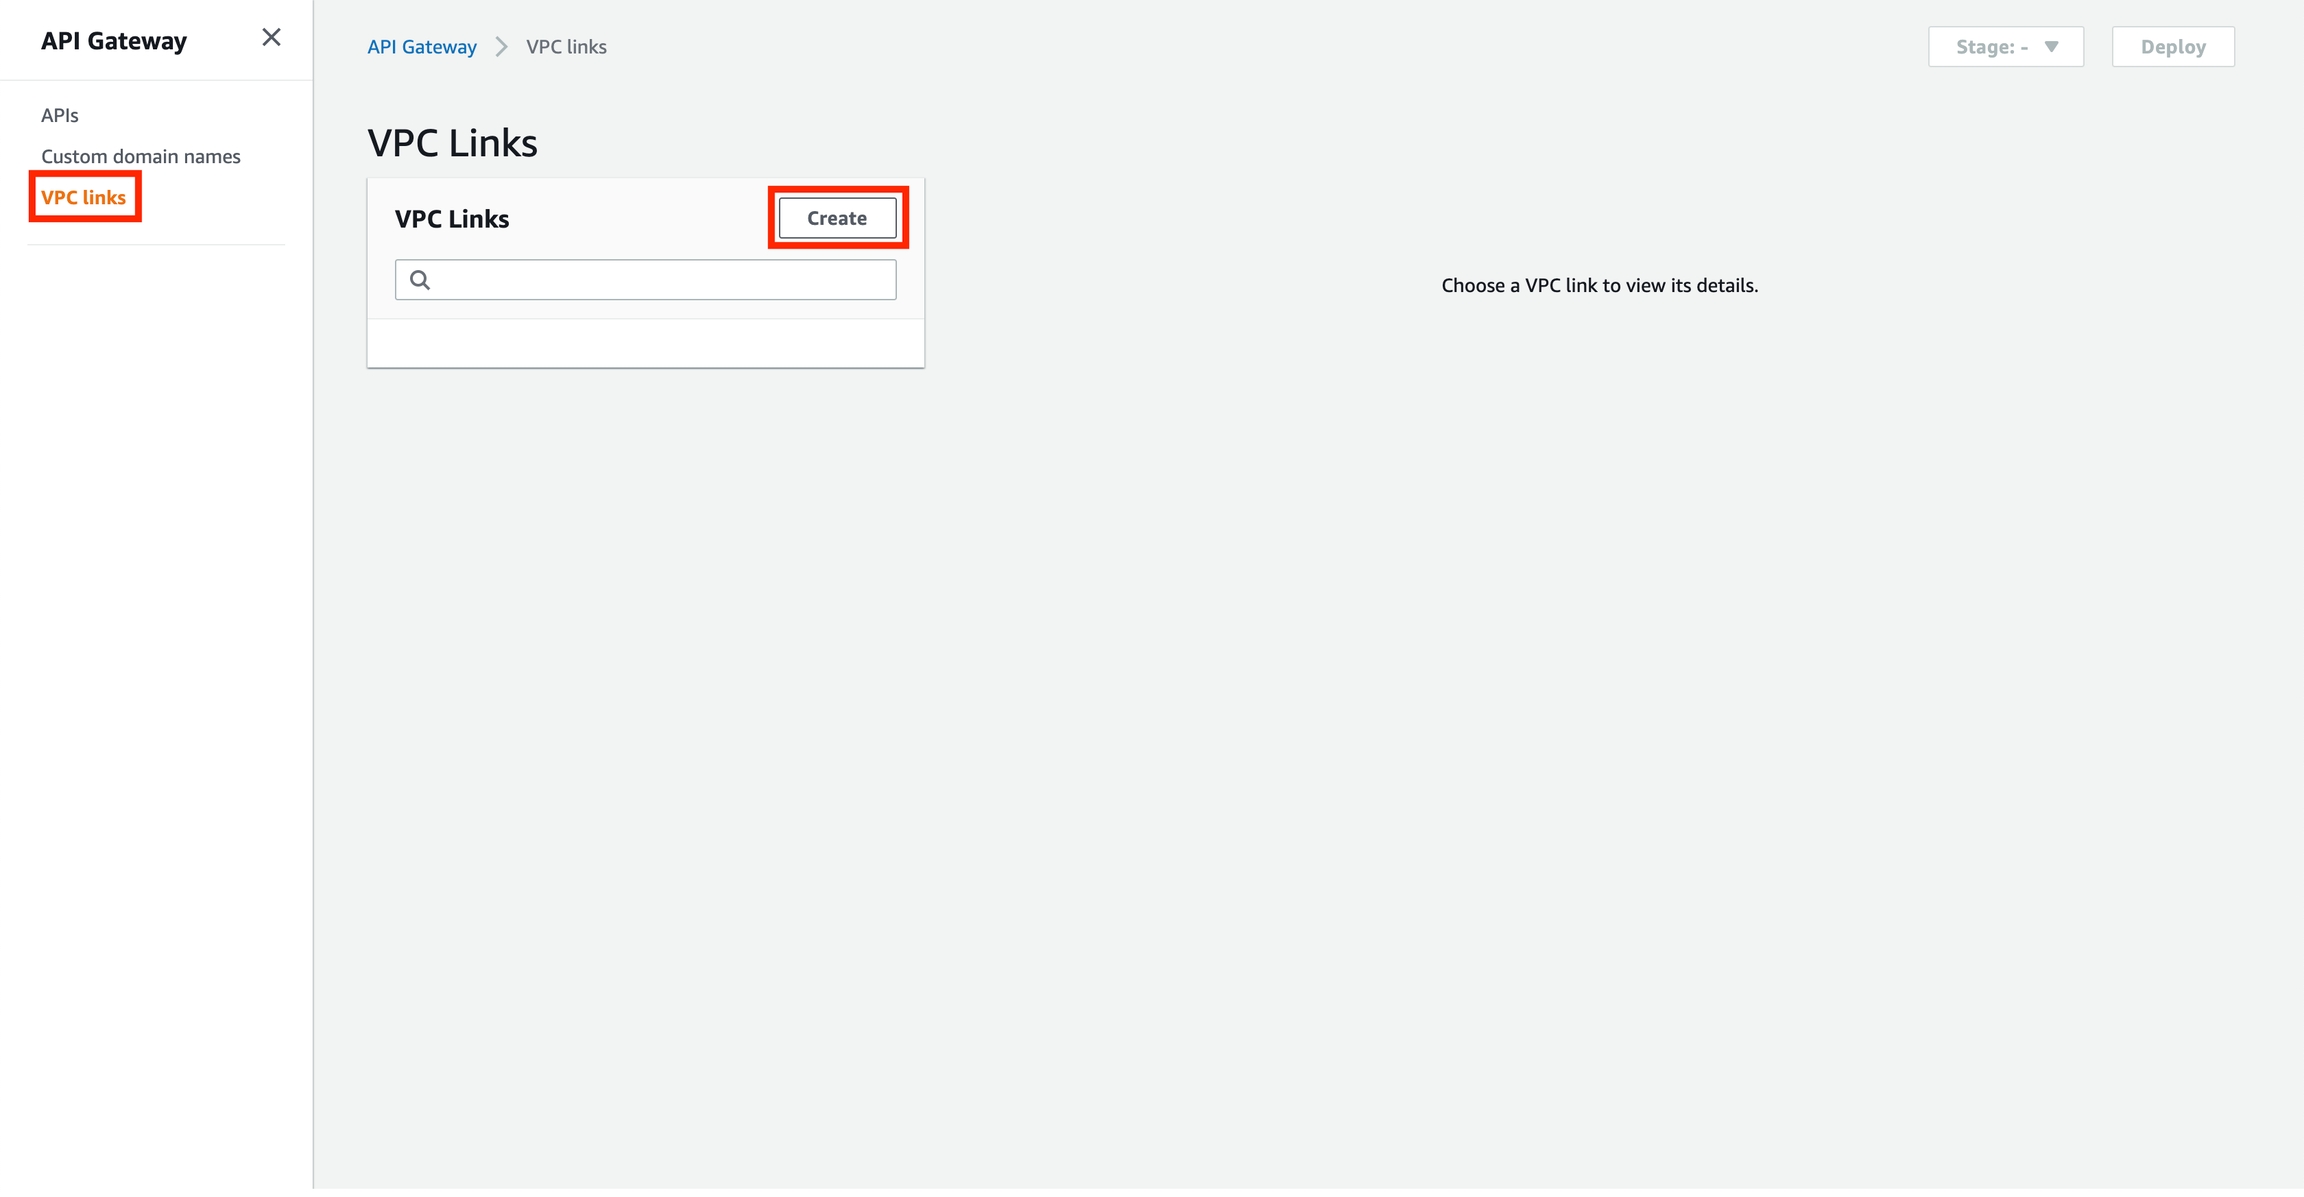
Select "VPC link for REST APIs", name your VPC link (e.g. "cortex"), select the API load balancer, and click "Create".
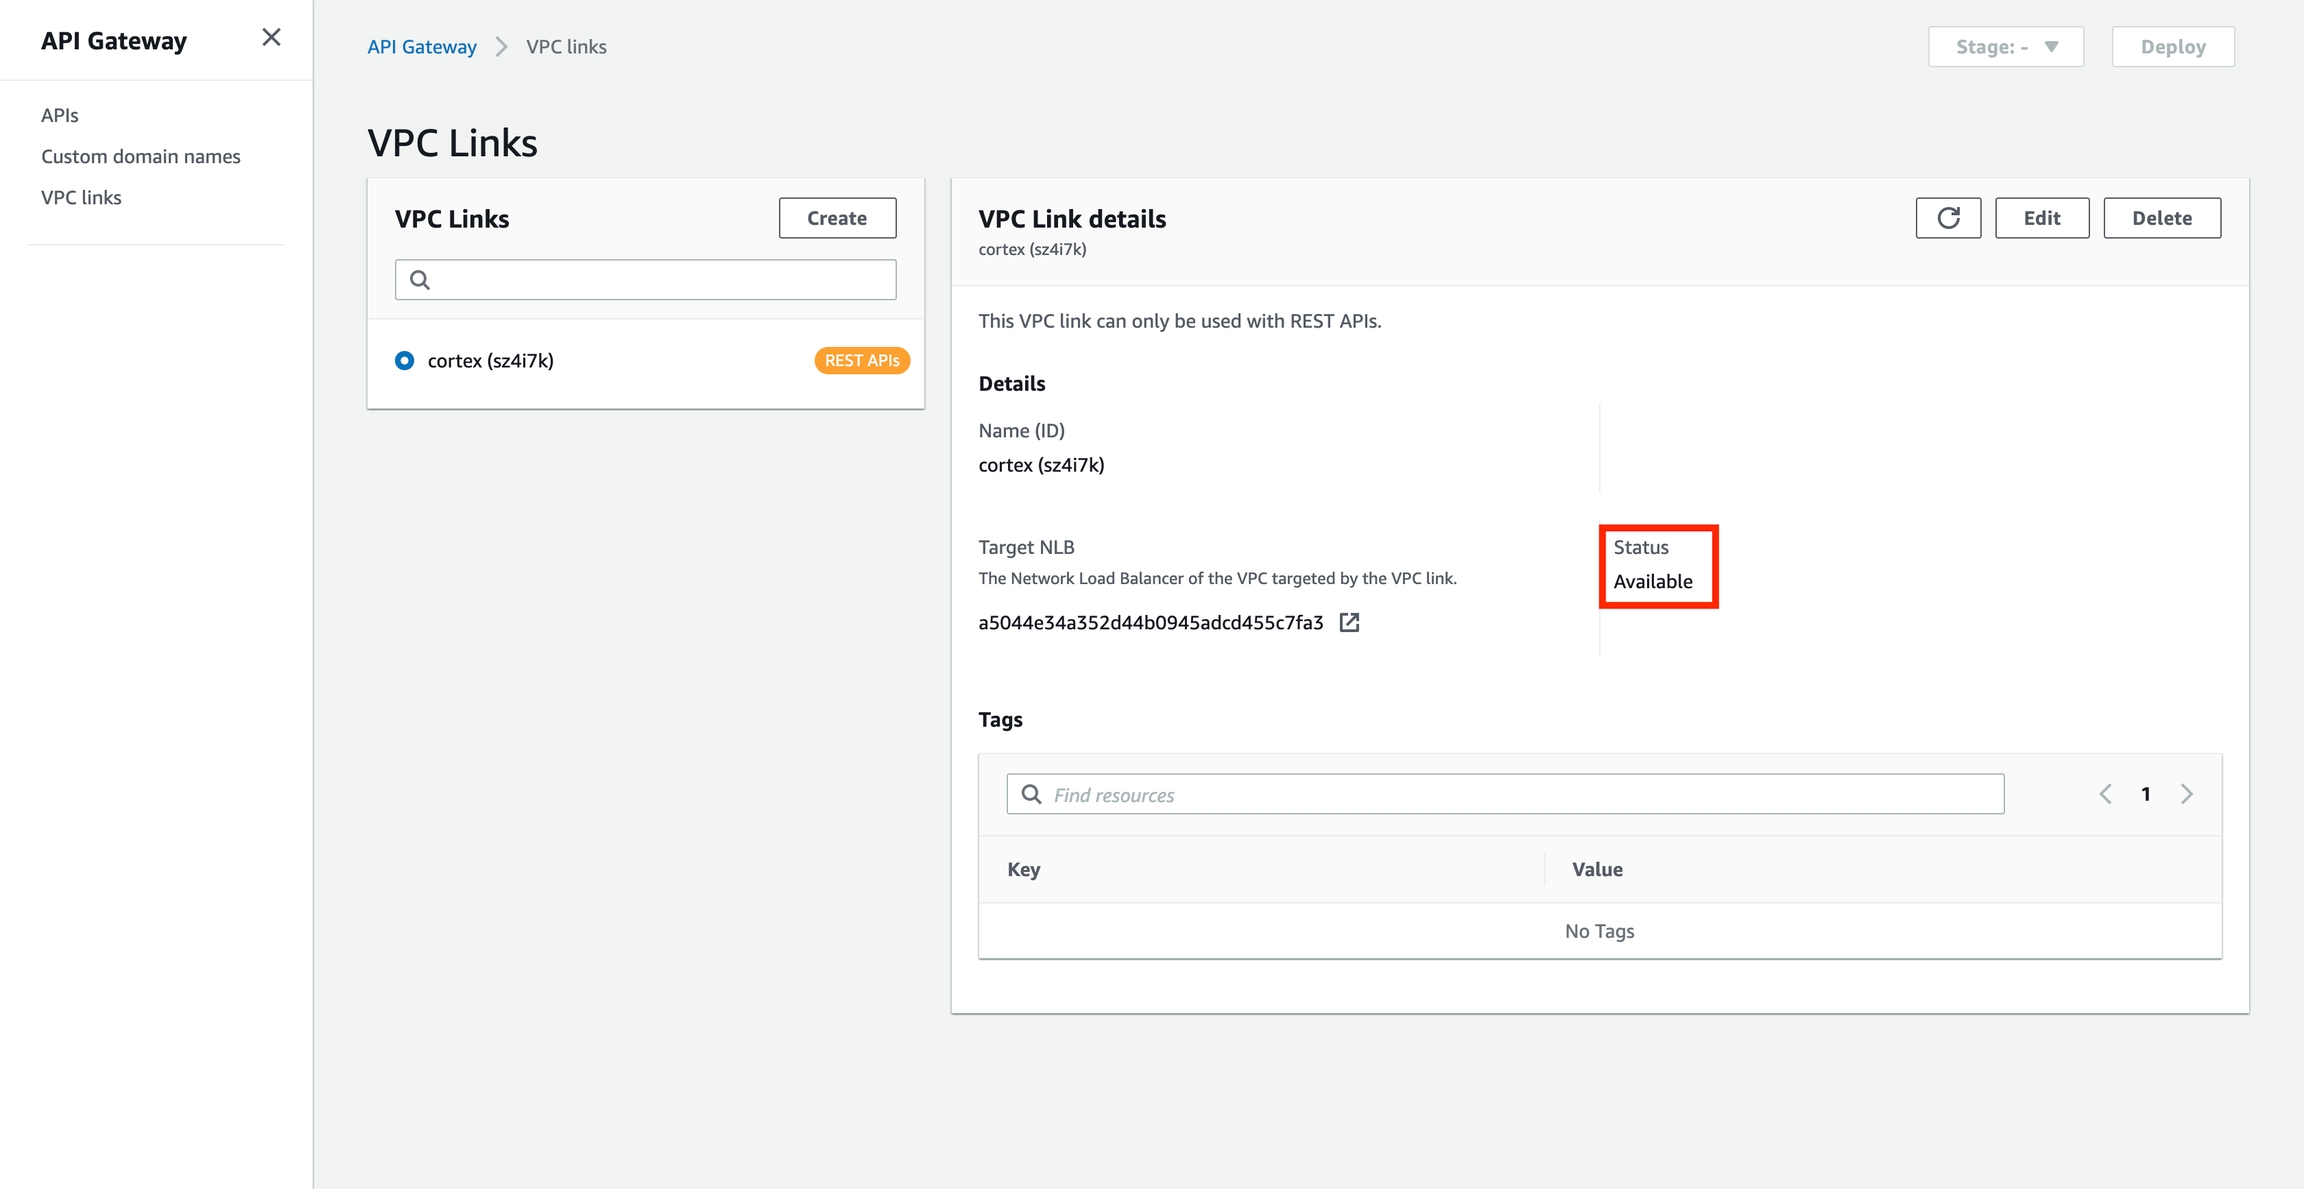
Wait for the VPC link to be created (it will take a few minutes)
Create an API Gateway
Go to the API Gateway console, select "REST API" under "Choose an API type", and click "Build"

Select "REST" and "New API", name your API (e.g. "cortex"), select either "Regional" or "Edge optimized" (depending on your preference), and click "Create API"

Select "Actions" > "Create Resource"
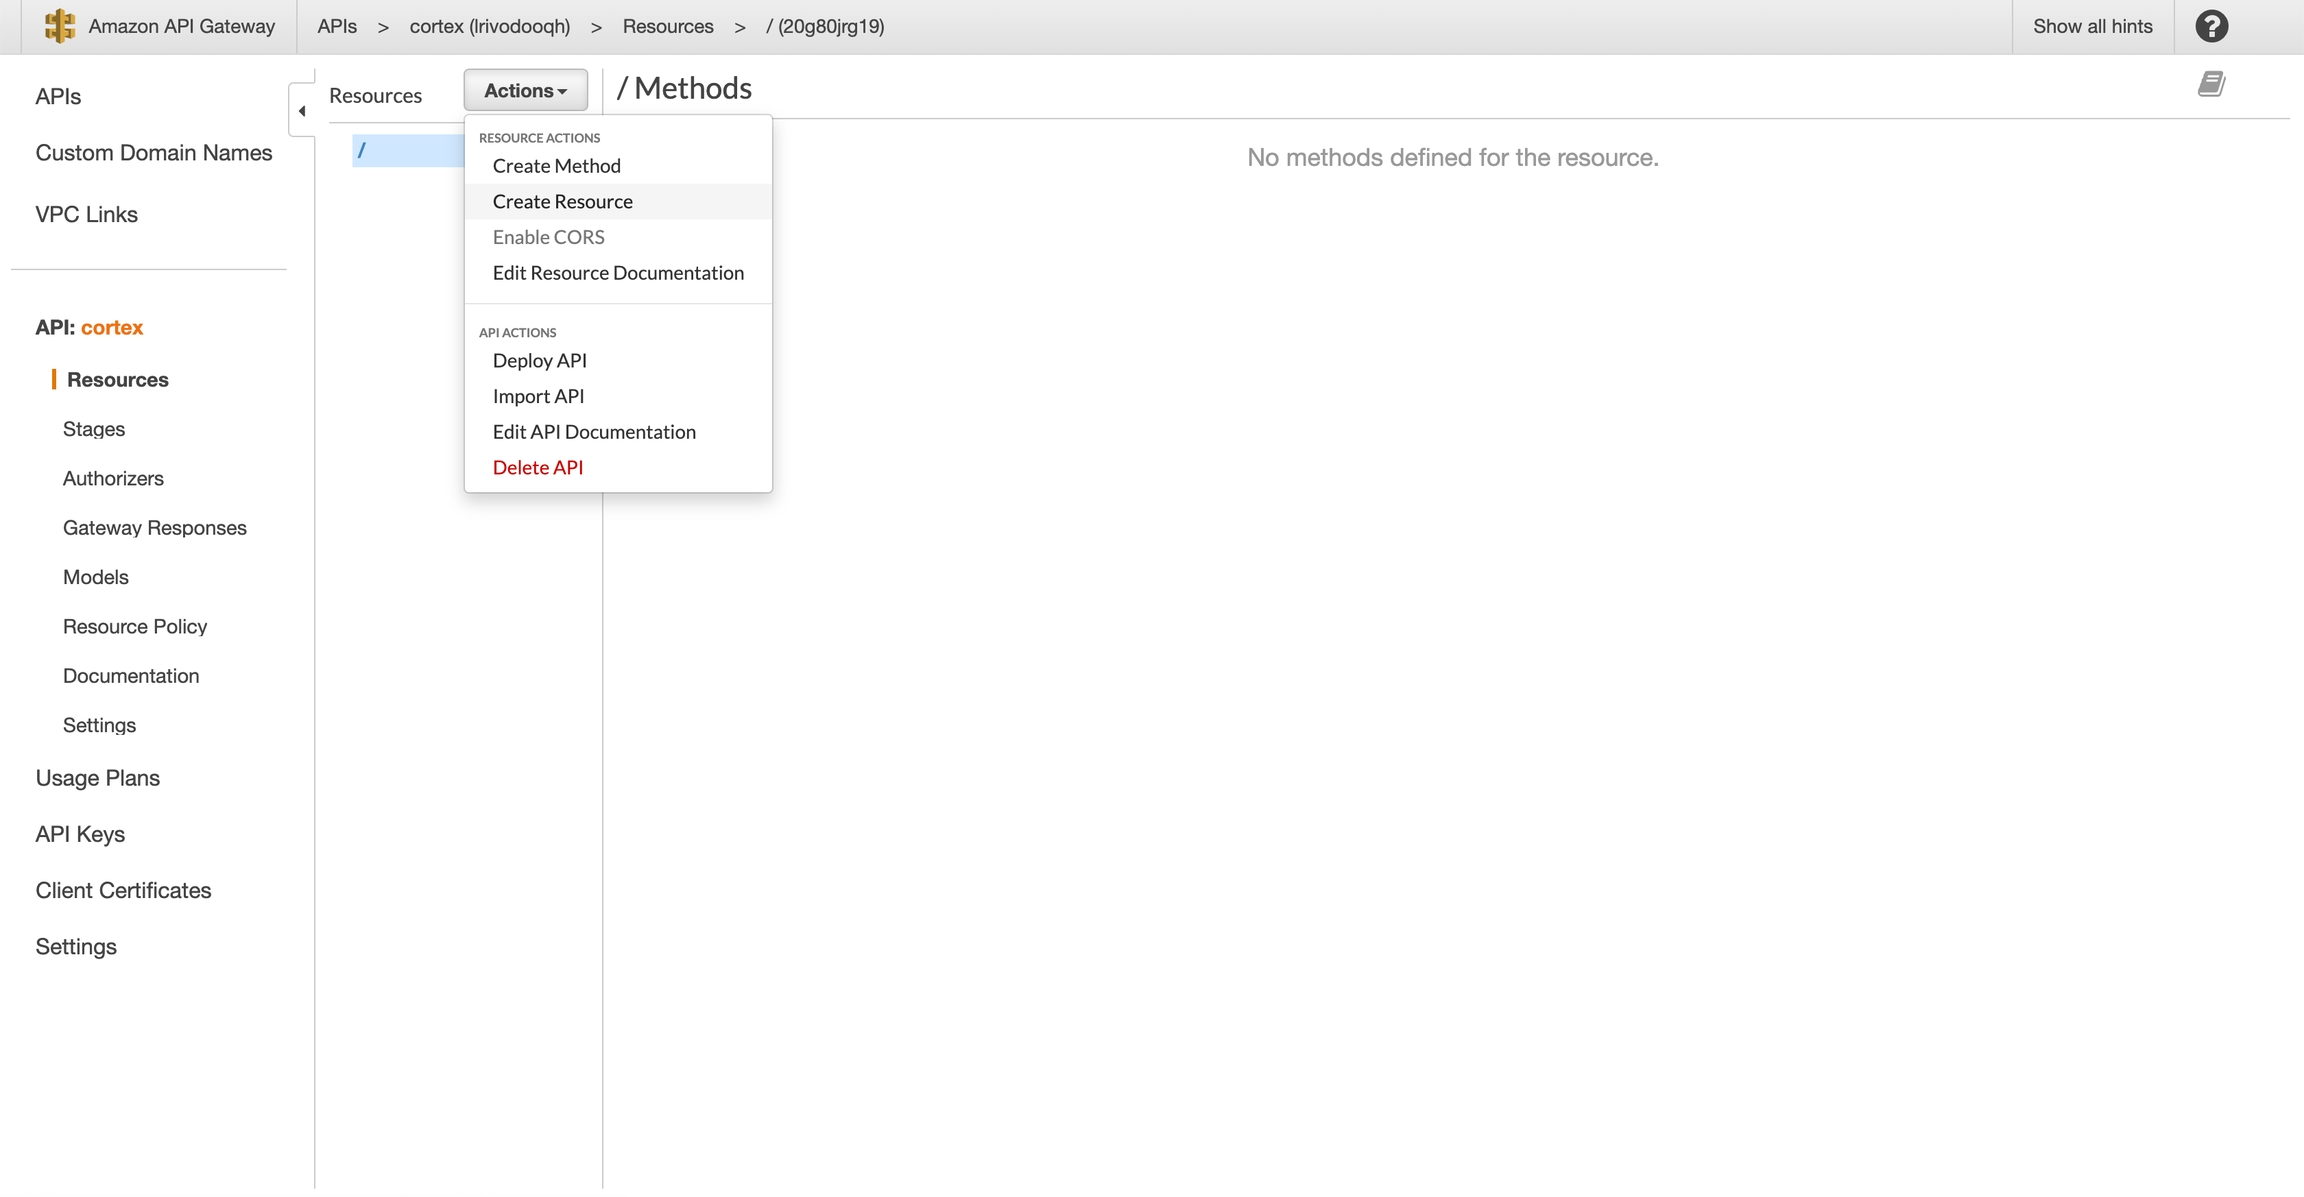
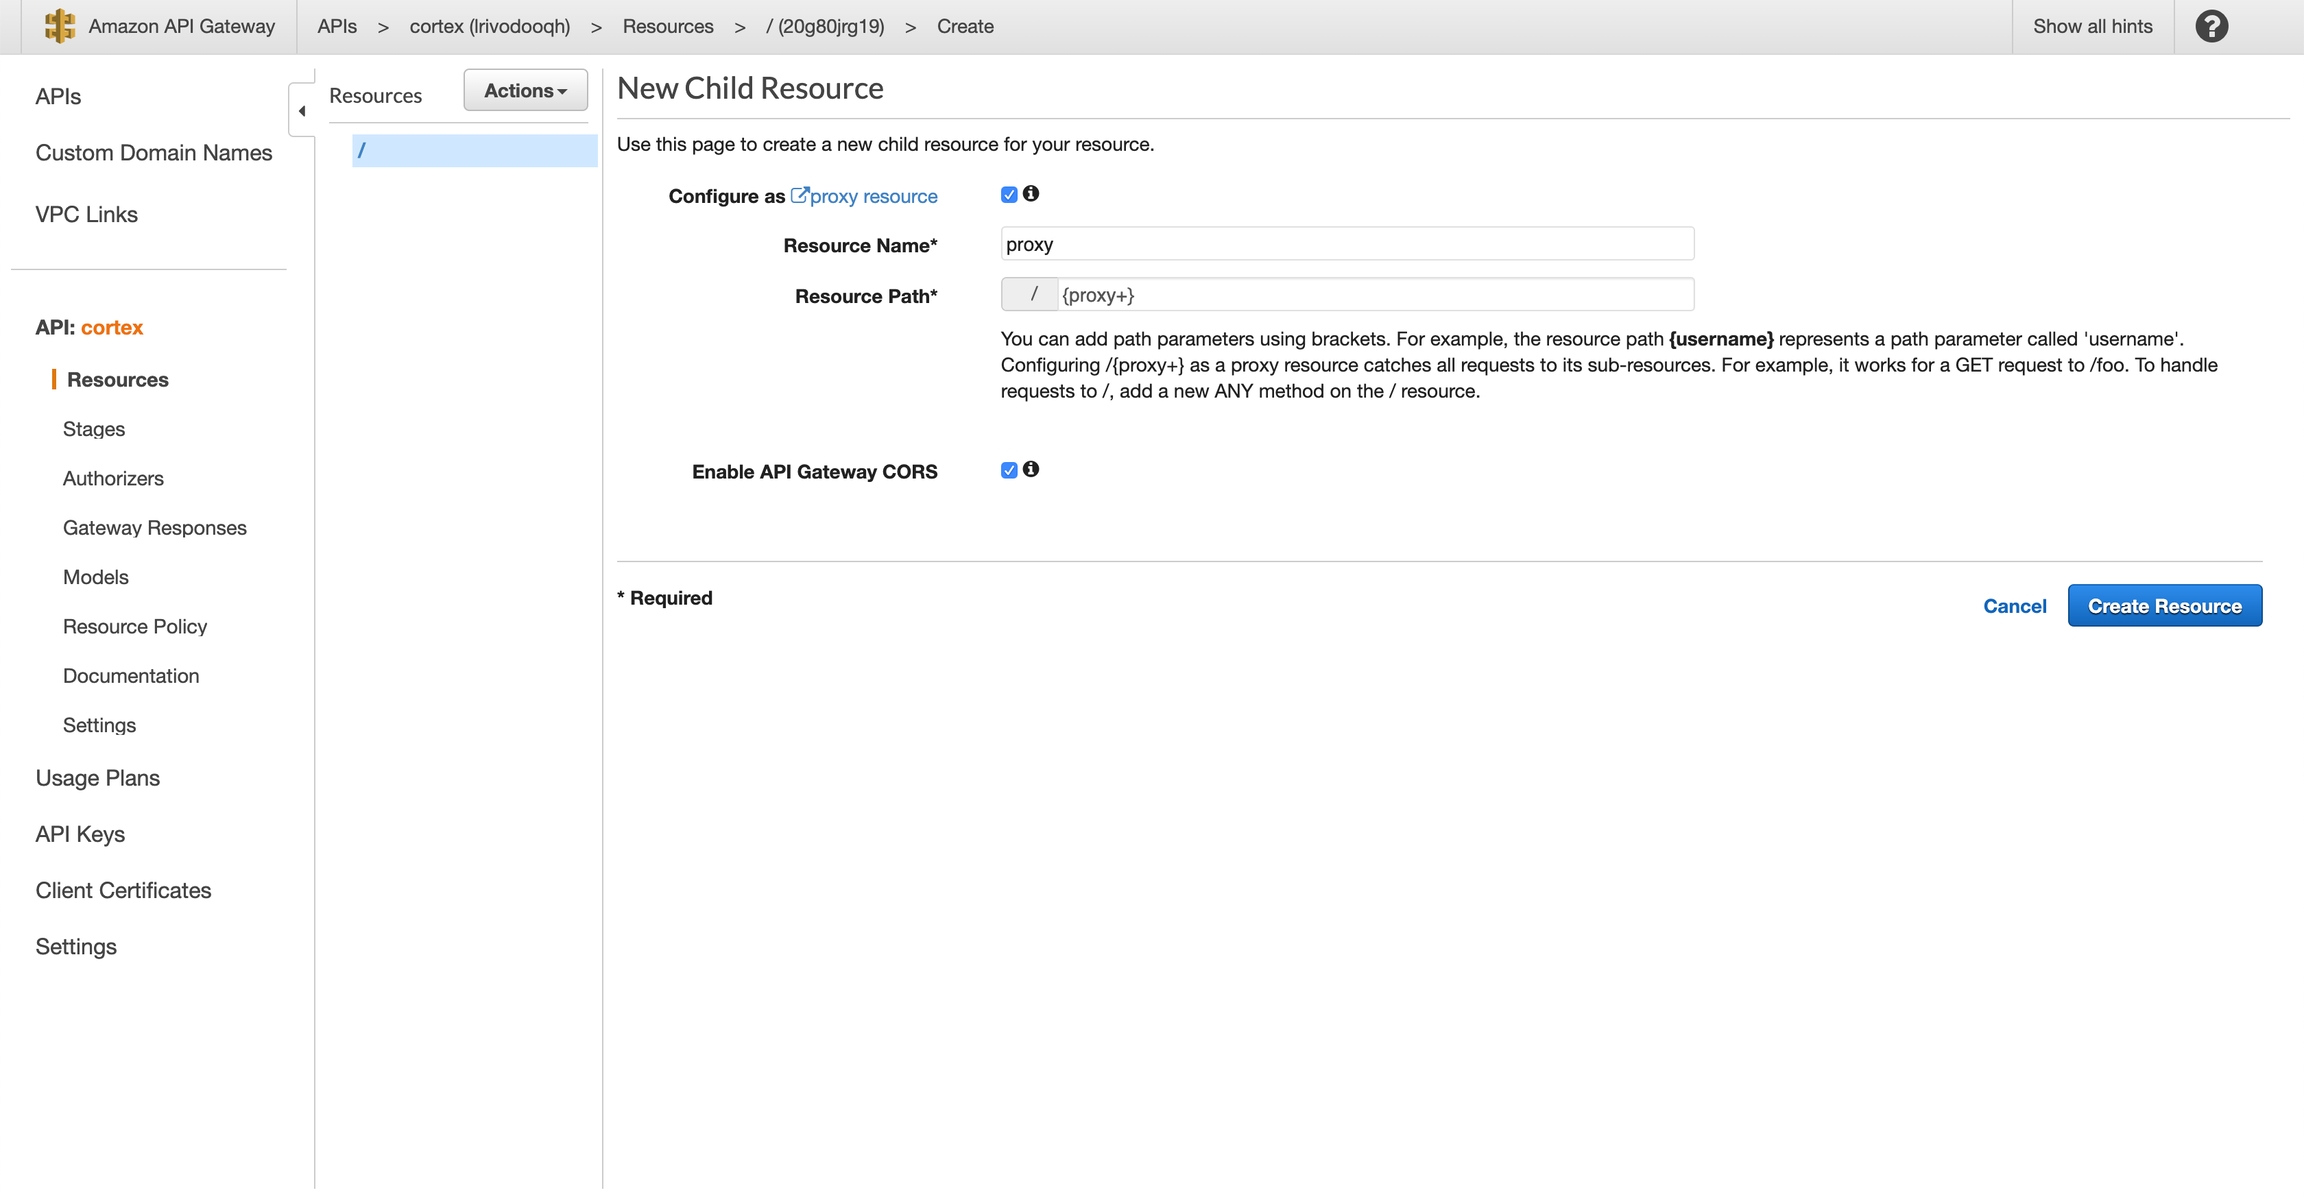
Select "Configure as proxy resource" and "Enable API Gateway CORS", and click "Create Resource"
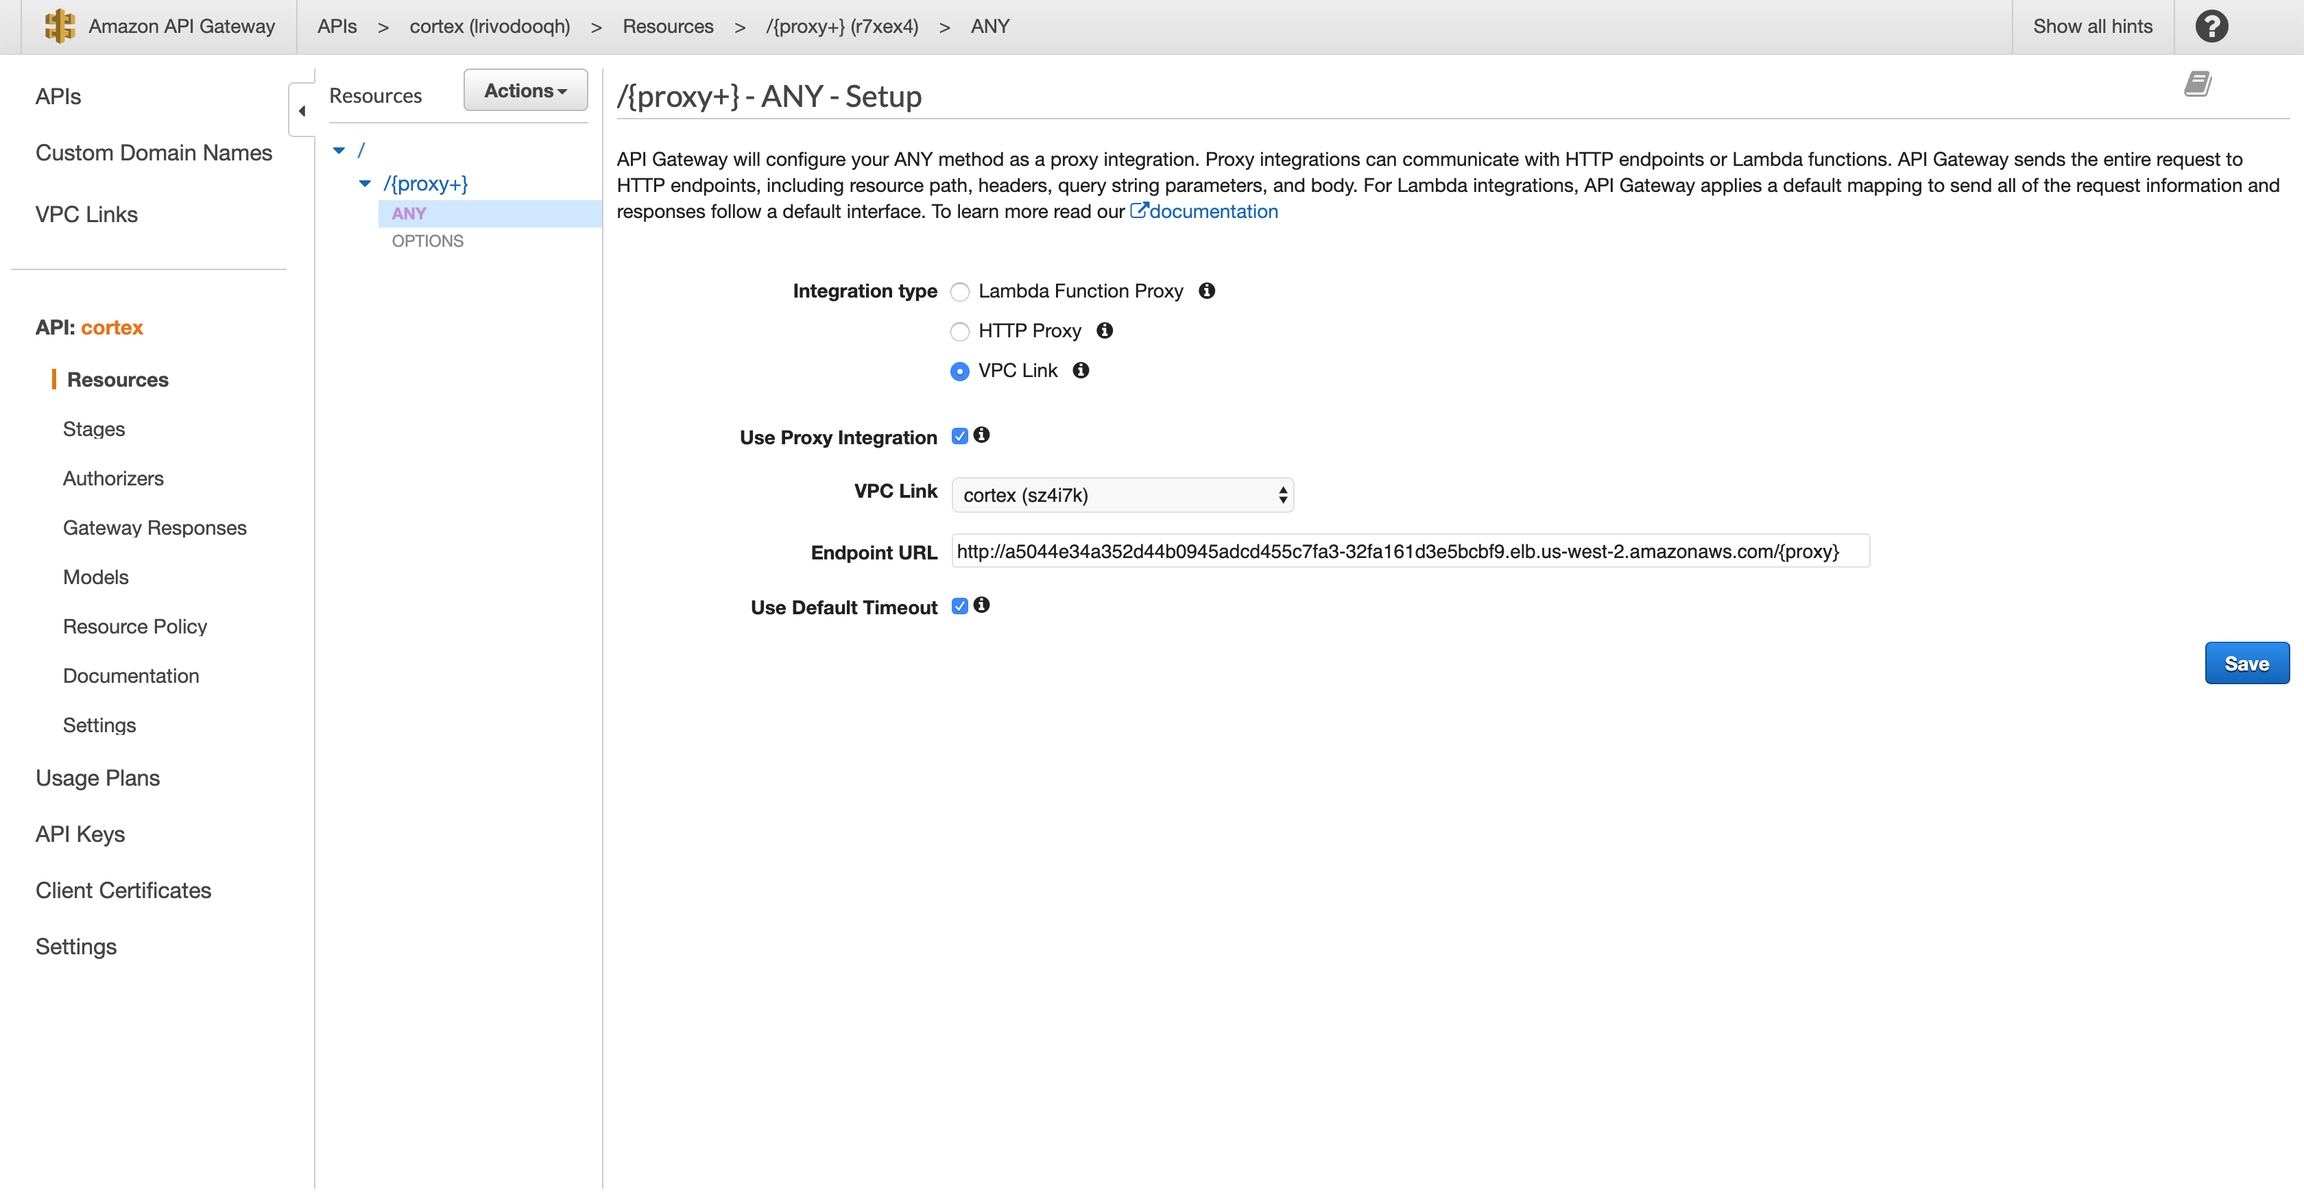
Select "VPC Link", select "Use Proxy Integration", choose your newly-created VPC Link, and set "Endpoint URL" to http://API_LOAD_BALANCER_ENDPOINT/{proxy}. You can get your API load balancer endpoint via cortex cluster info; make sure to prepend http:// and append /{proxy}. For example, mine is: http://a5044e34a352d44b0945adcd455c7fa3-32fa161d3e5bcbf9.elb.us-west-2.amazonaws.com/{proxy}. Click "Save"
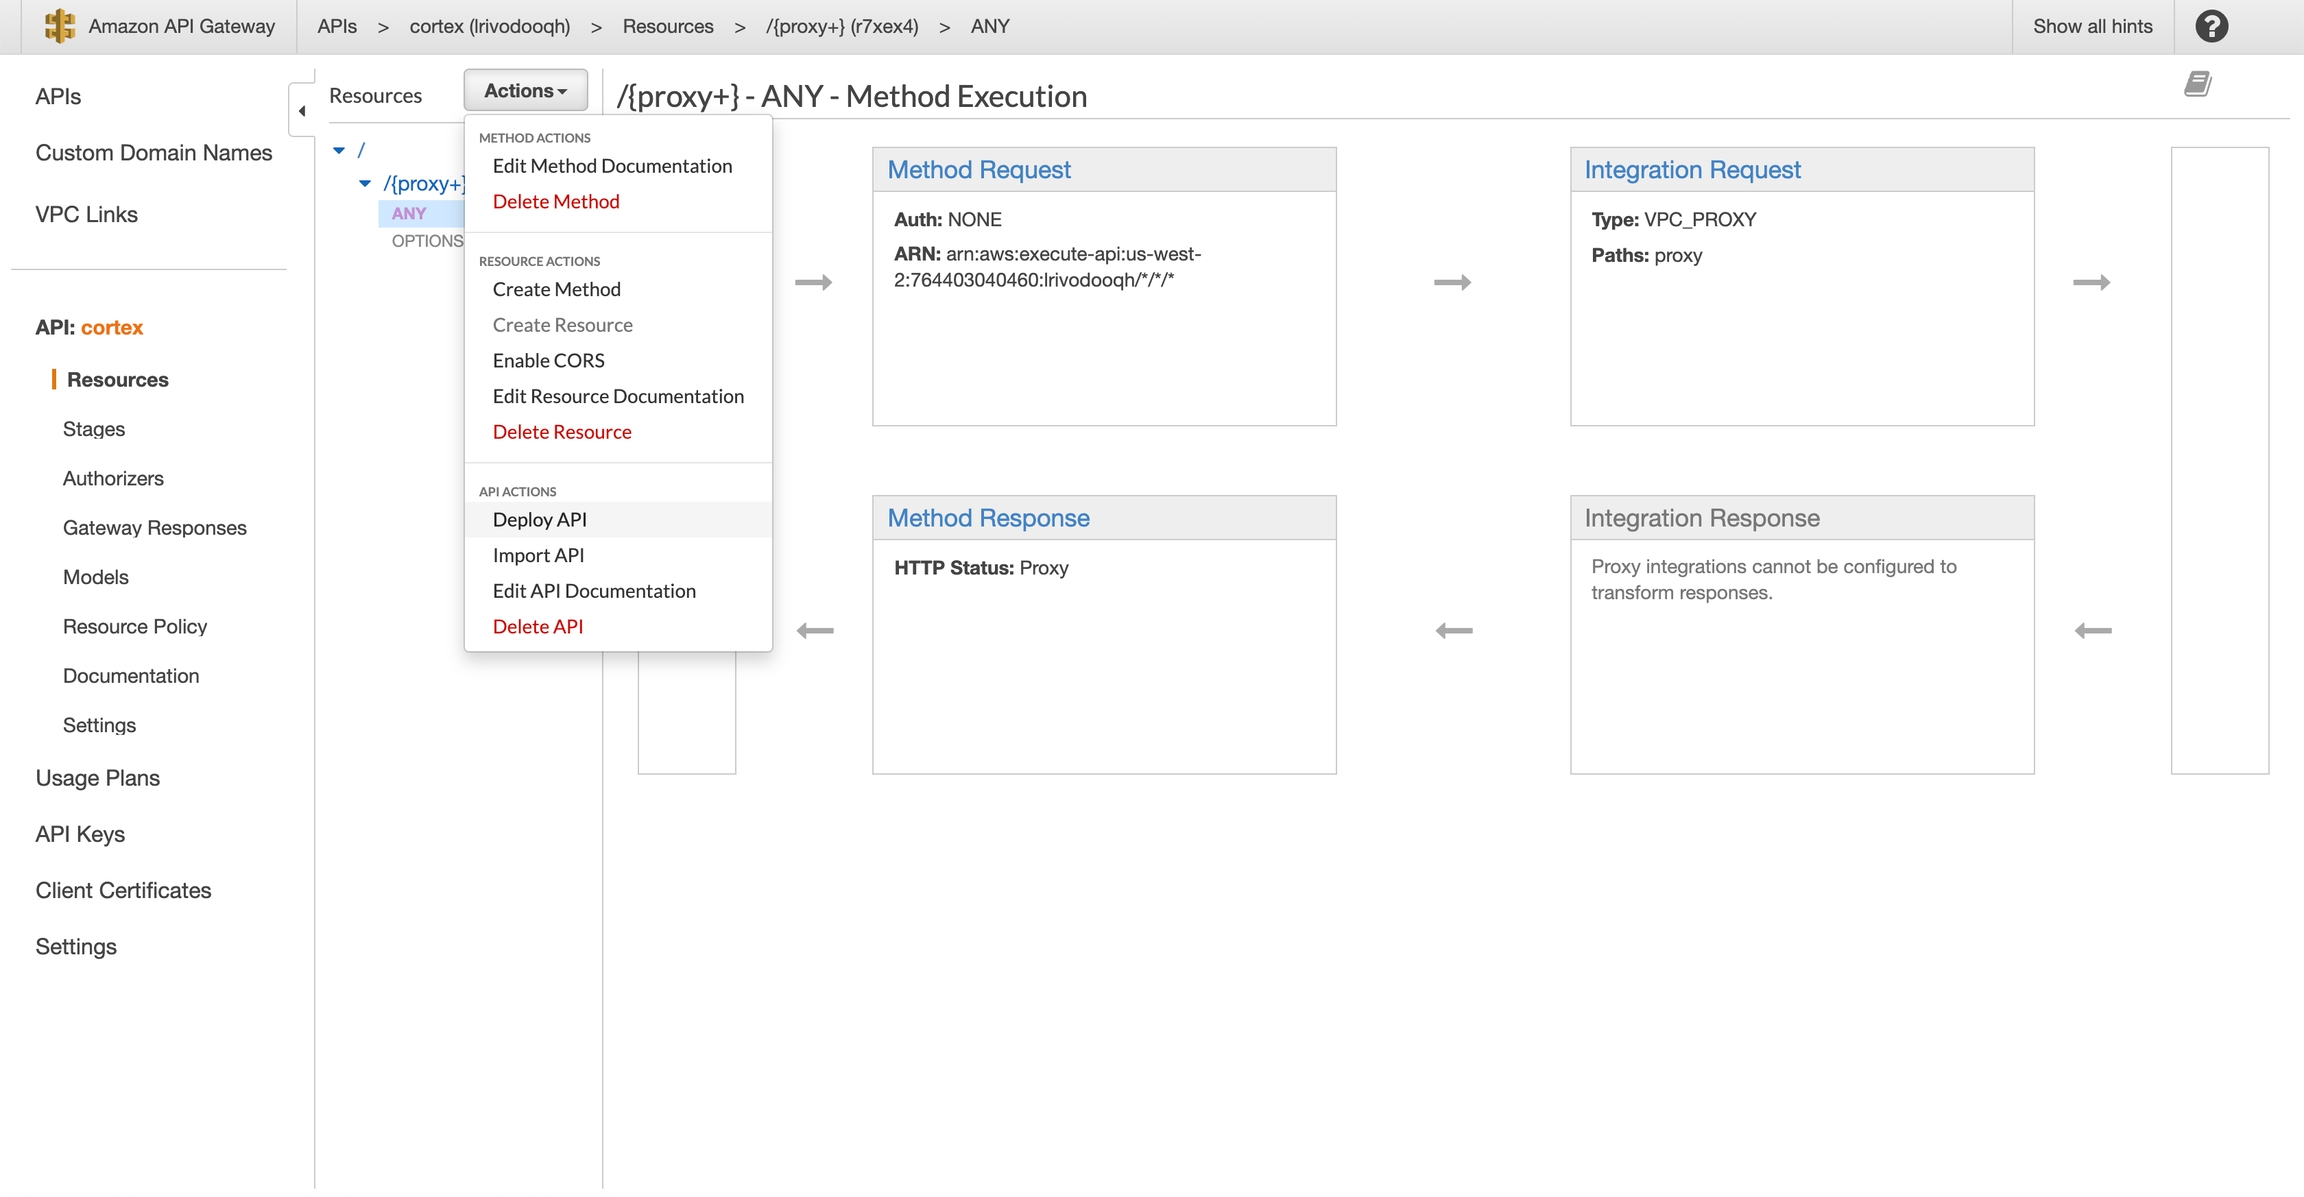
Select "Actions" > "Deploy API"
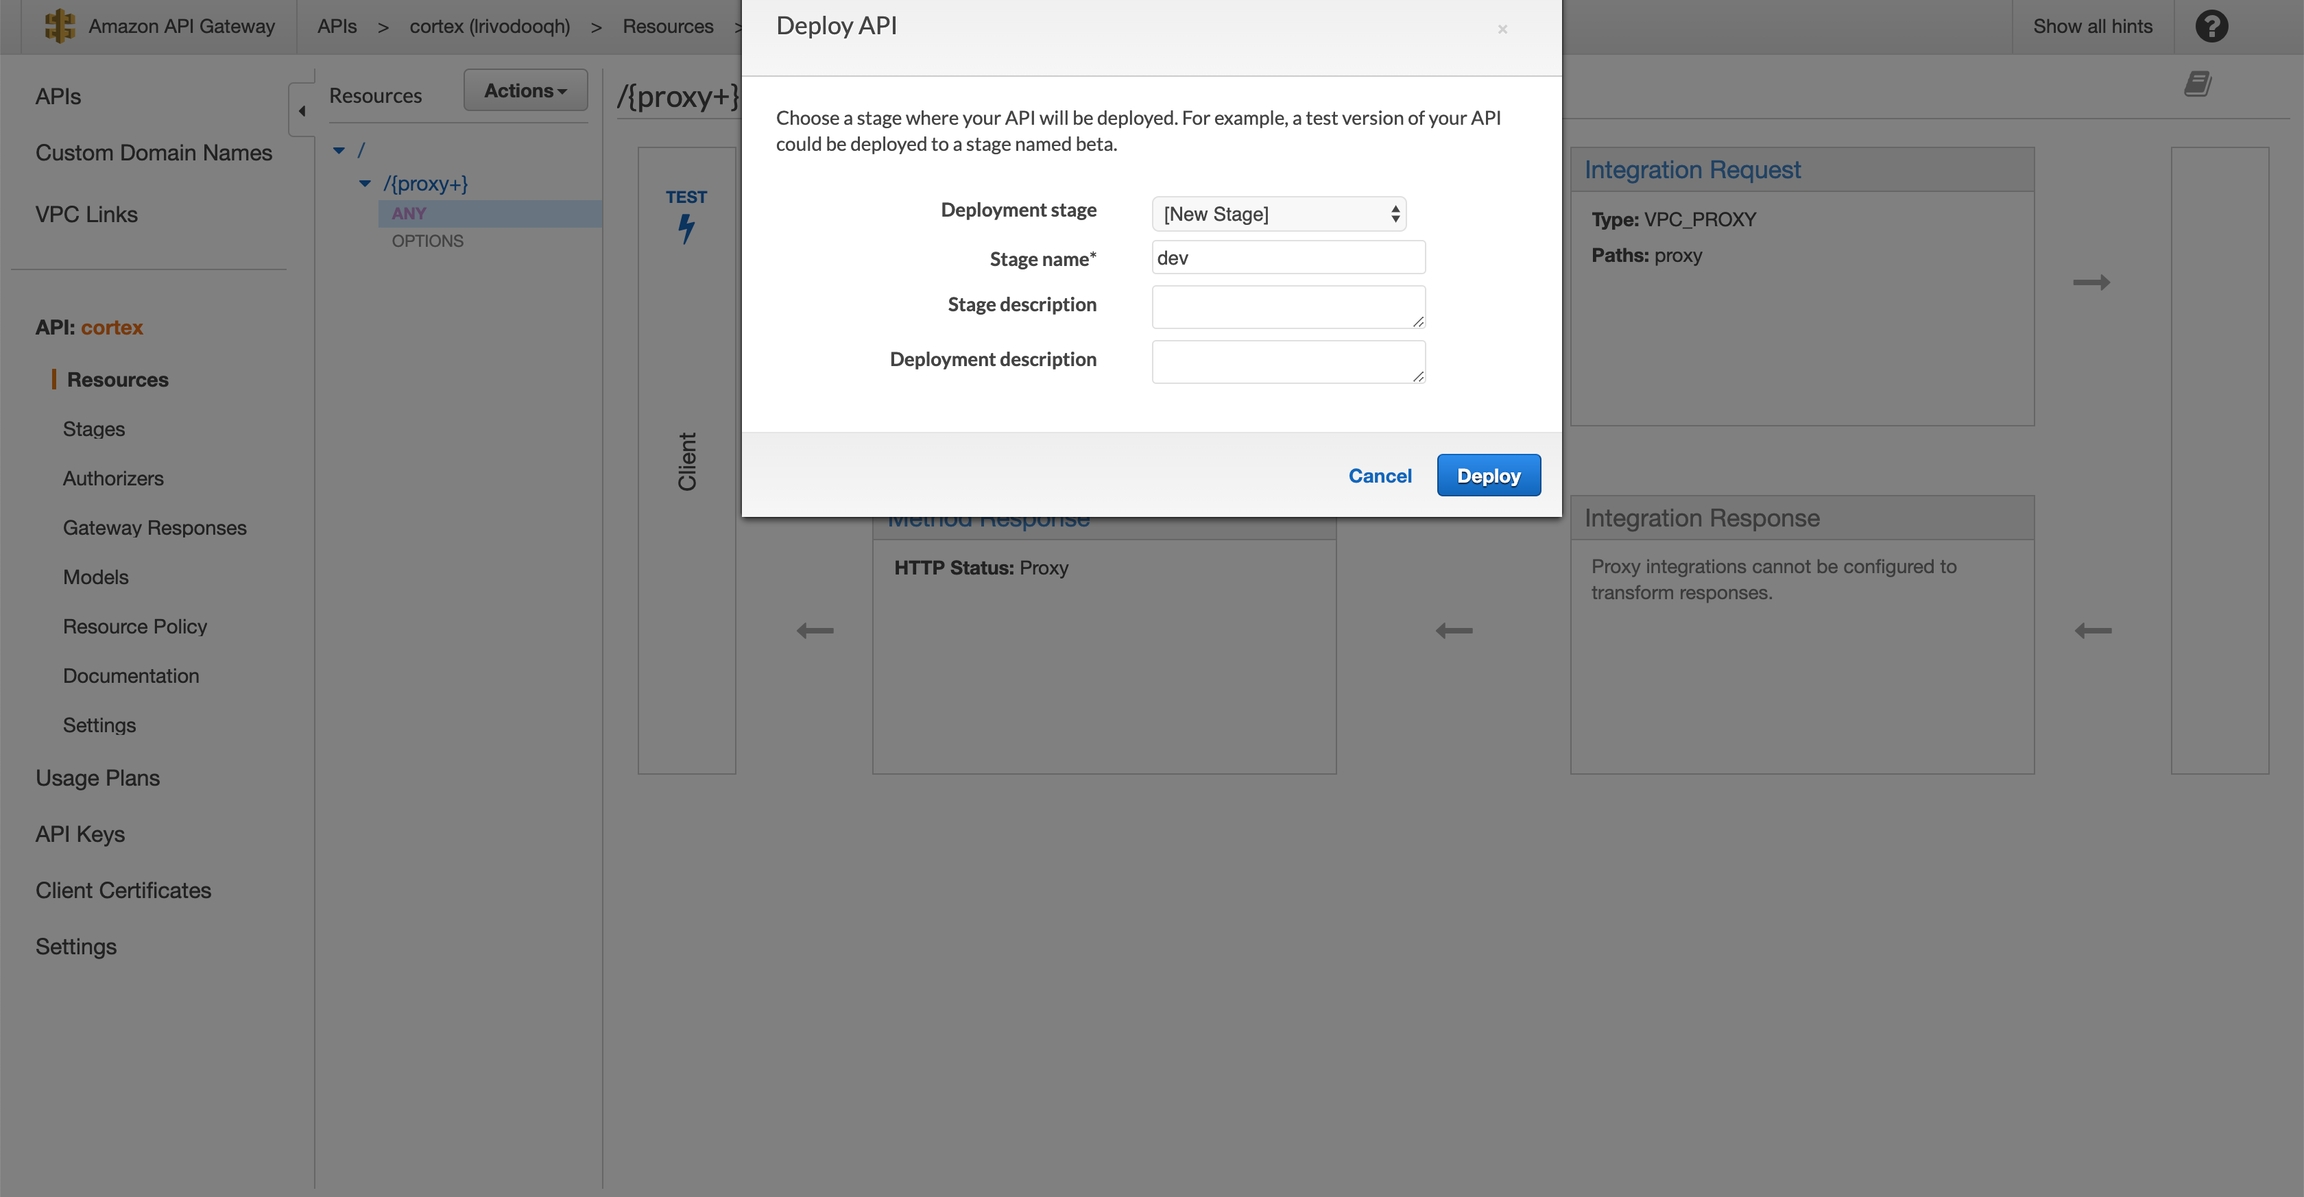
Create a new stage (e.g. "dev") and click "Deploy"
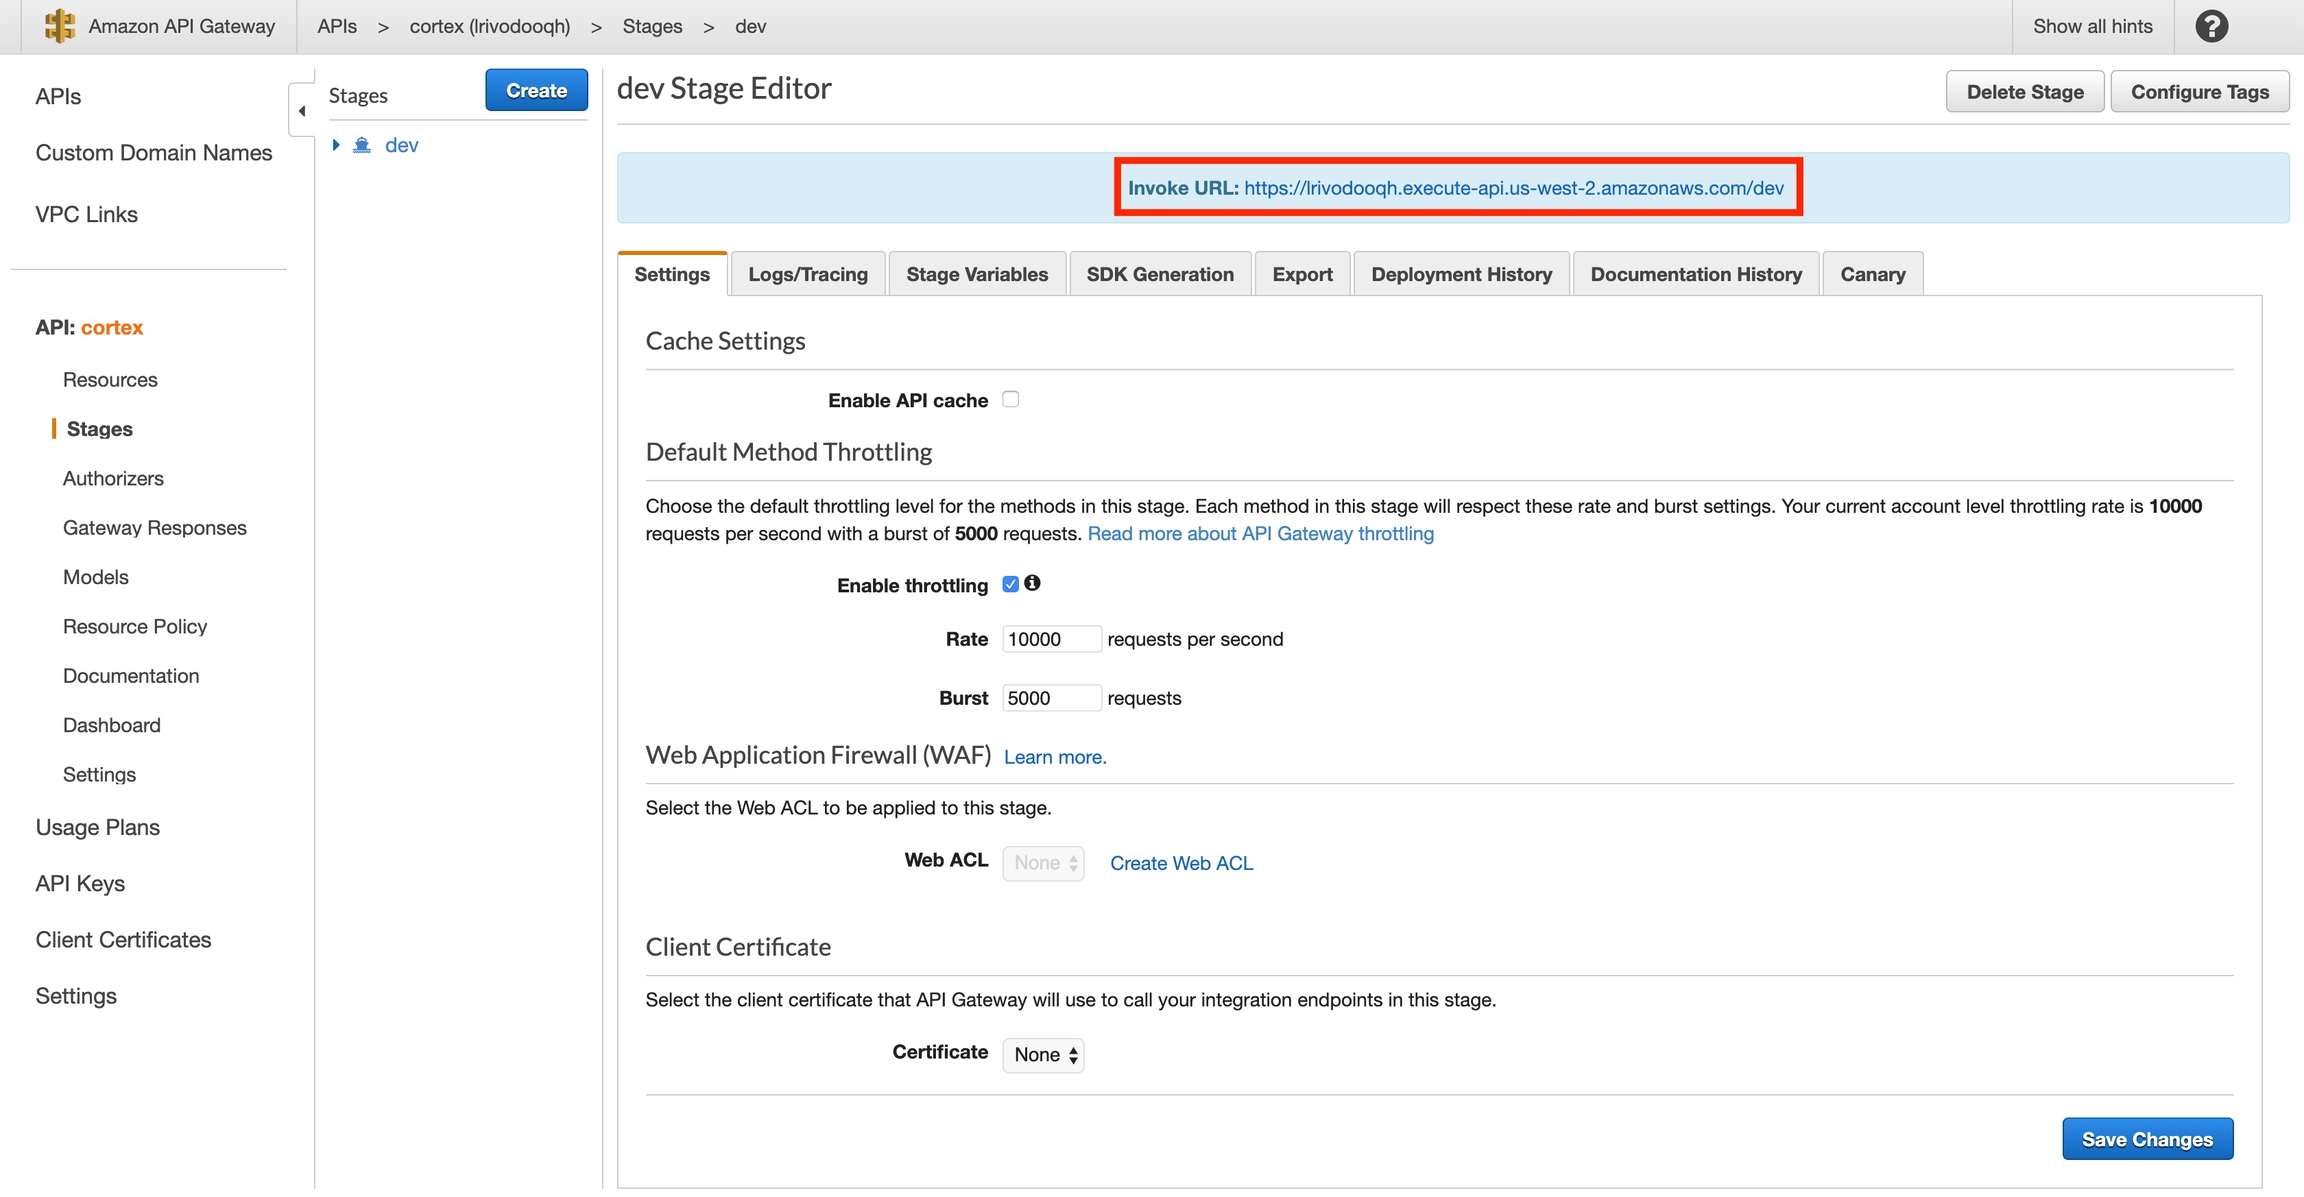
Copy your "Invoke URL"
Use your new endpoint
You may now use the "Invoke URL" in place of your API load balancer endpoint in your client. For example, this curl request:
Would become:
Cleanup
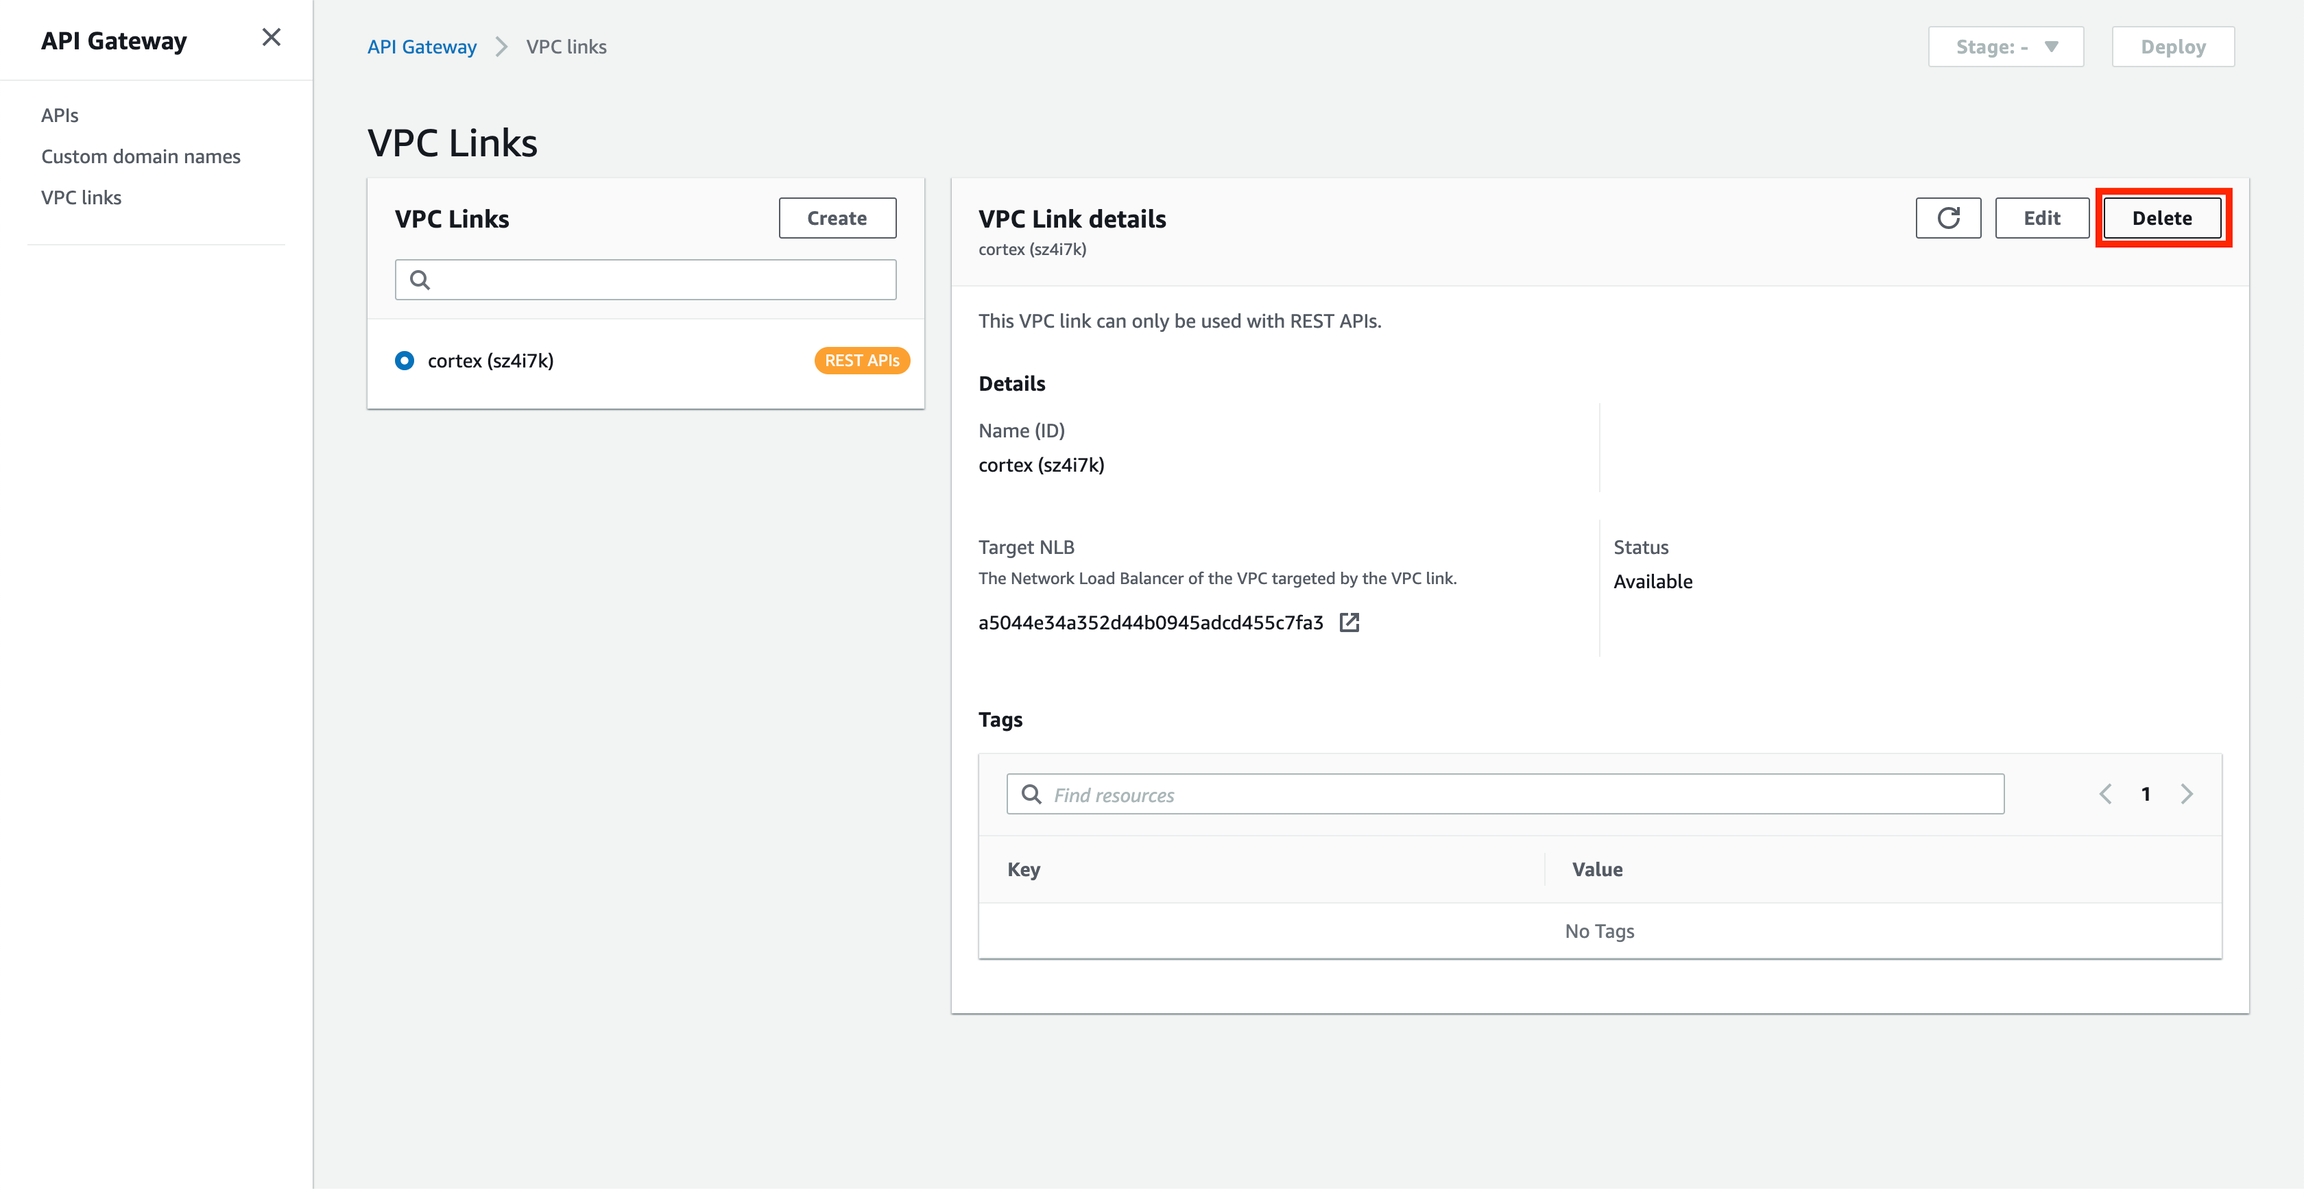
Delete the API Gateway and VPC Link before spinning down your Cortex cluster:
Last updated