Custom domain
Last updated
Last updated
You can use any custom domain for your endpoints. For example, you can make your API accessible via api.example.com/text-generator. This guide will demonstrate how to create a dedicated subdomain in AWS Route 53 and, if desired, configure your API load balancer to use an SSL certificate provisioned by AWS Certificate Manager.
Decide on a subdomain that you want to dedicate to Cortex APIs. For example if your domain is example.com, a valid subdomain can be api.example.com. This guide will use cortexlabs.dev as the example domain and api.cortexlabs.dev as the subdomain.
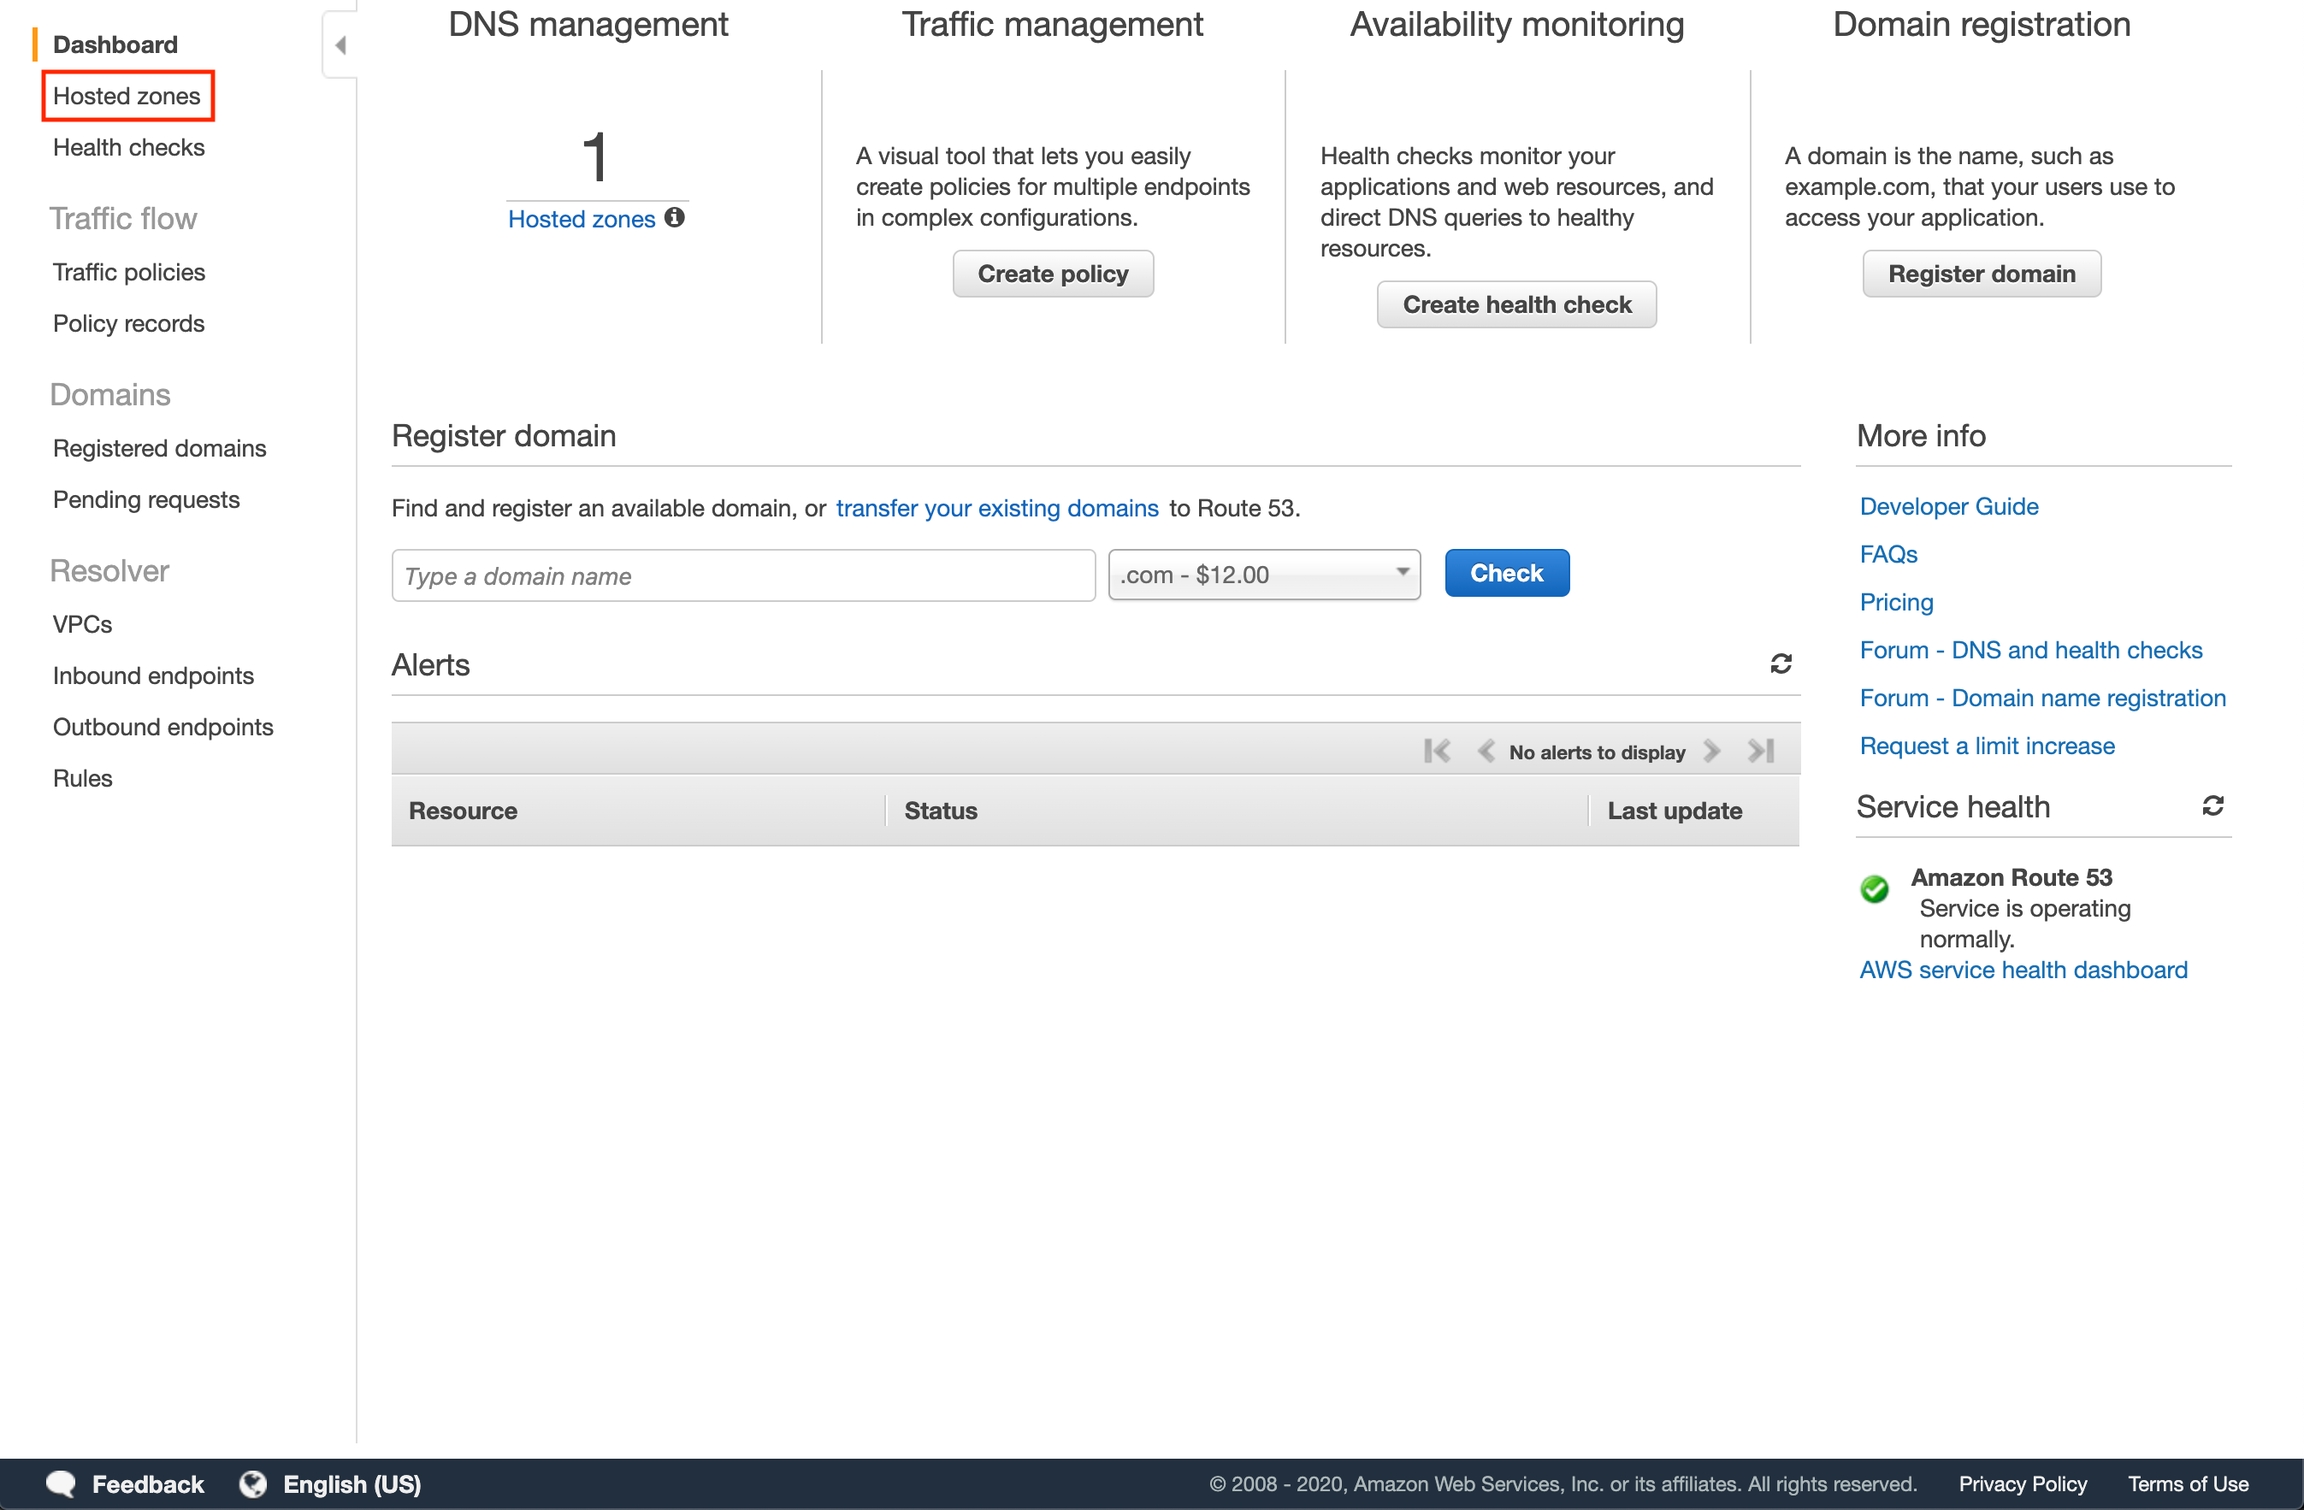
We will set up a hosted zone on Route 53 to manage the DNS records for the subdomain. Go to the Route 53 console and click "Hosted Zones".
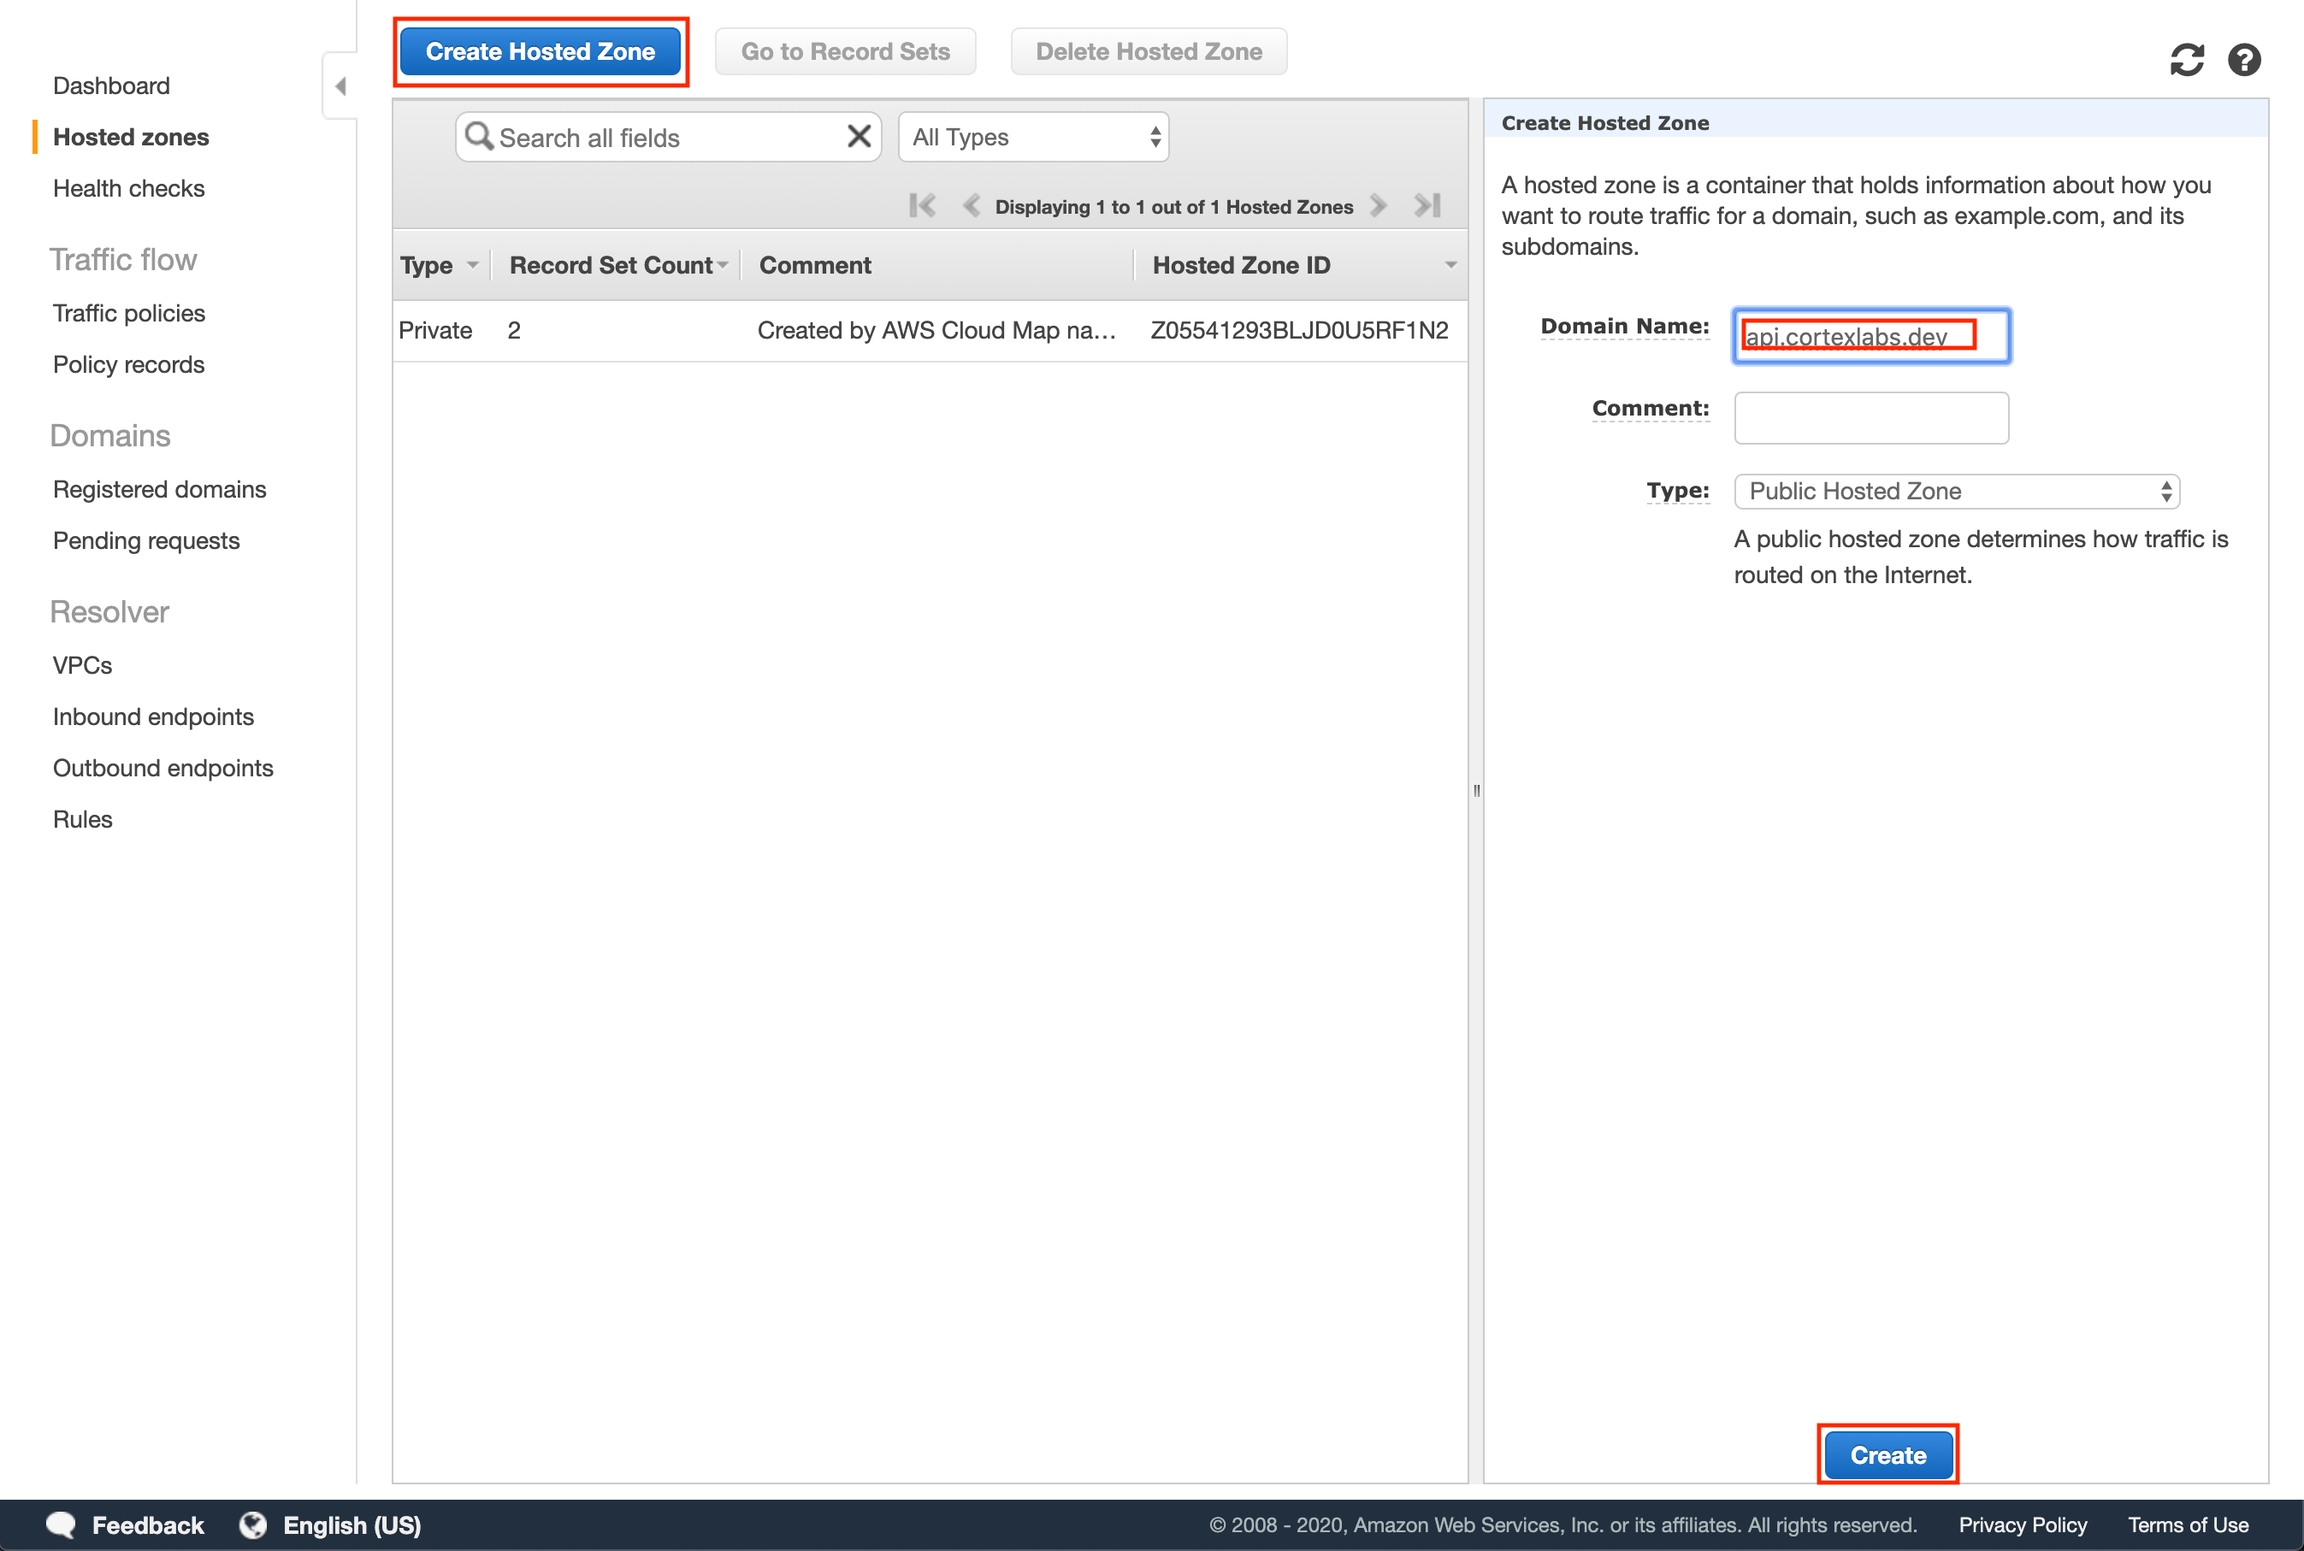
Click "Create Hosted Zone" and then enter your subdomain as the domain name for your hosted zone and click "Create".
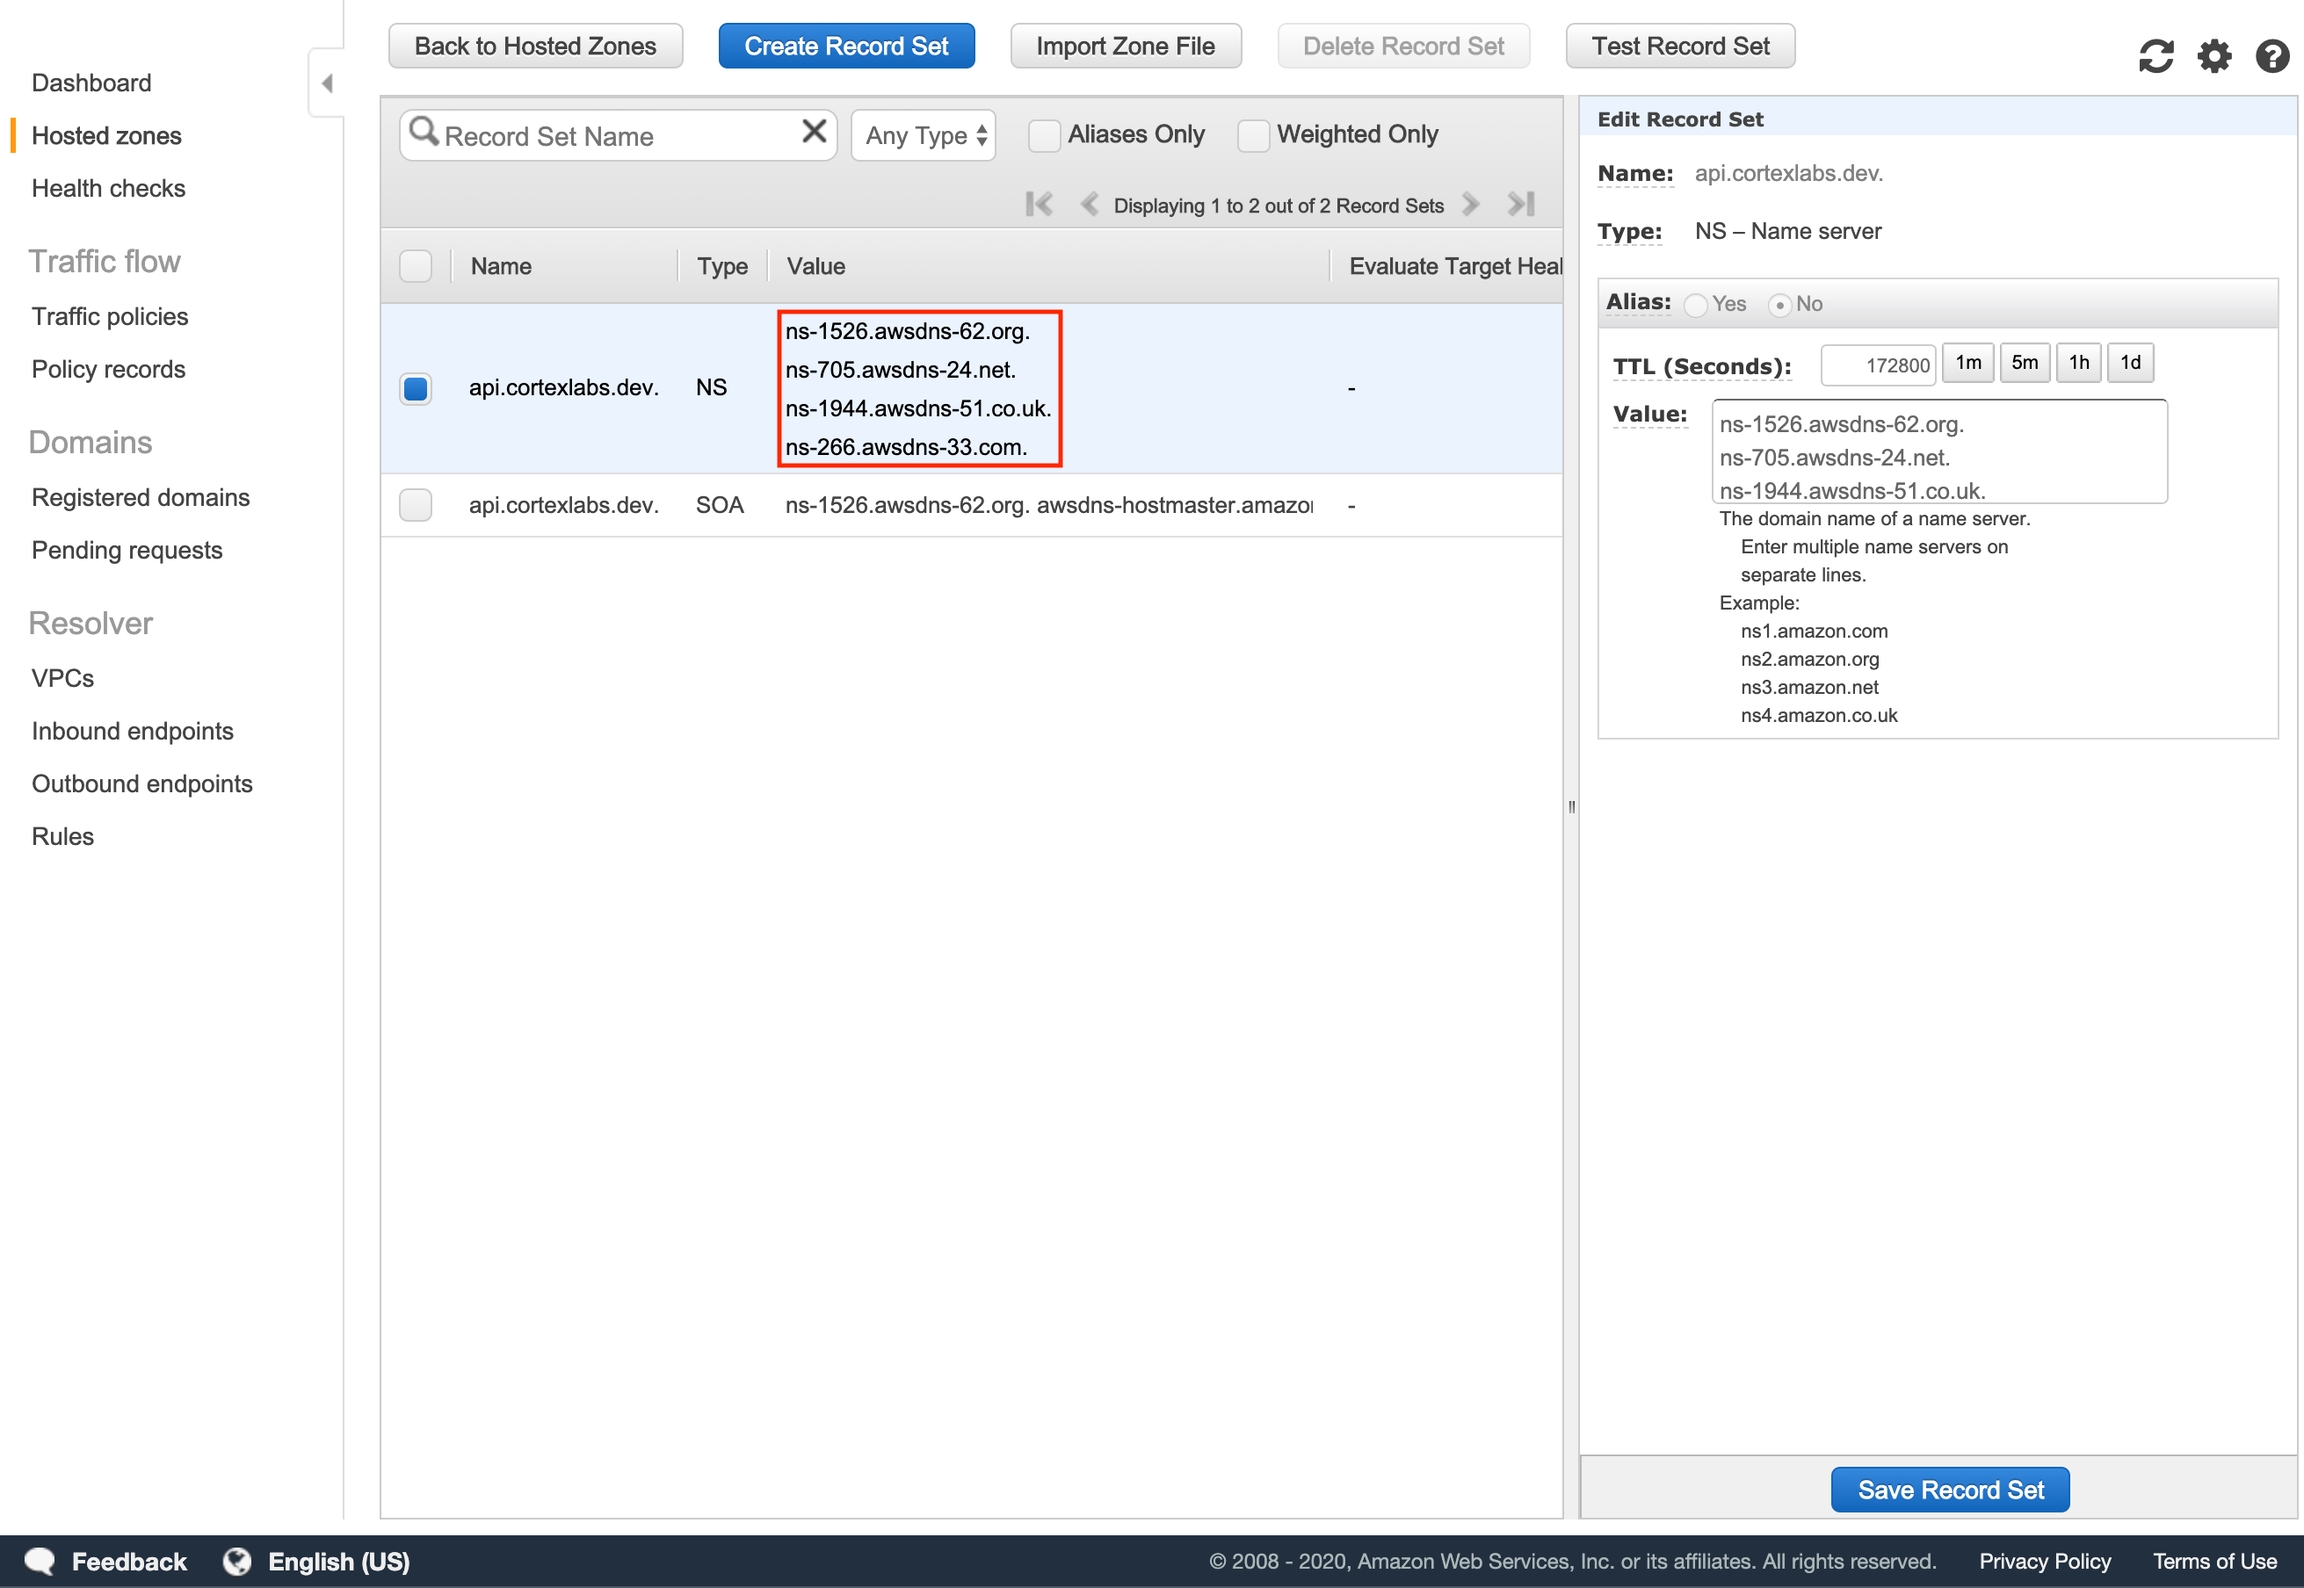
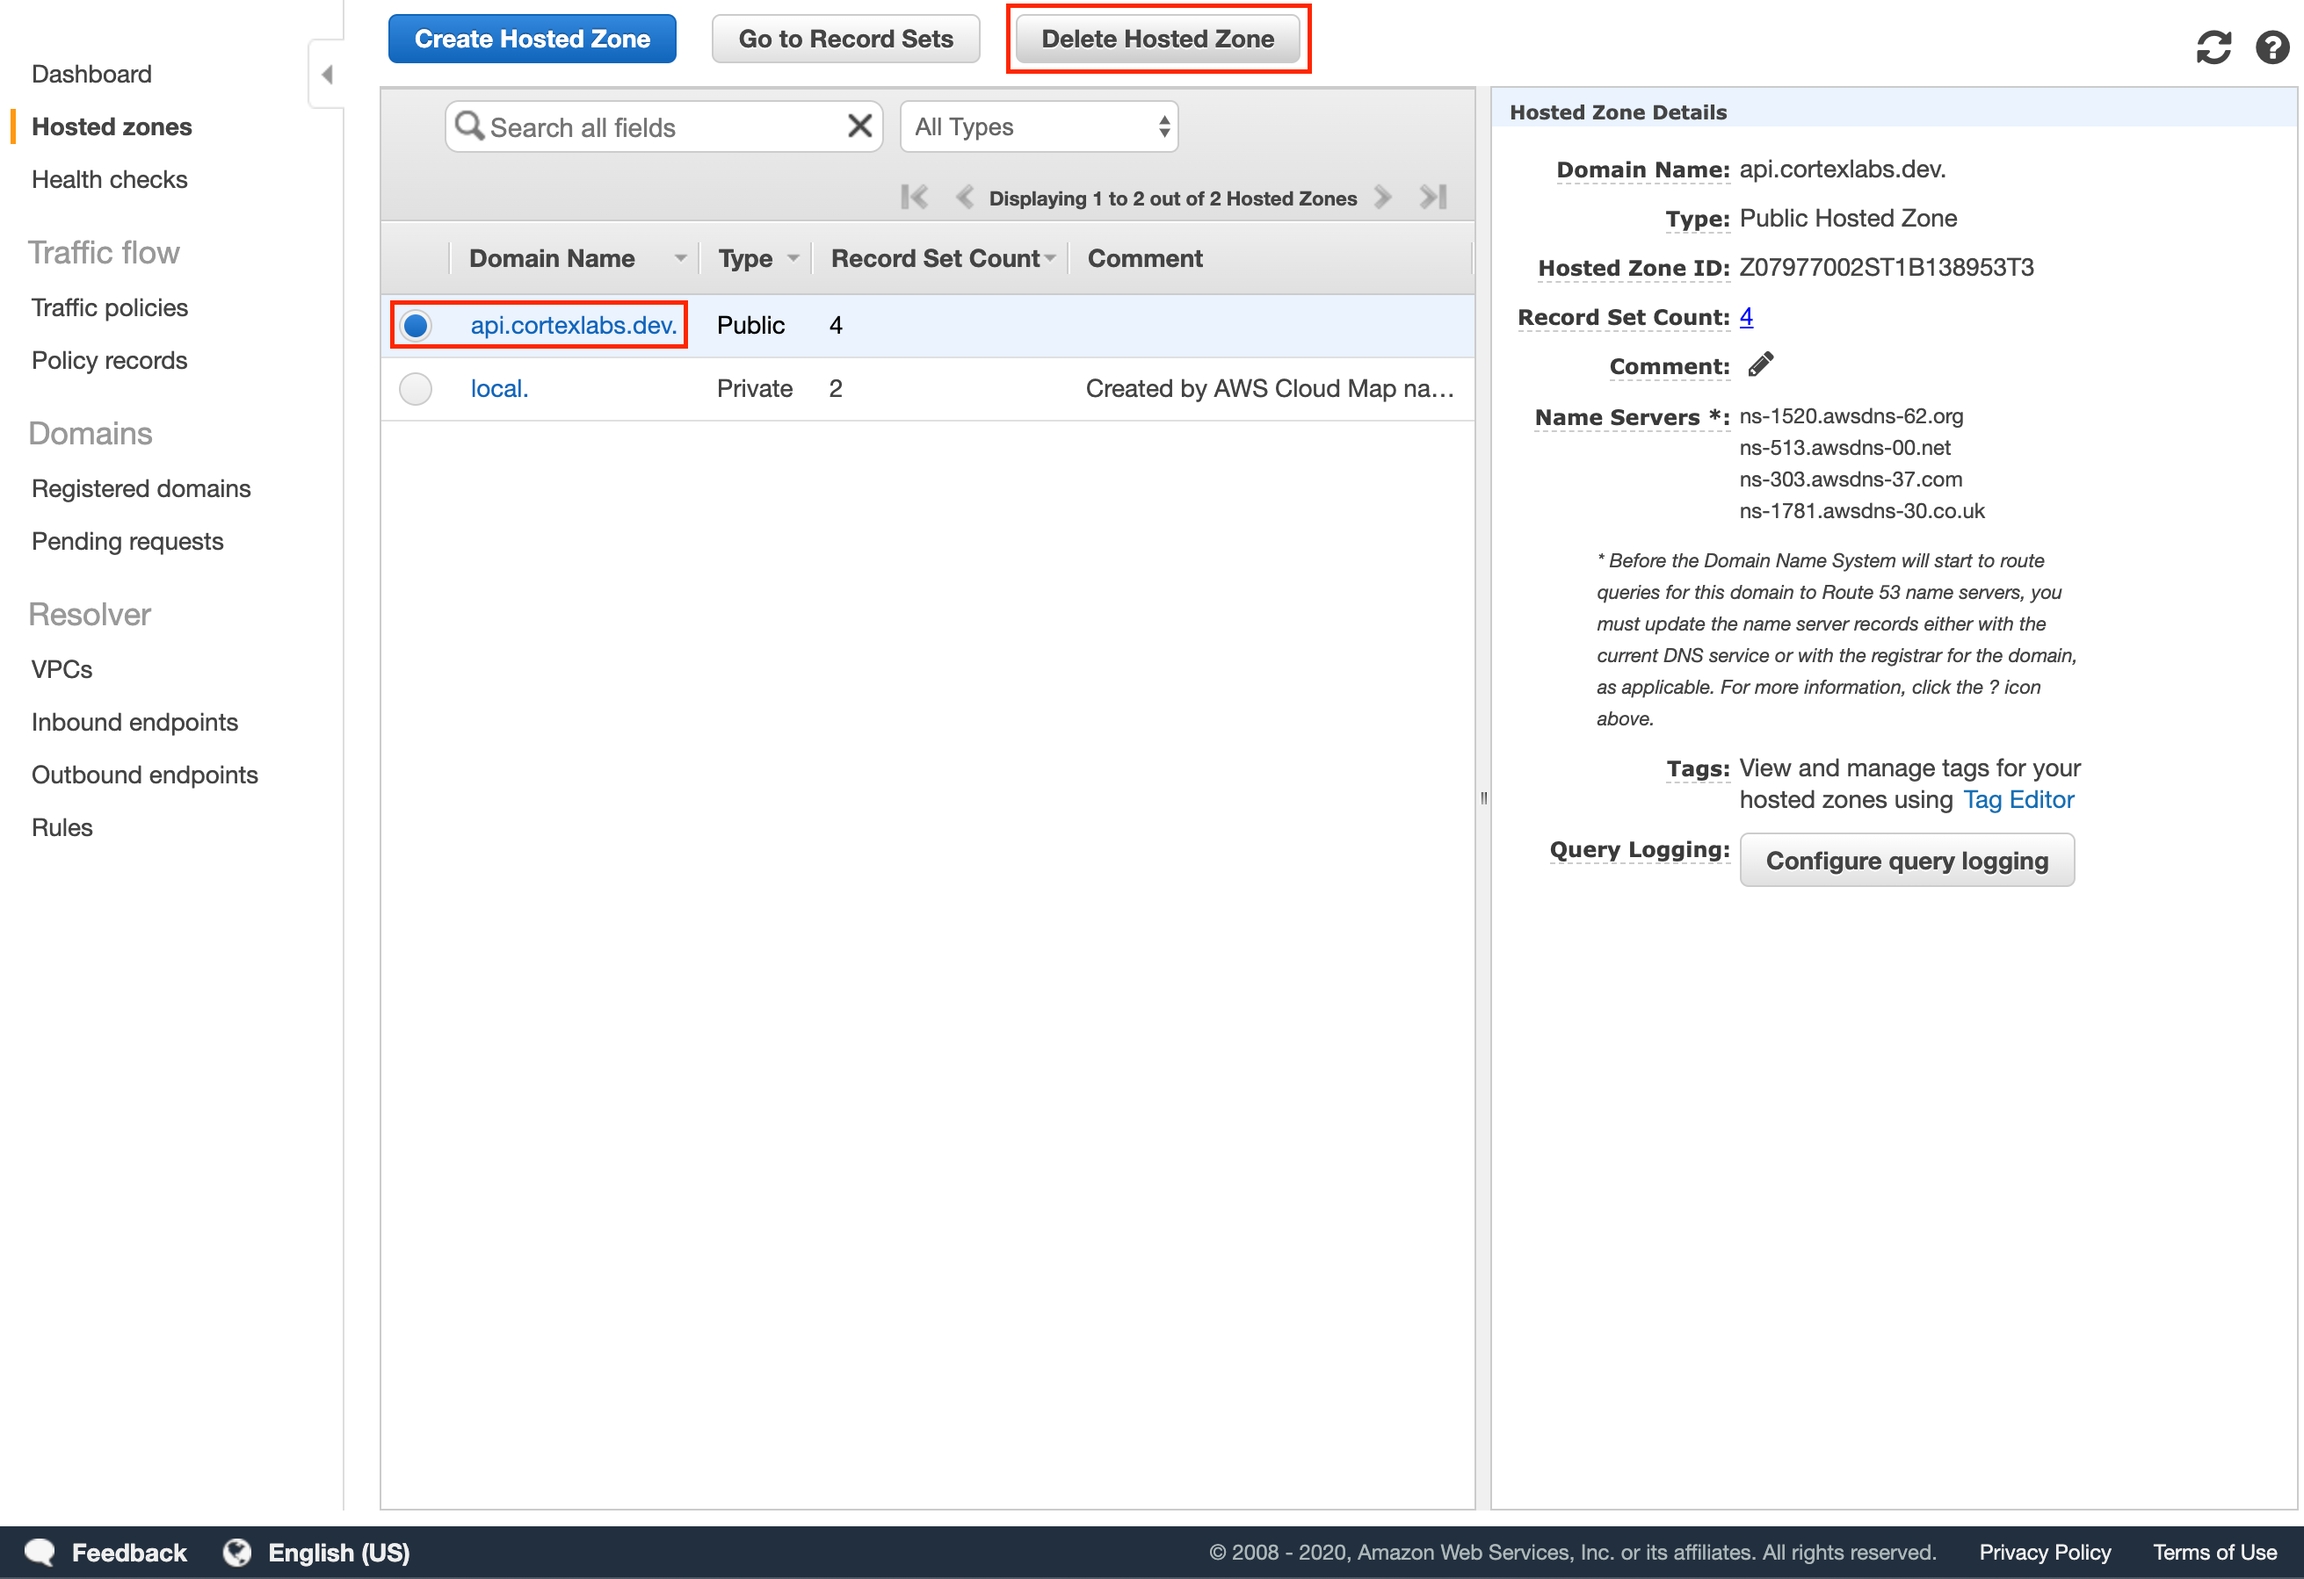
Take note of the values in the NS record.
Navigate to your root DNS service provider (e.g. Google Domains, AWS Route 53, Go Daddy). Your root DNS service provider is typically the registrar where you purchased your domain (unless you have transferred DNS management elsewhere). The procedure for adding DNS records may vary based on your service provider.
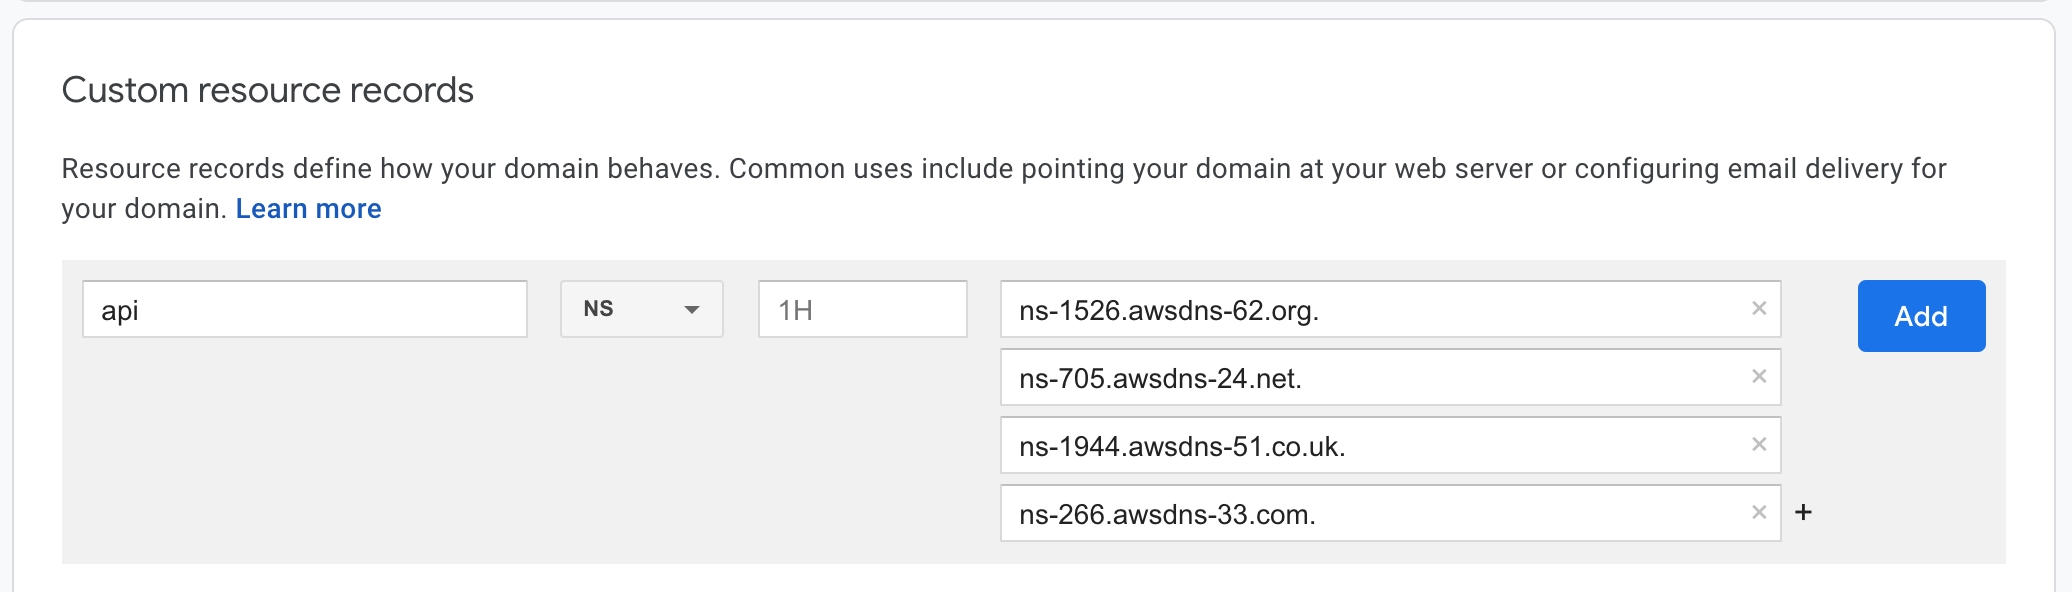
We are going to add an NS (name server) record that specifies that any traffic to your subdomain should use the name servers of your hosted zone in Route 53 for DNS resolution.
cortexlabs.dev is managed by Google Domains. The image below is a screenshot for adding a DNS record in Google Domains (your UI may differ based on your DNS service provider).
You can skip this section (and continue to add the DNS record) if you don't need an SSL certificate for your custom domain. If you don't use an SSL certificate, you will need to skip certificate verification when making HTTPS requests to your APIs (e.g. curl -k https://***), or make HTTP requests instead (e.g. curl http://***).
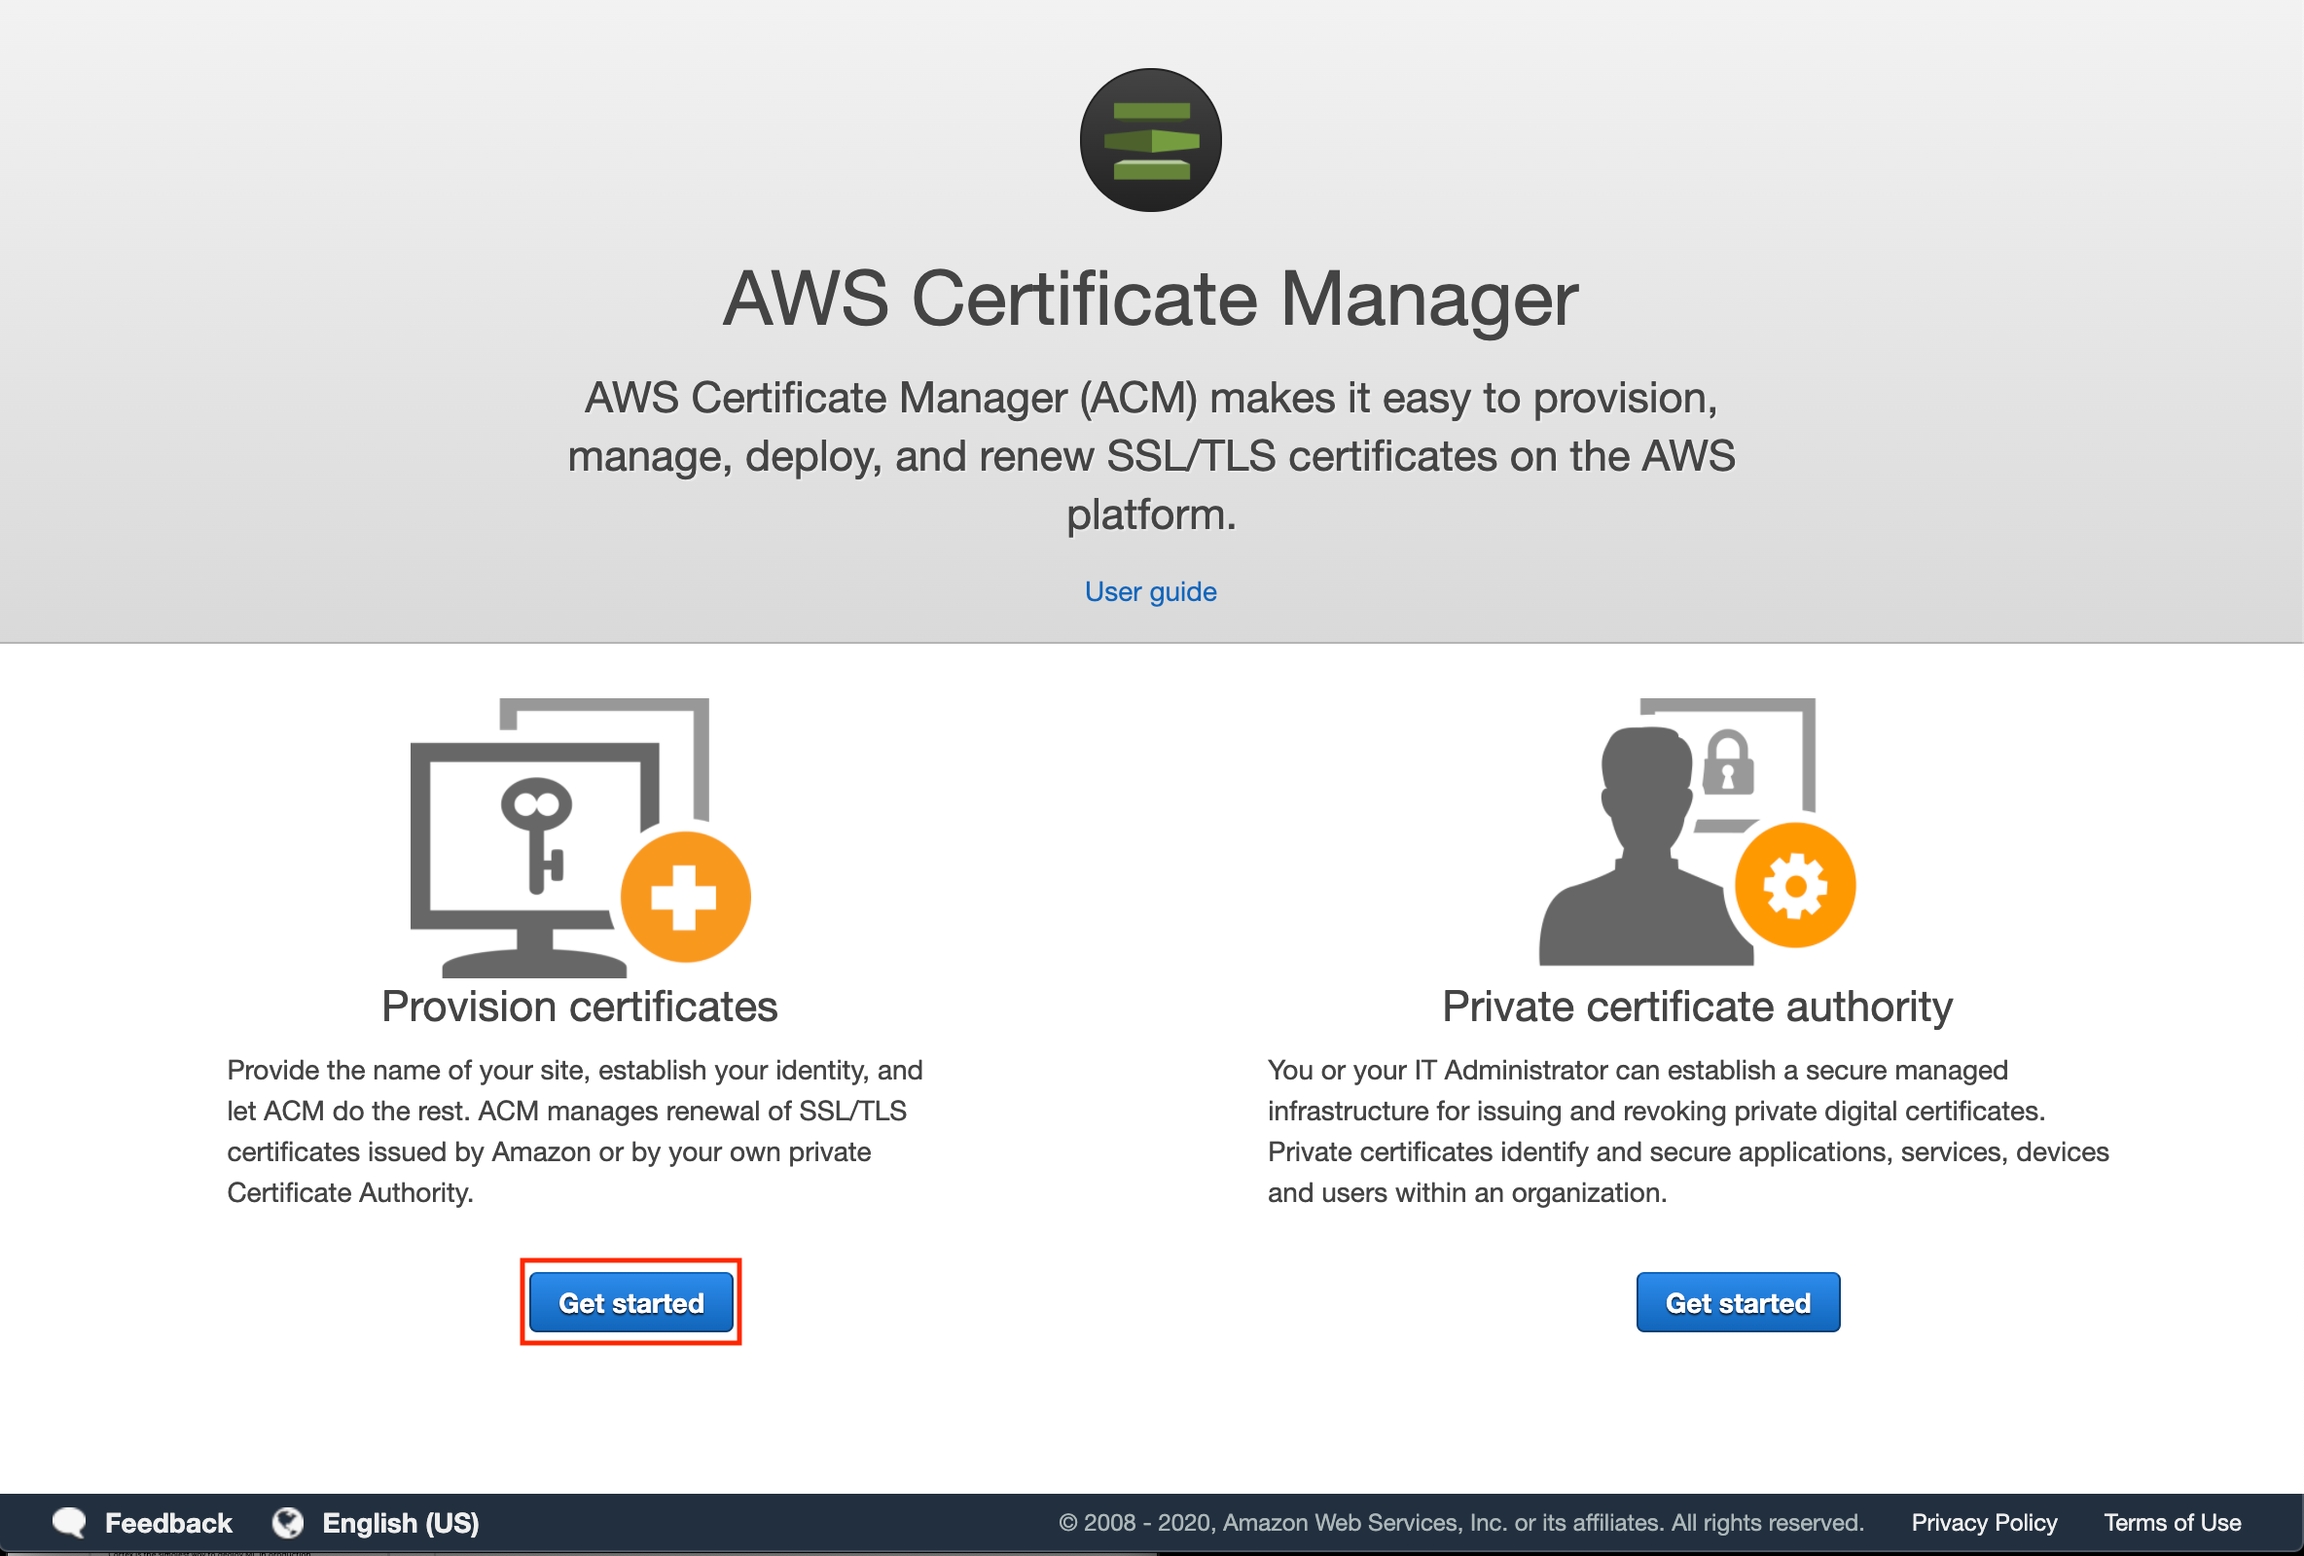
To create an SSL certificate, go to the ACM console and click "Get Started" under the "Provision certificates" section.
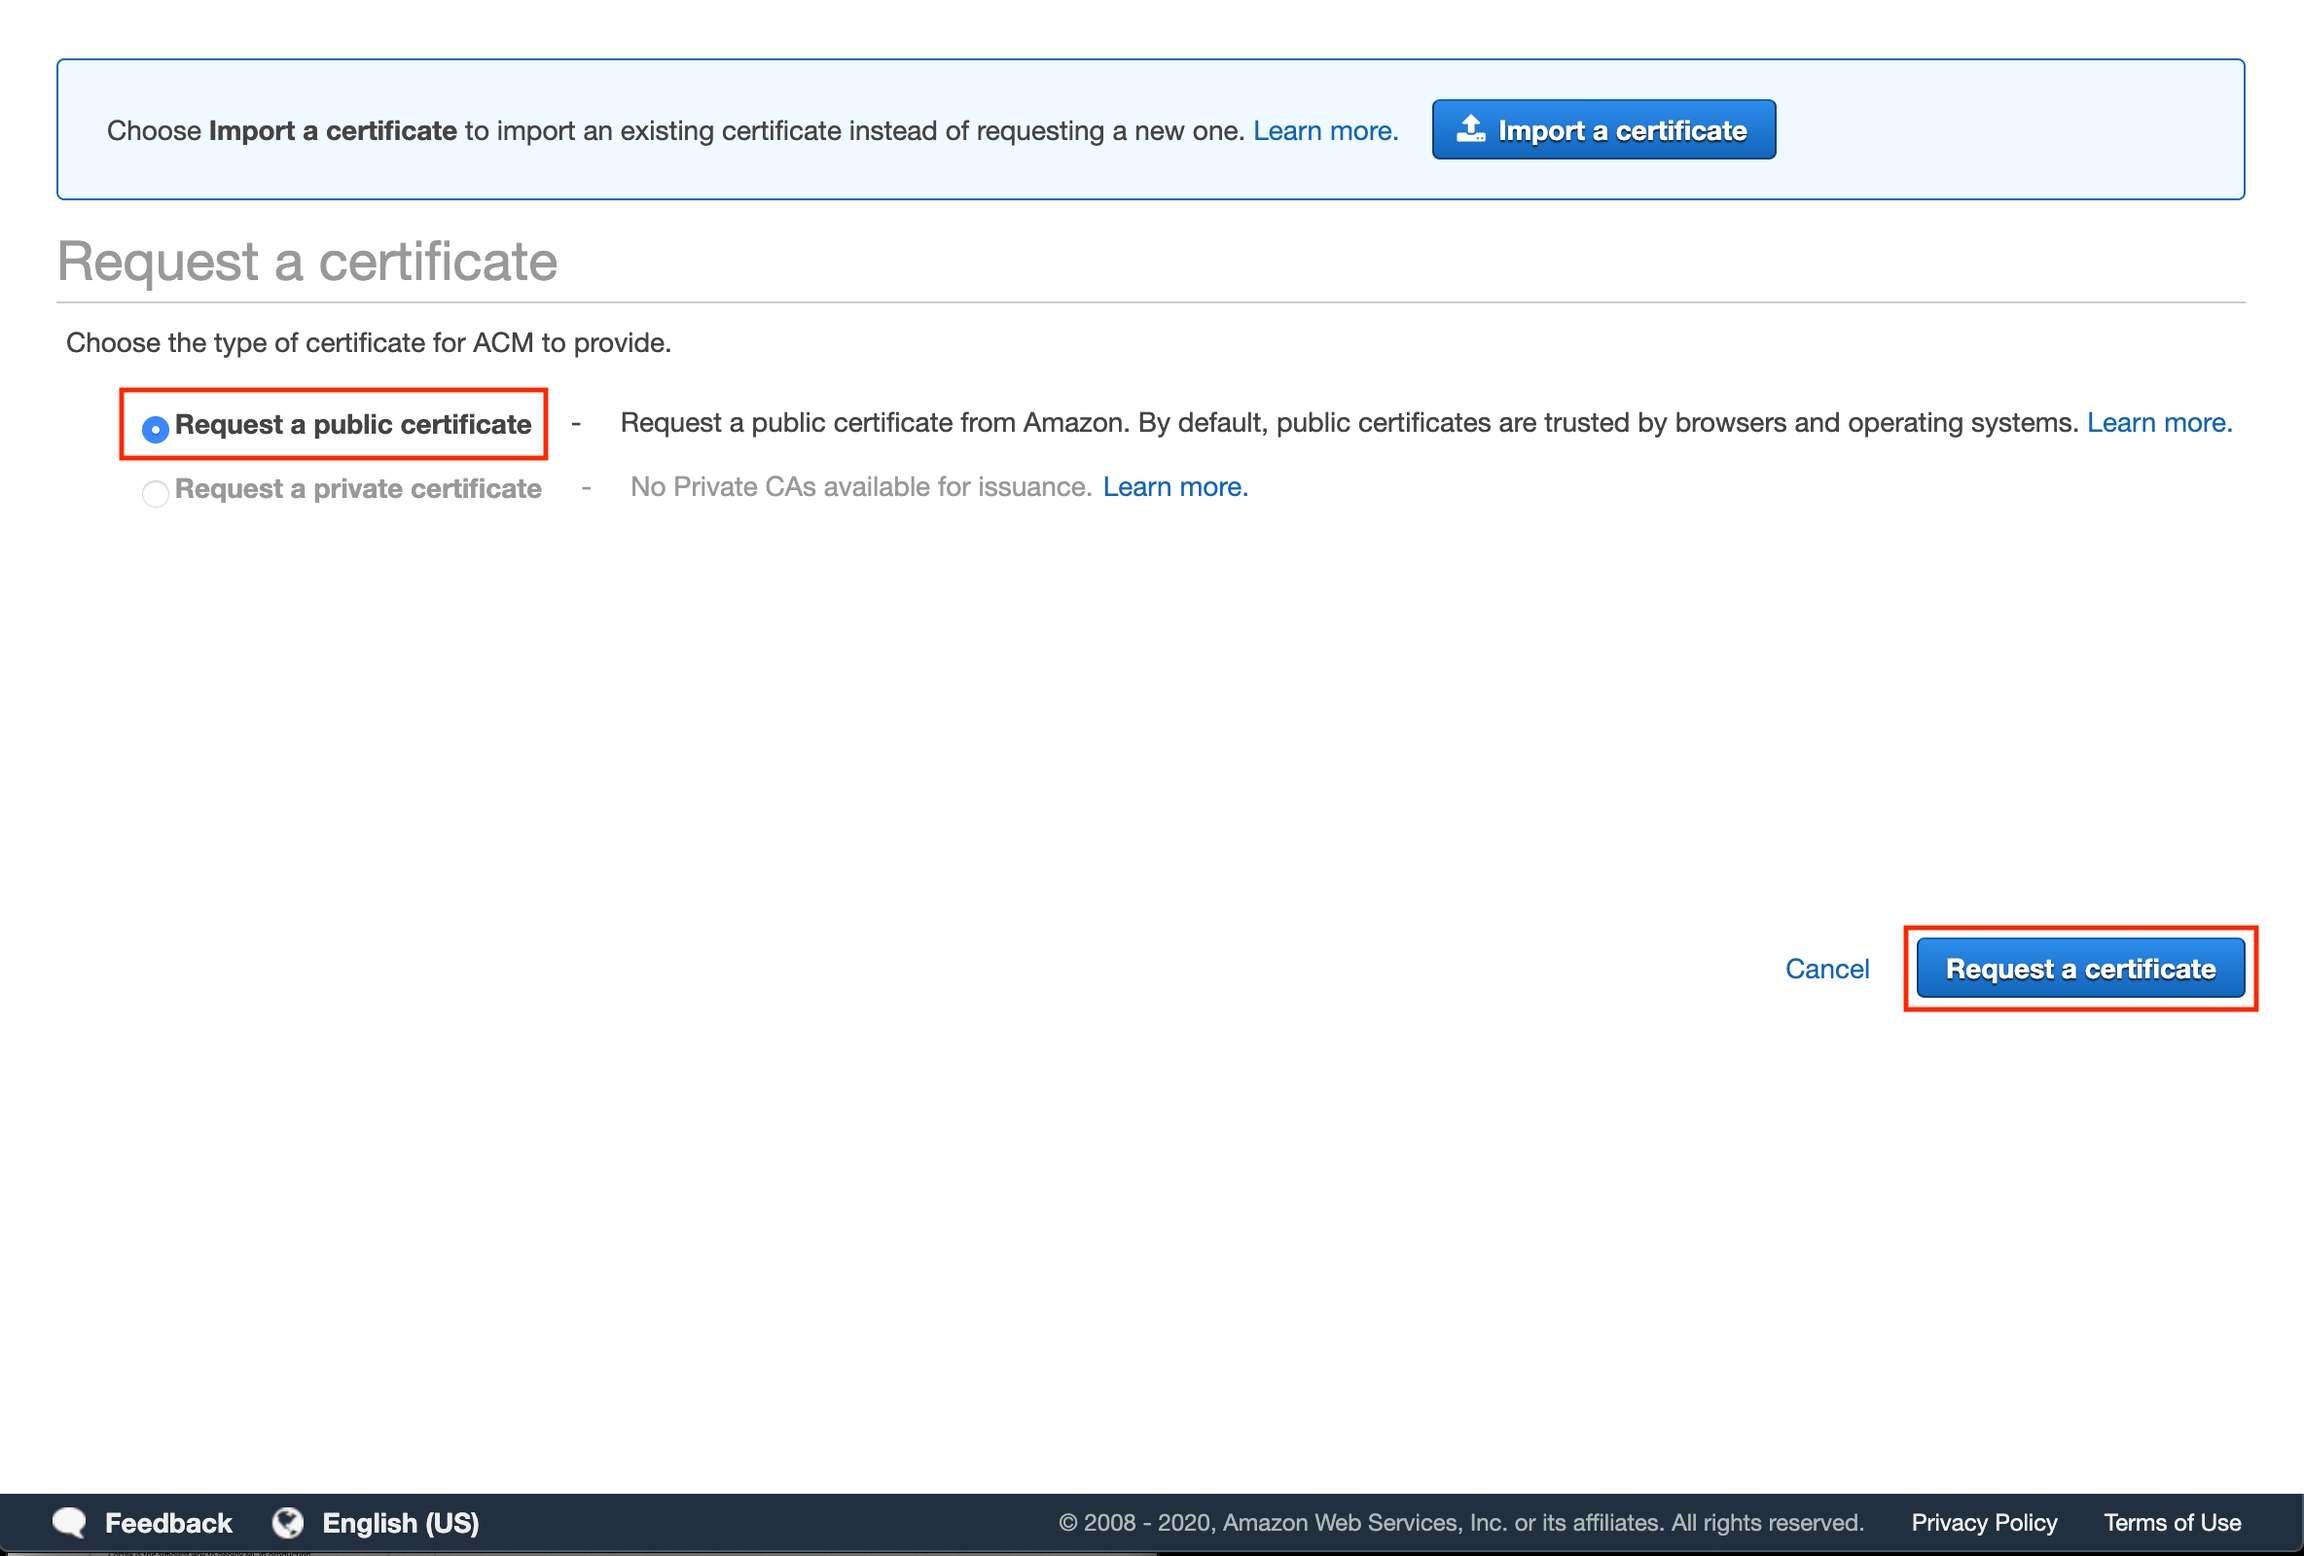
Select "Request a public certificate" and then "Request a certificate".
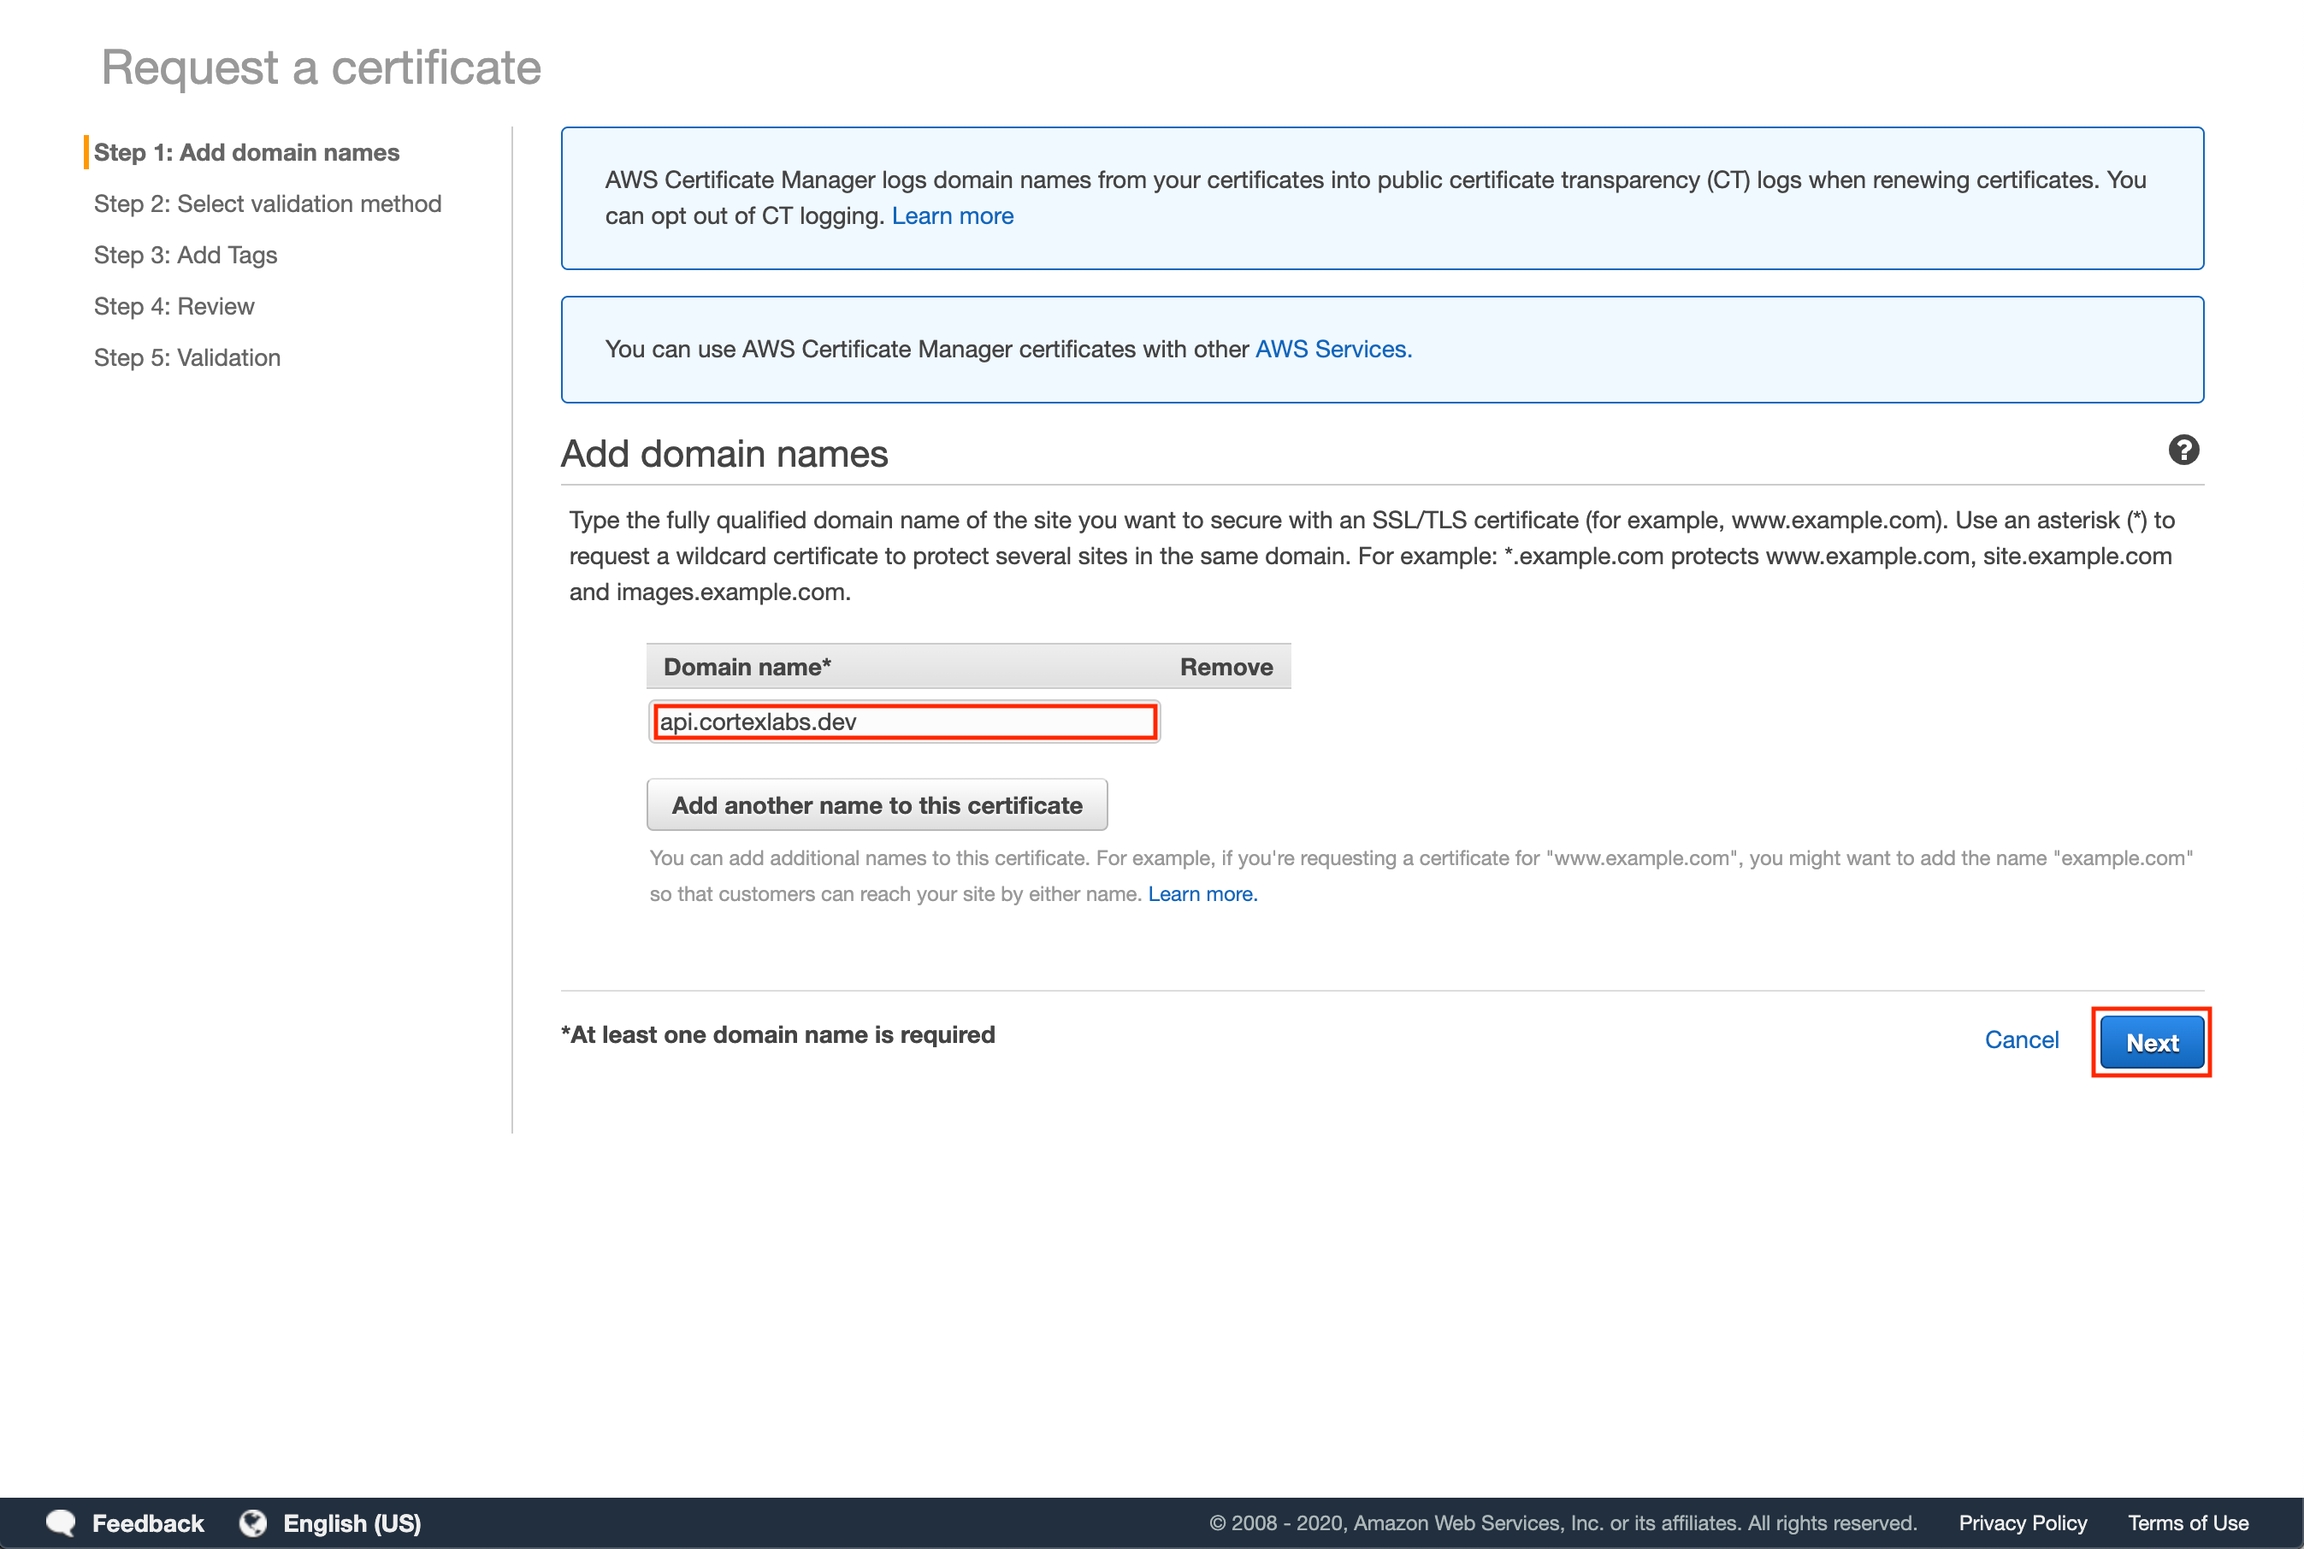
Enter your subdomain and then click "Next".
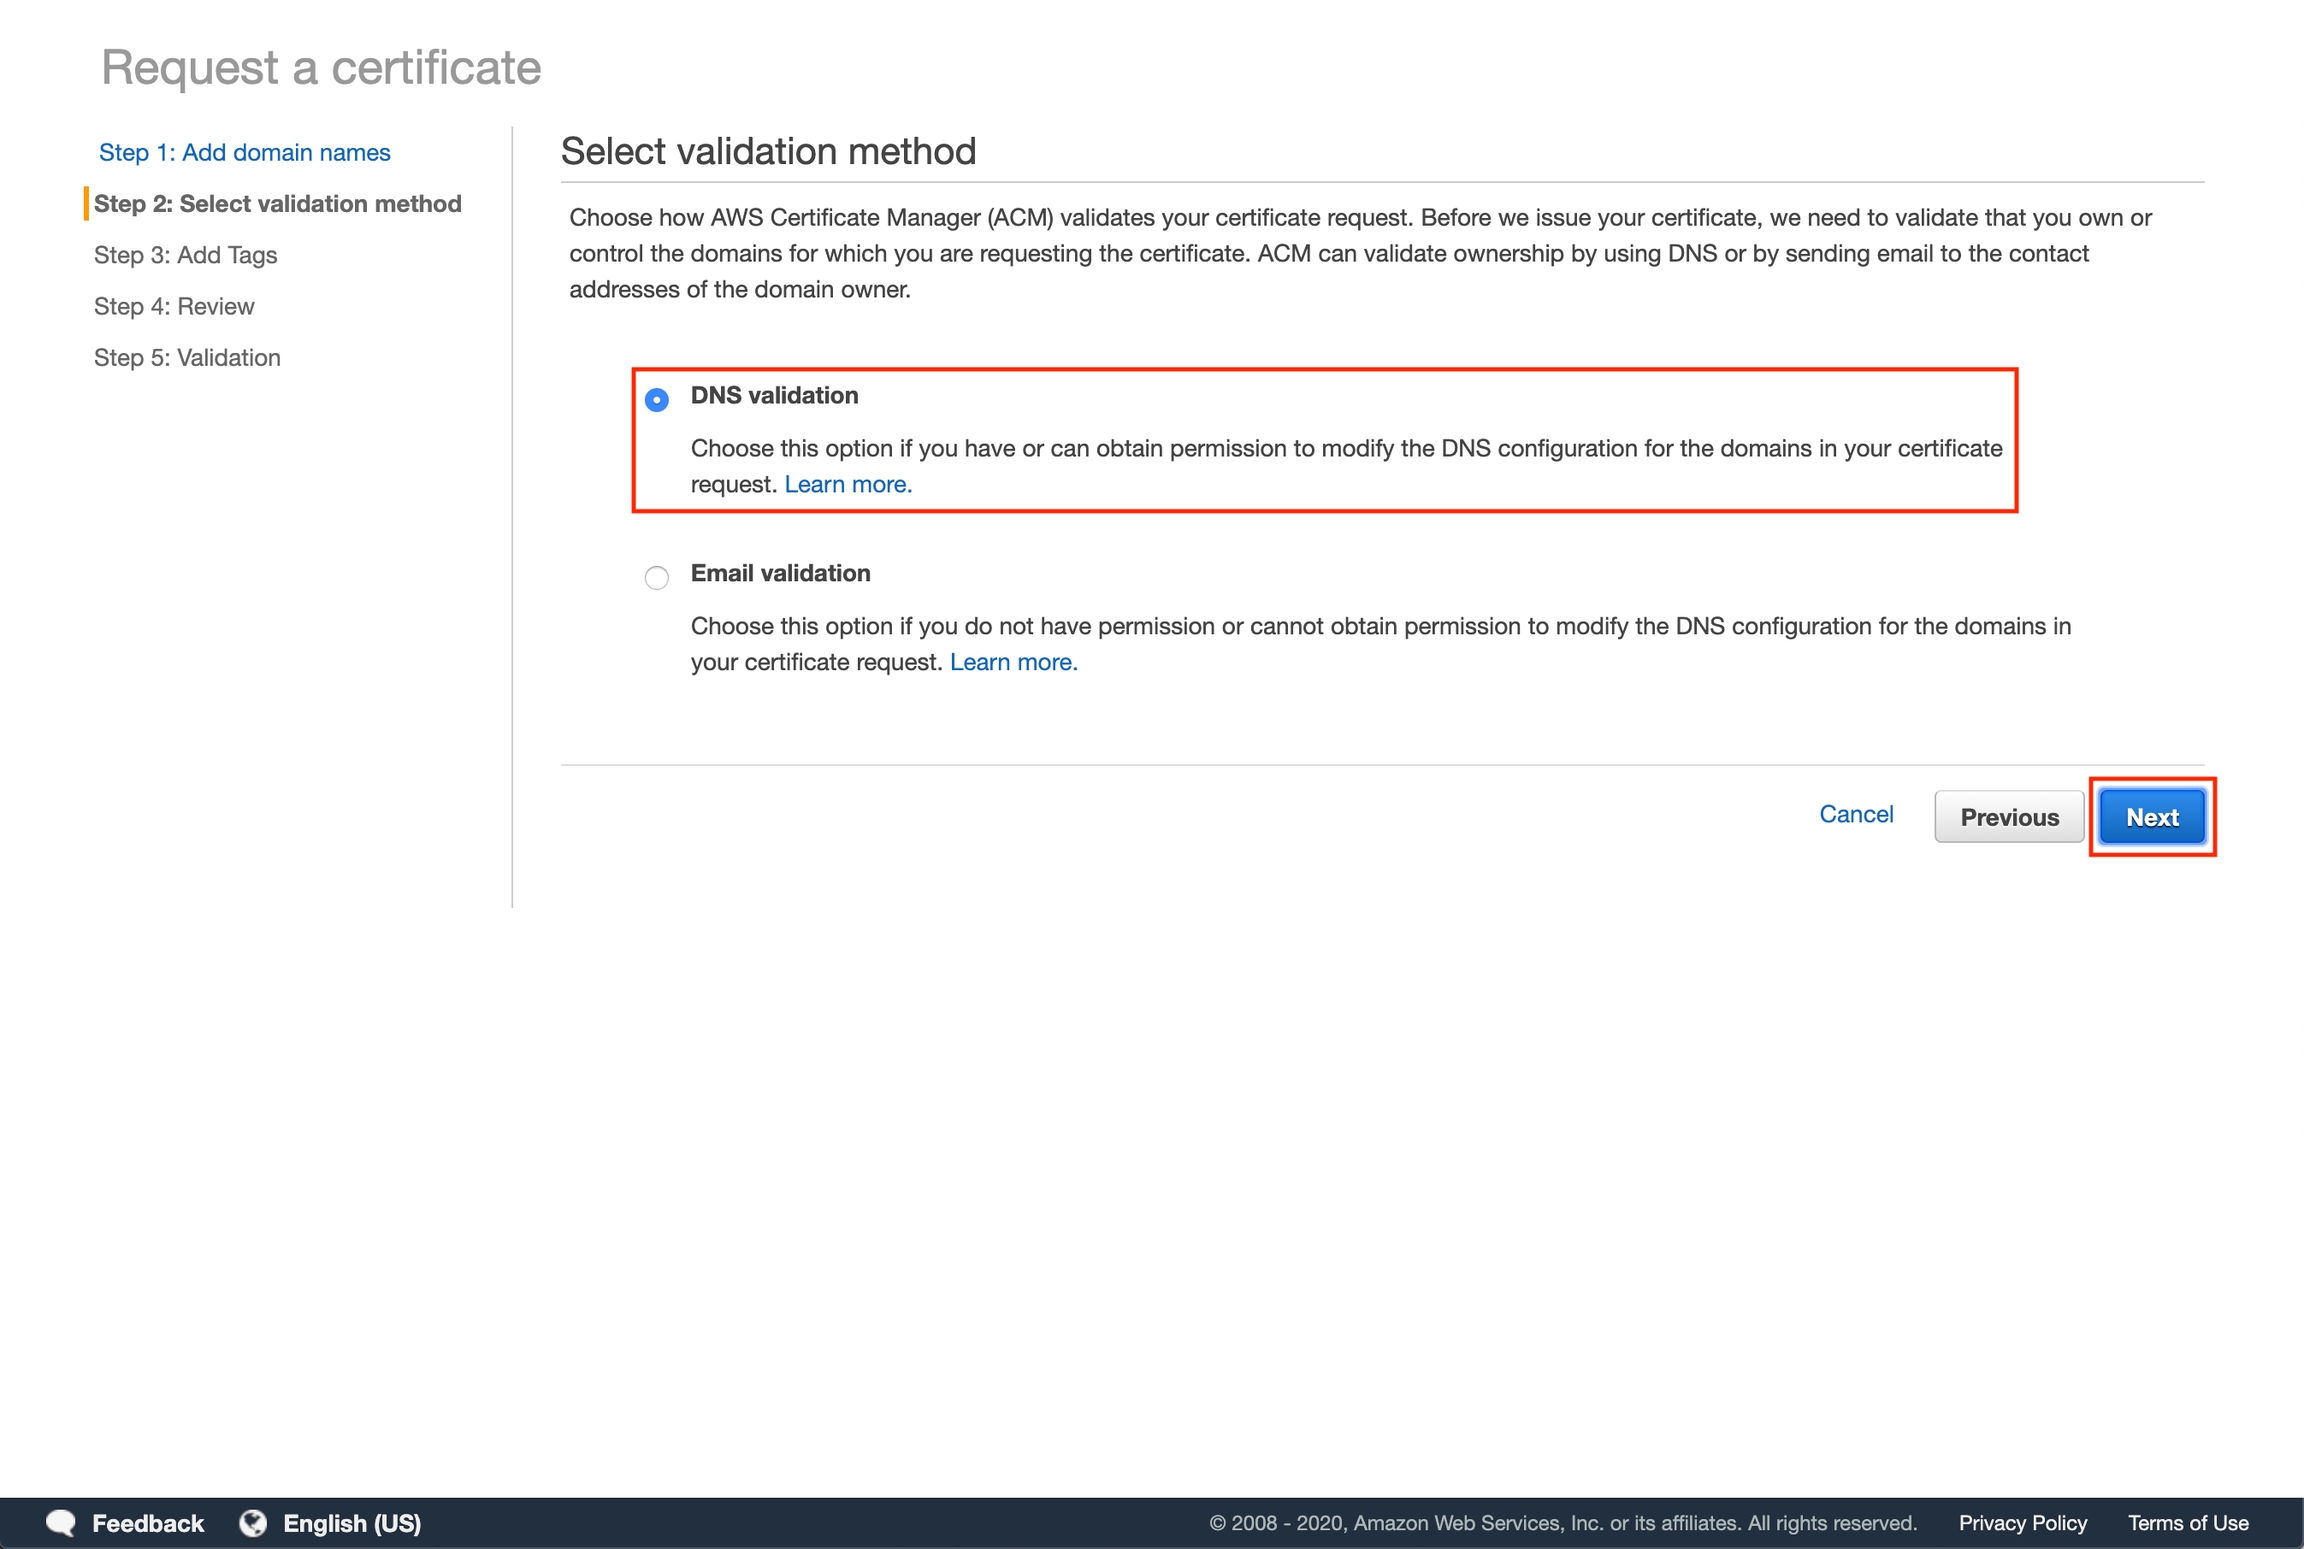
Select "DNS validation" and then click "Next".
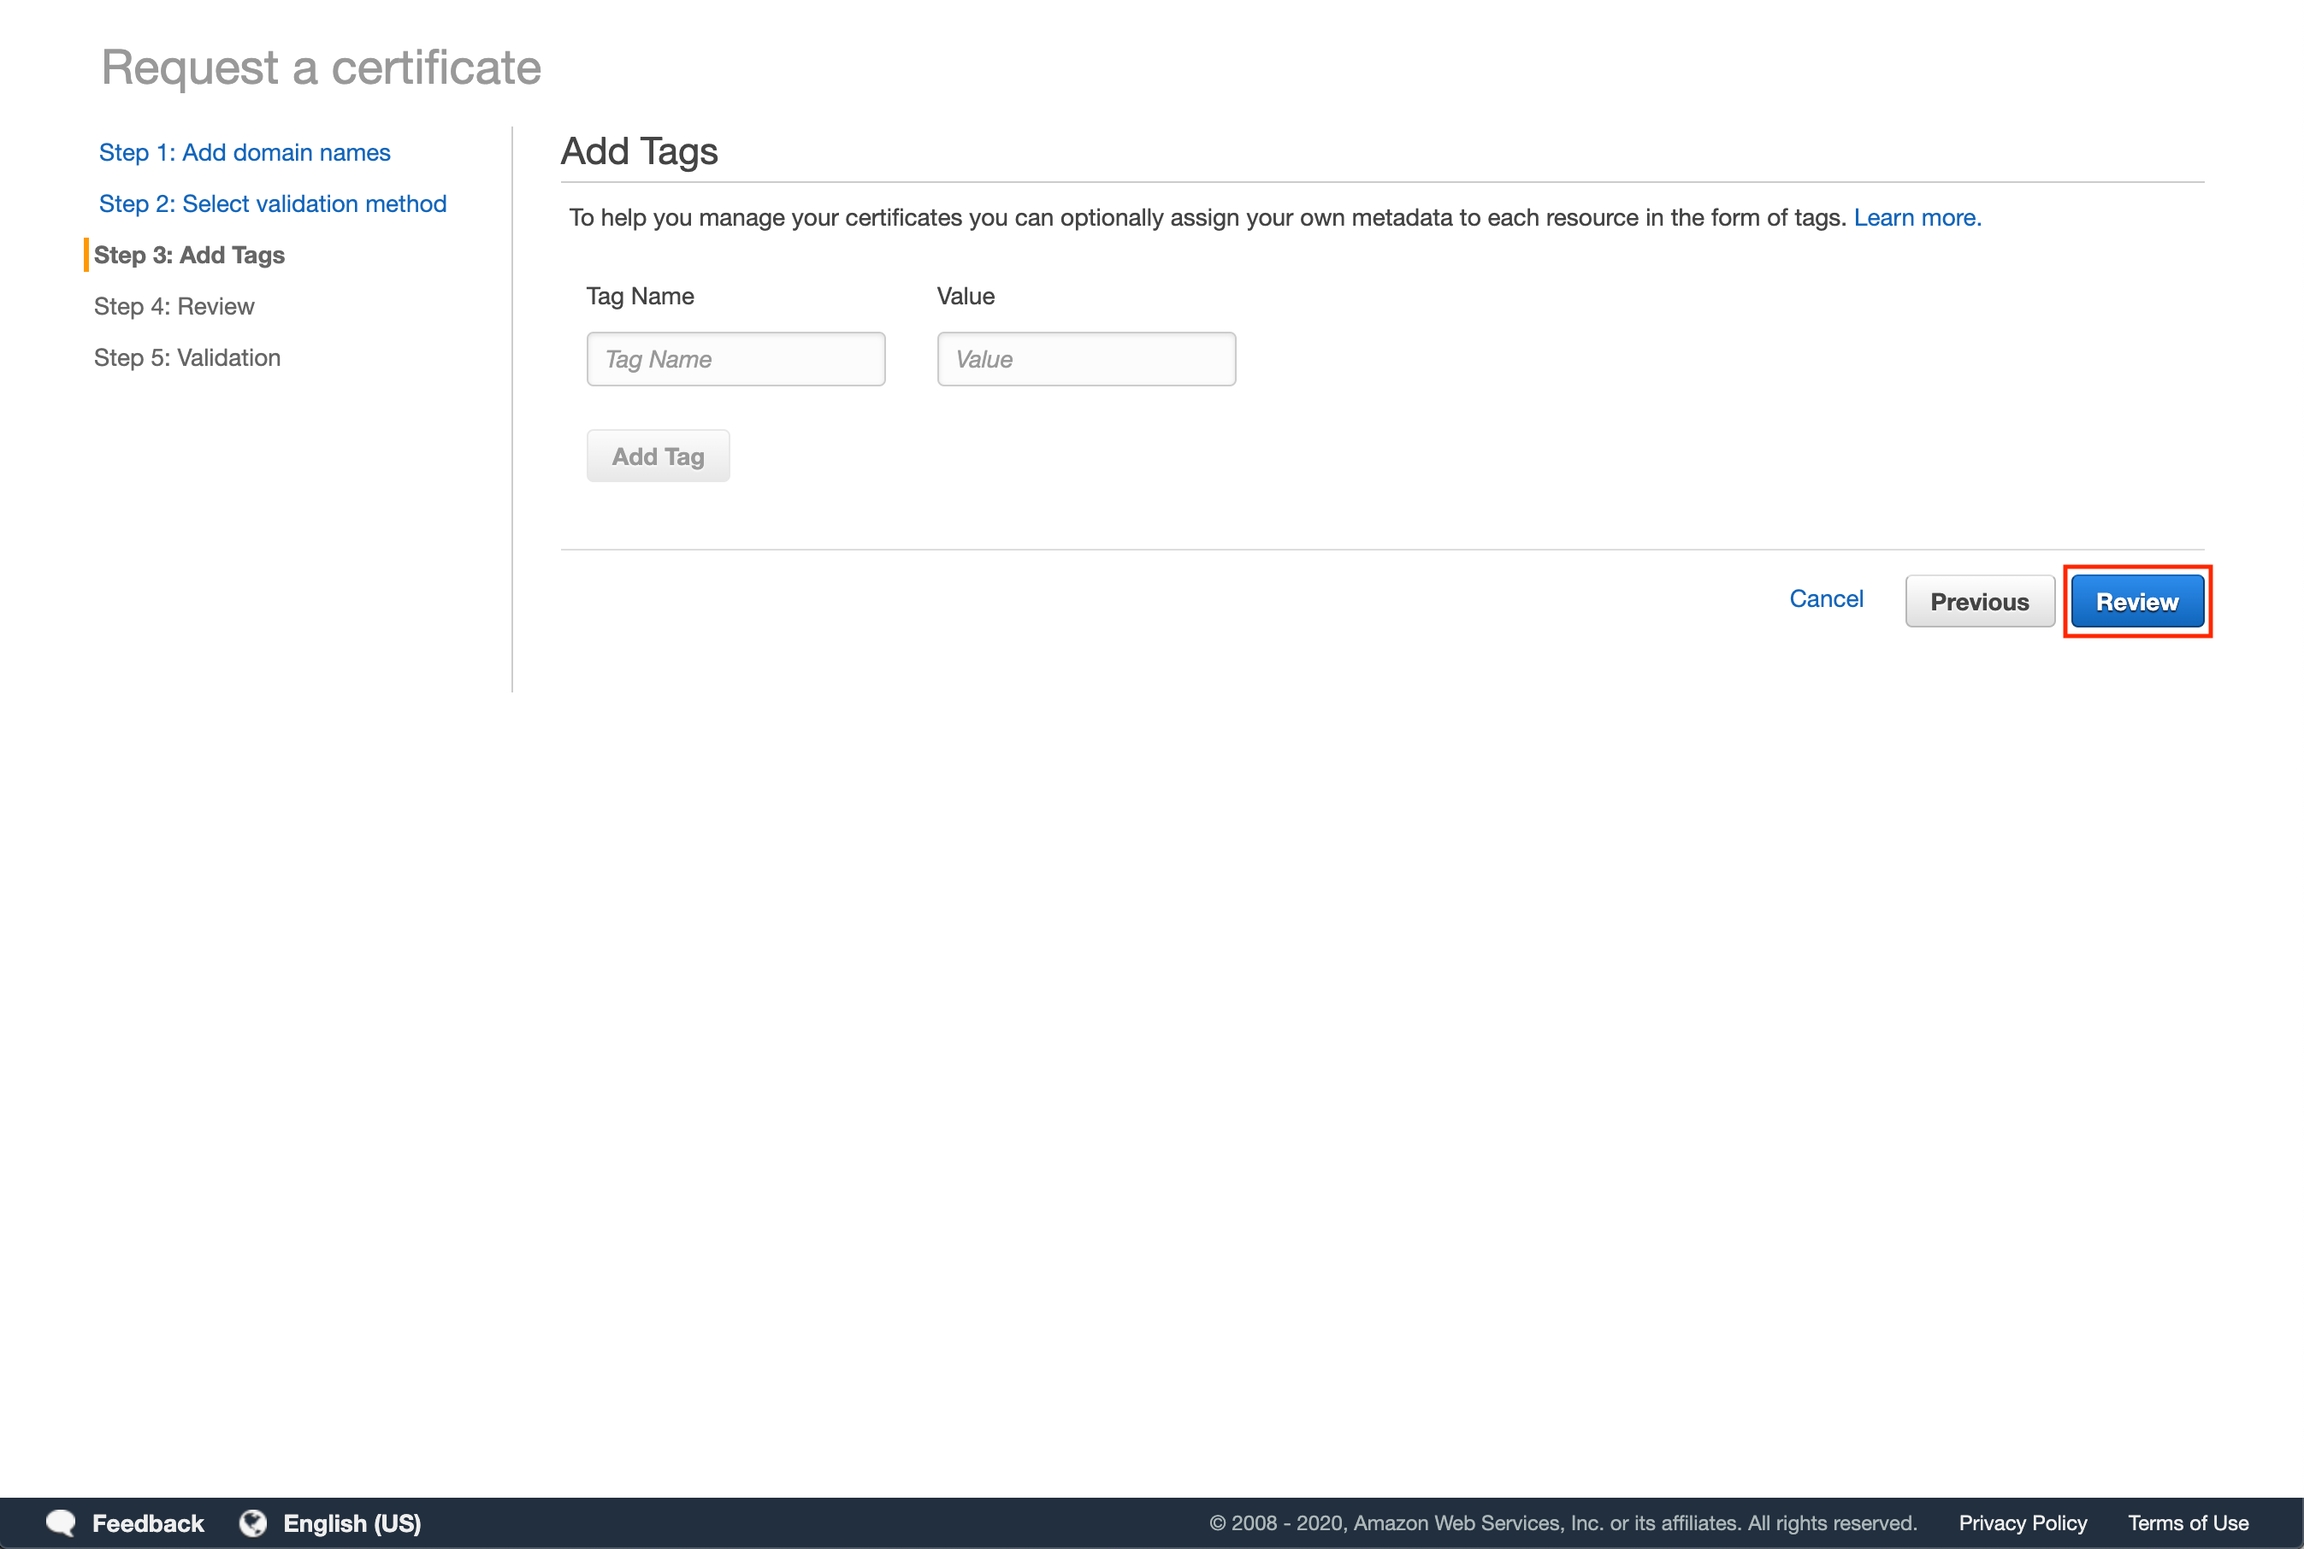
Add tags for searchability (optional) then click "Review".
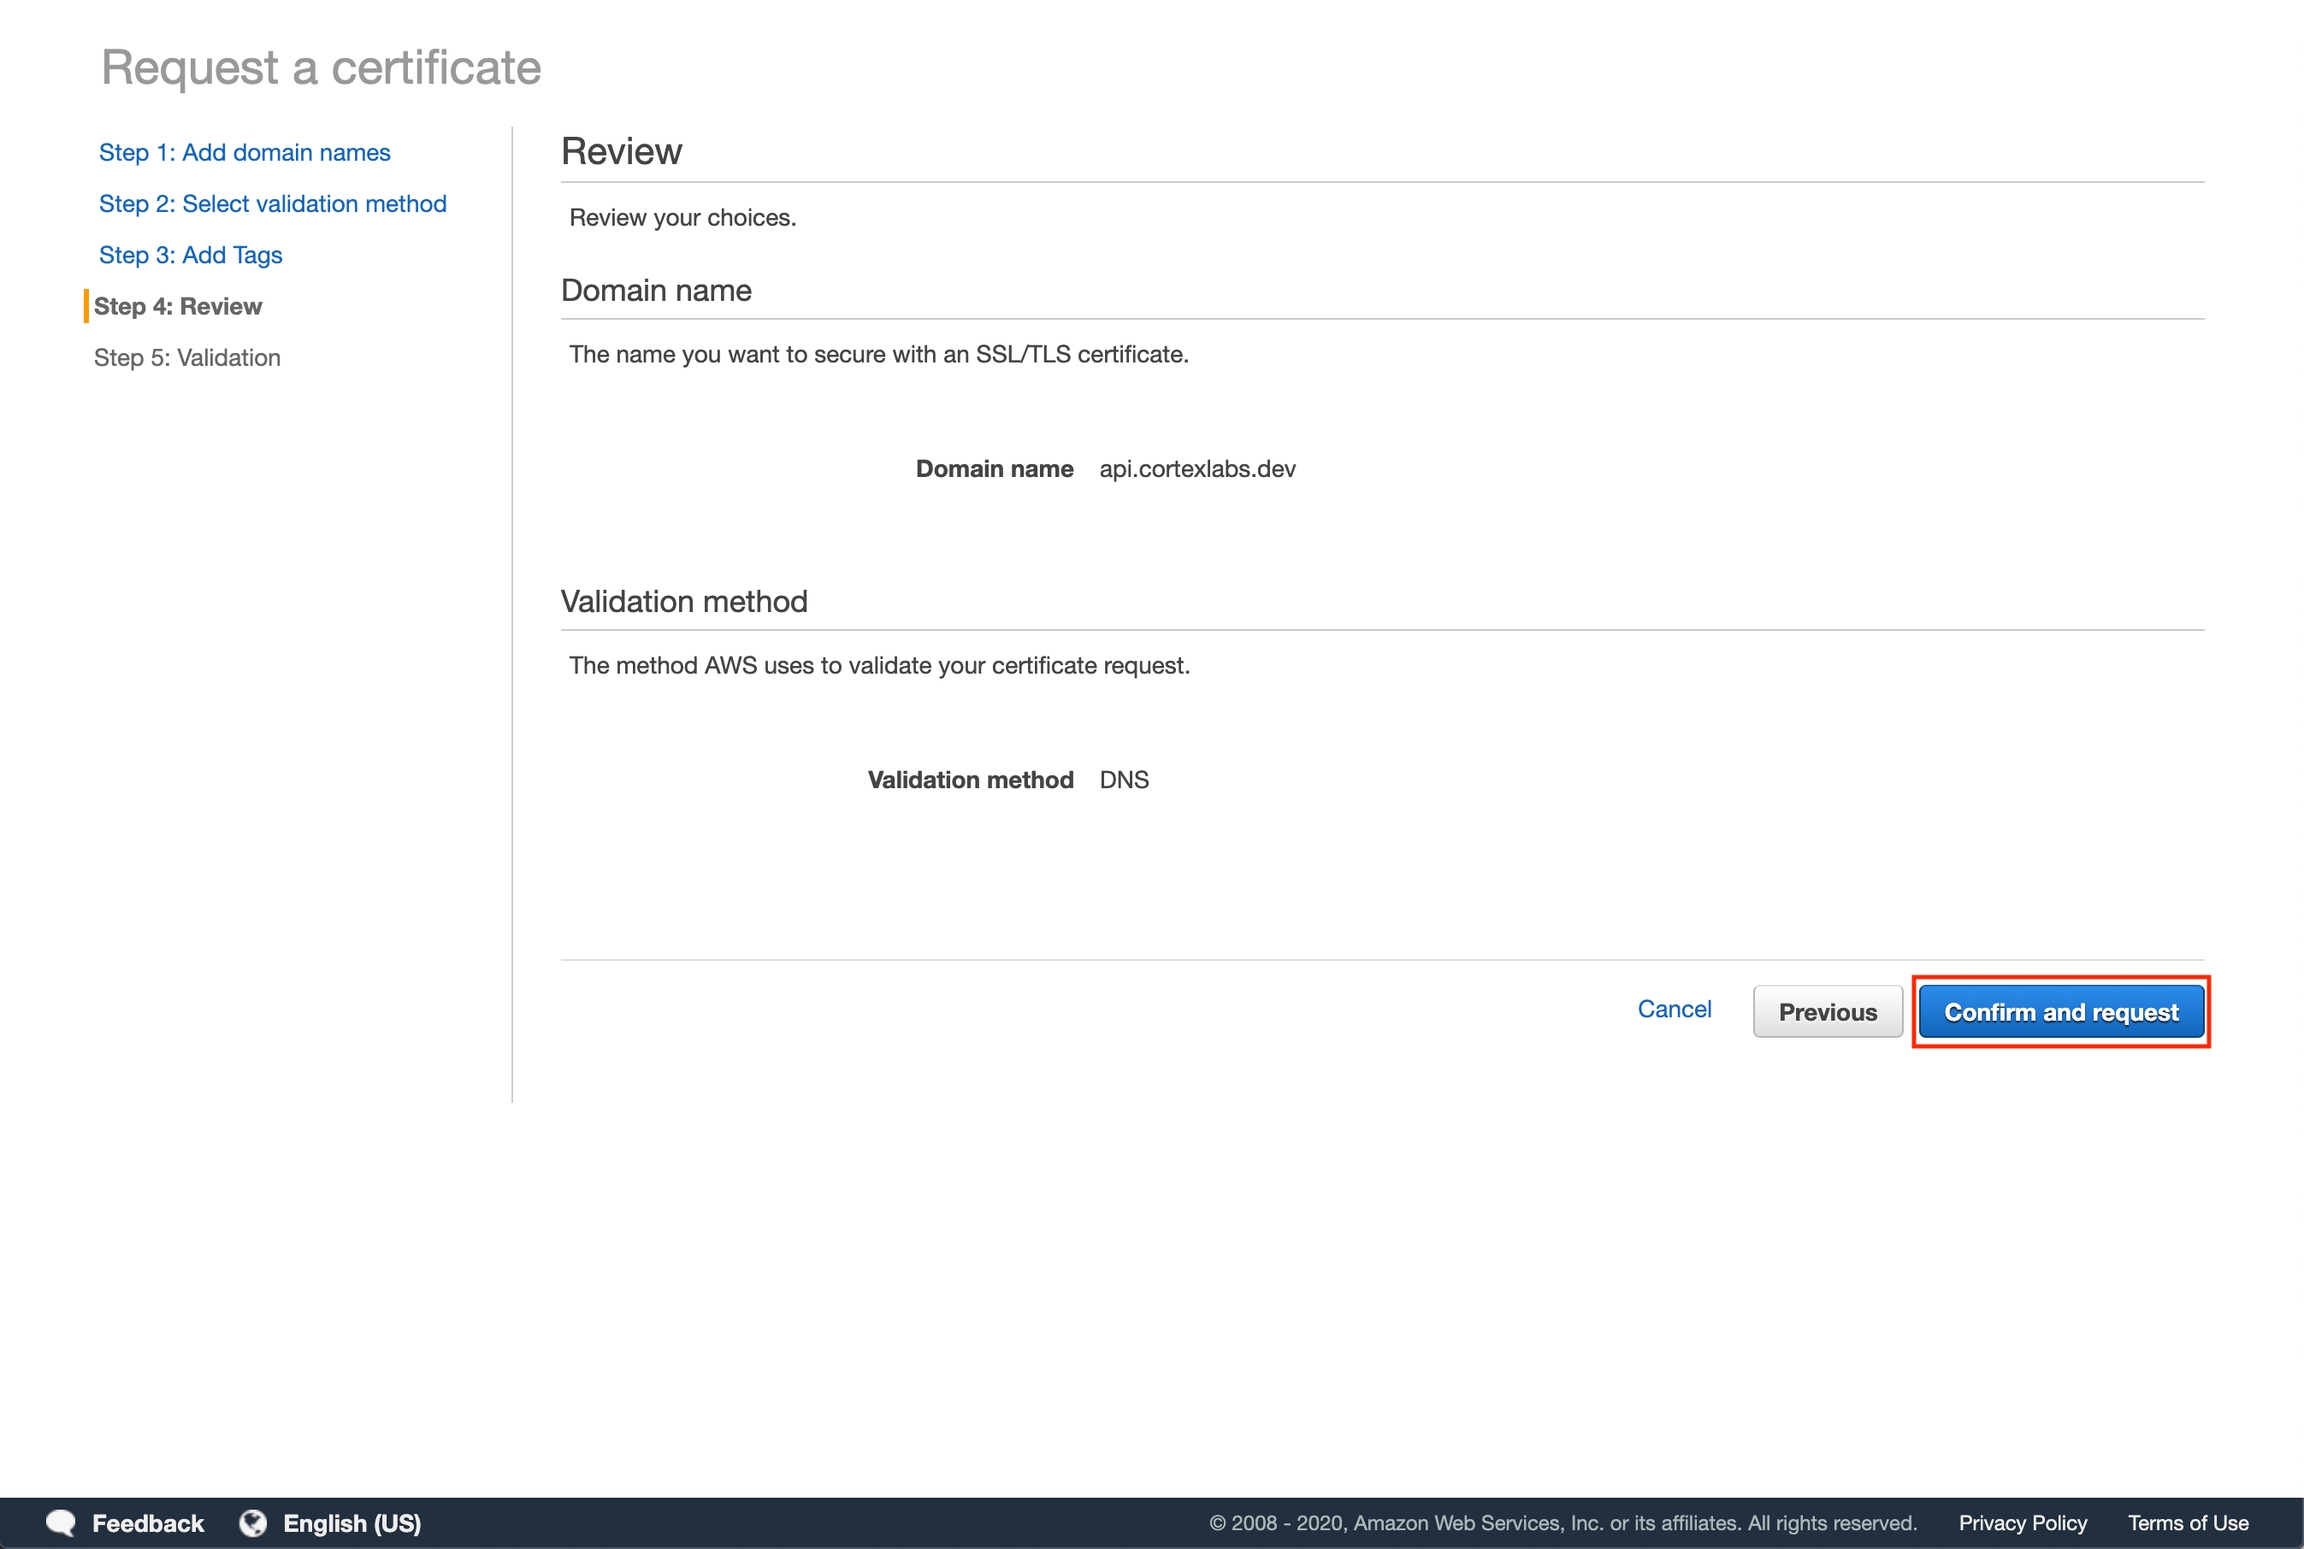
Click "Confirm and request".
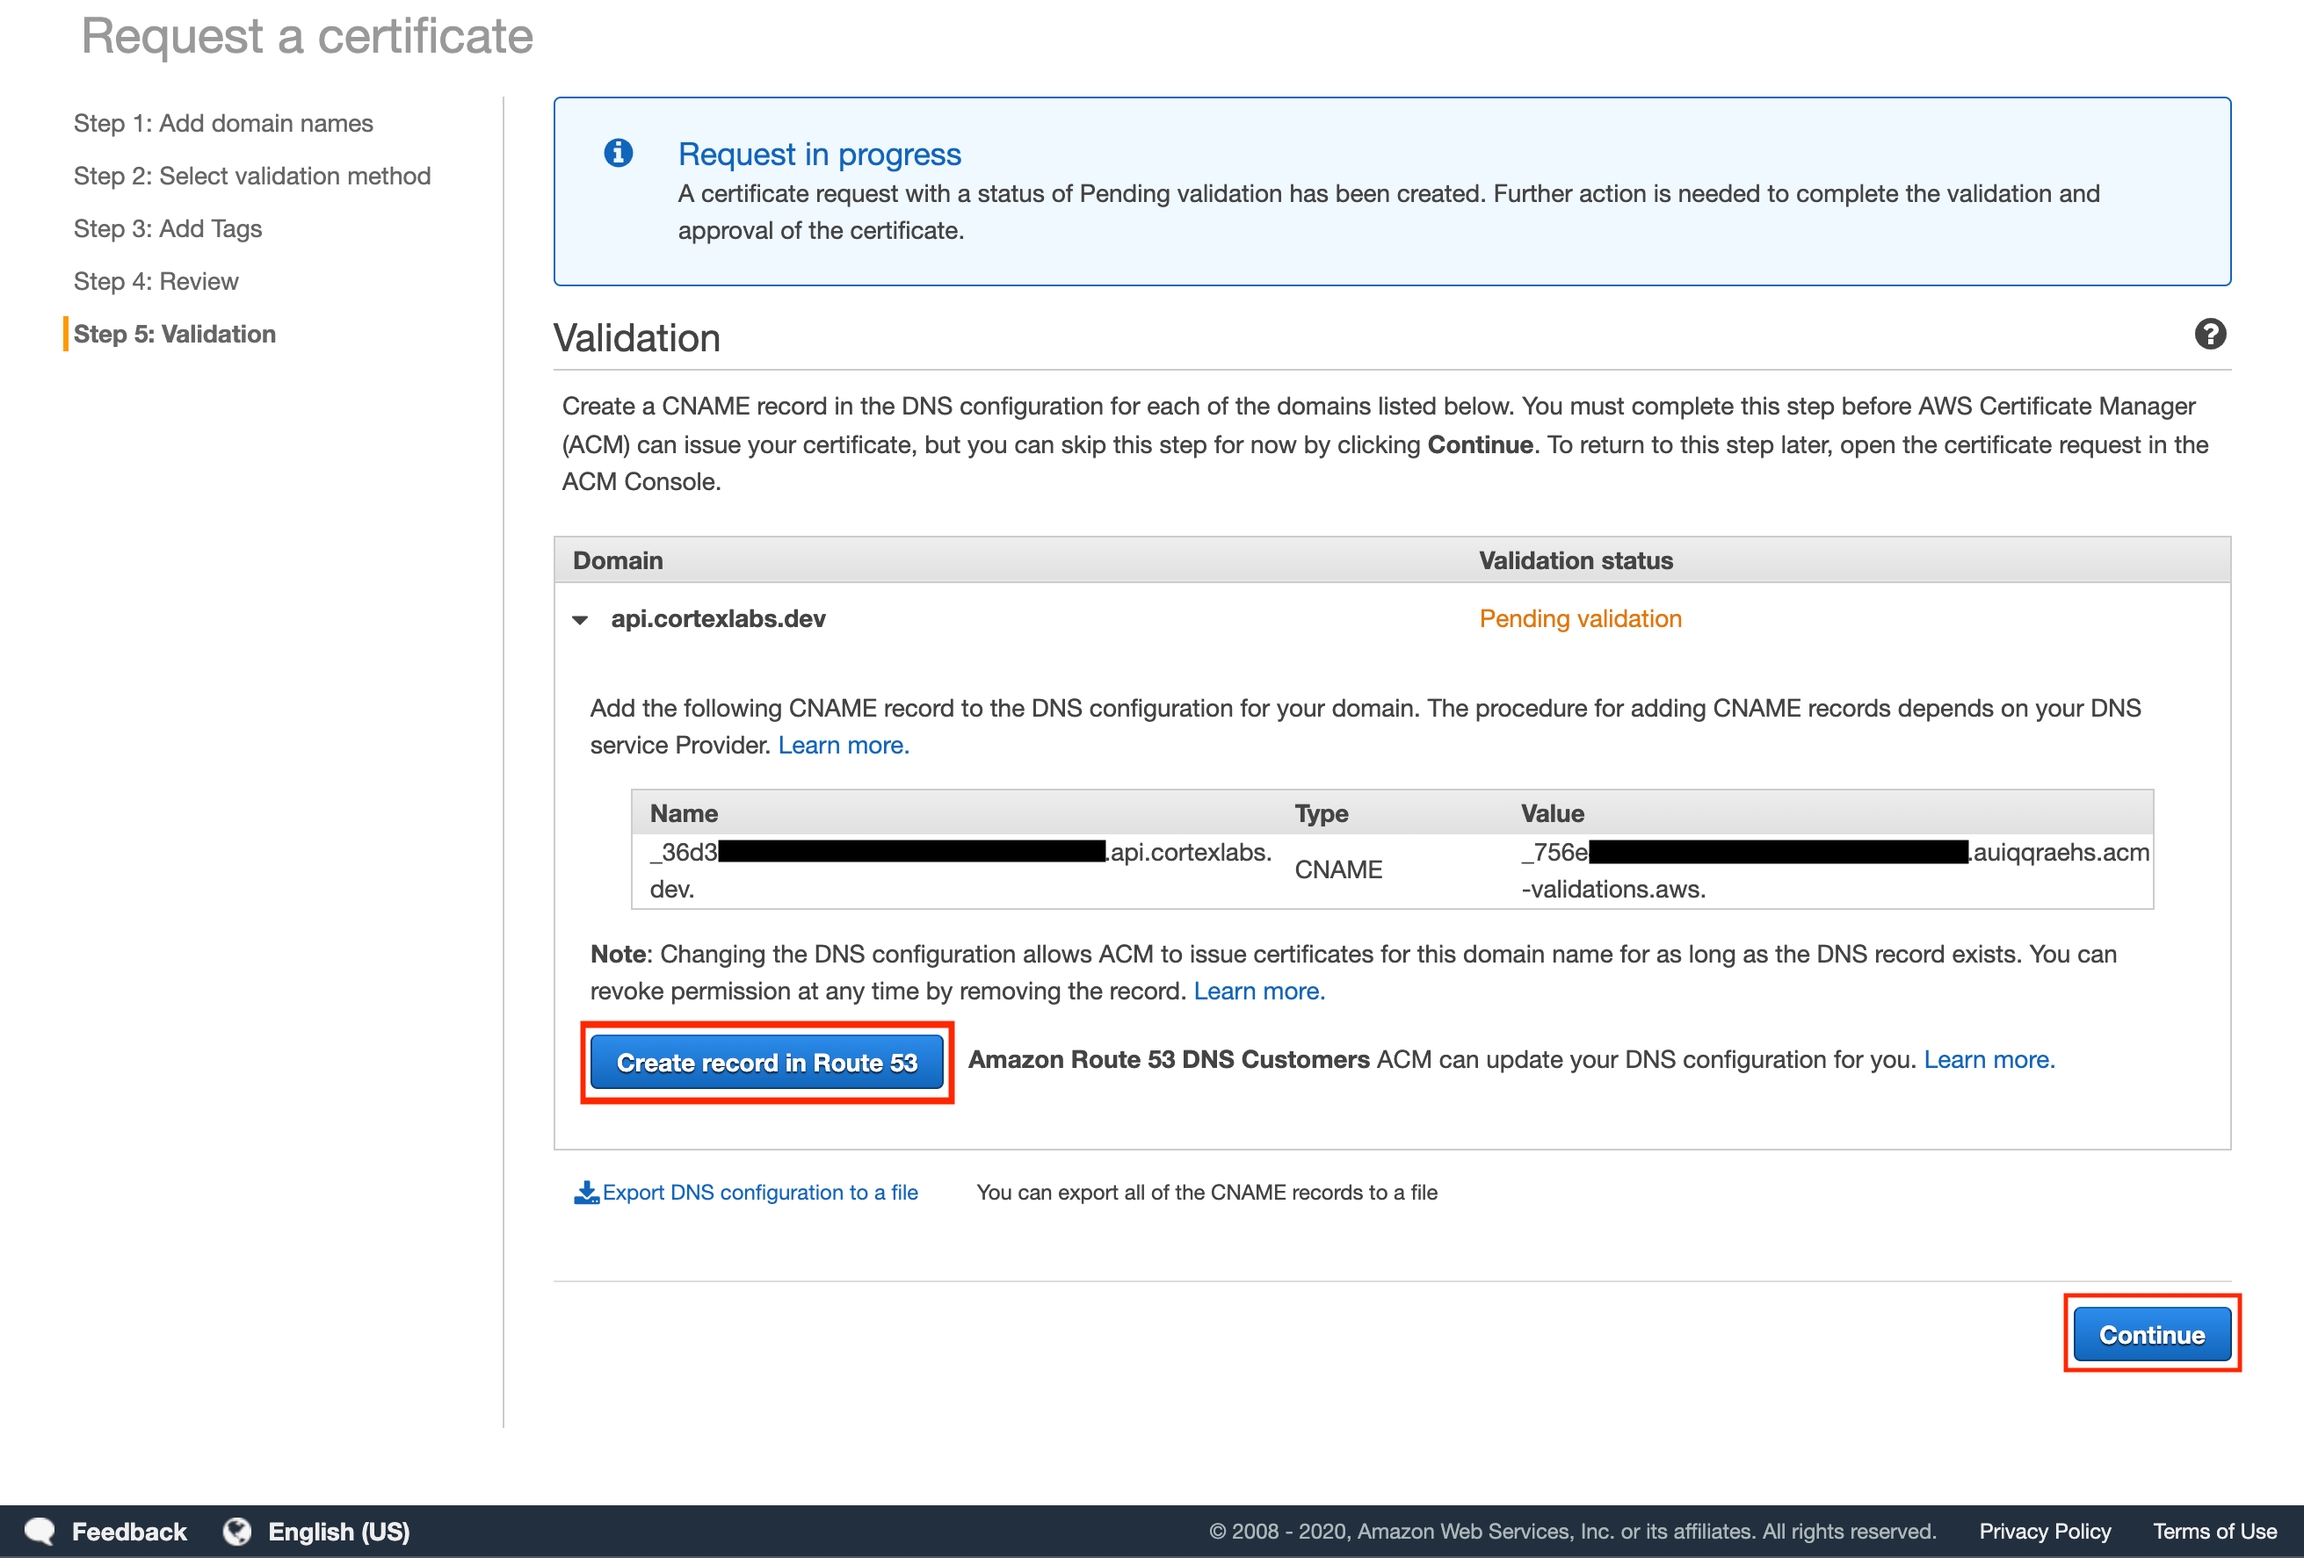
Click "Create record in Route 53". A popup will appear indicating that a Record is going to be added to Route 53. Click "Create" to automatically add the DNS record to your subdomain's hosted zone. Then click "Continue".
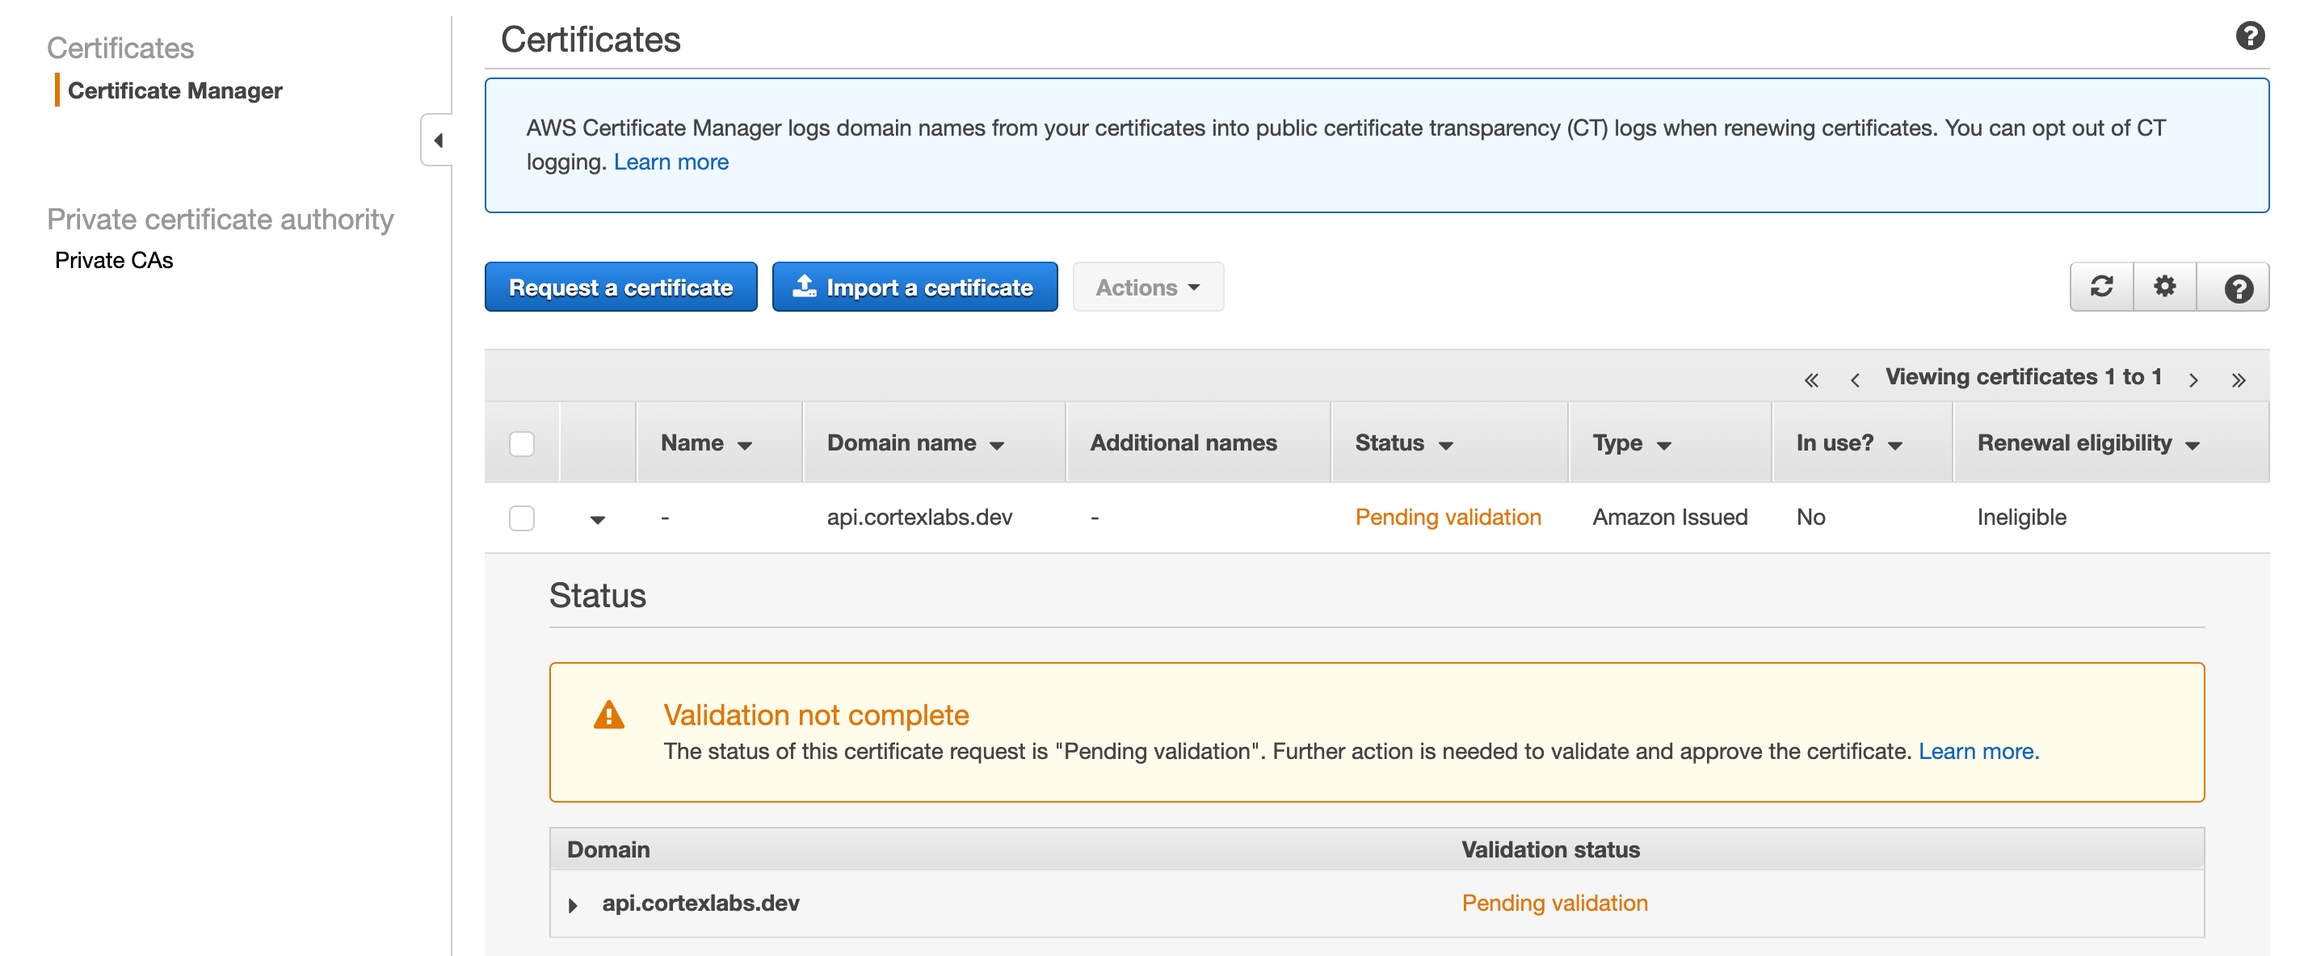
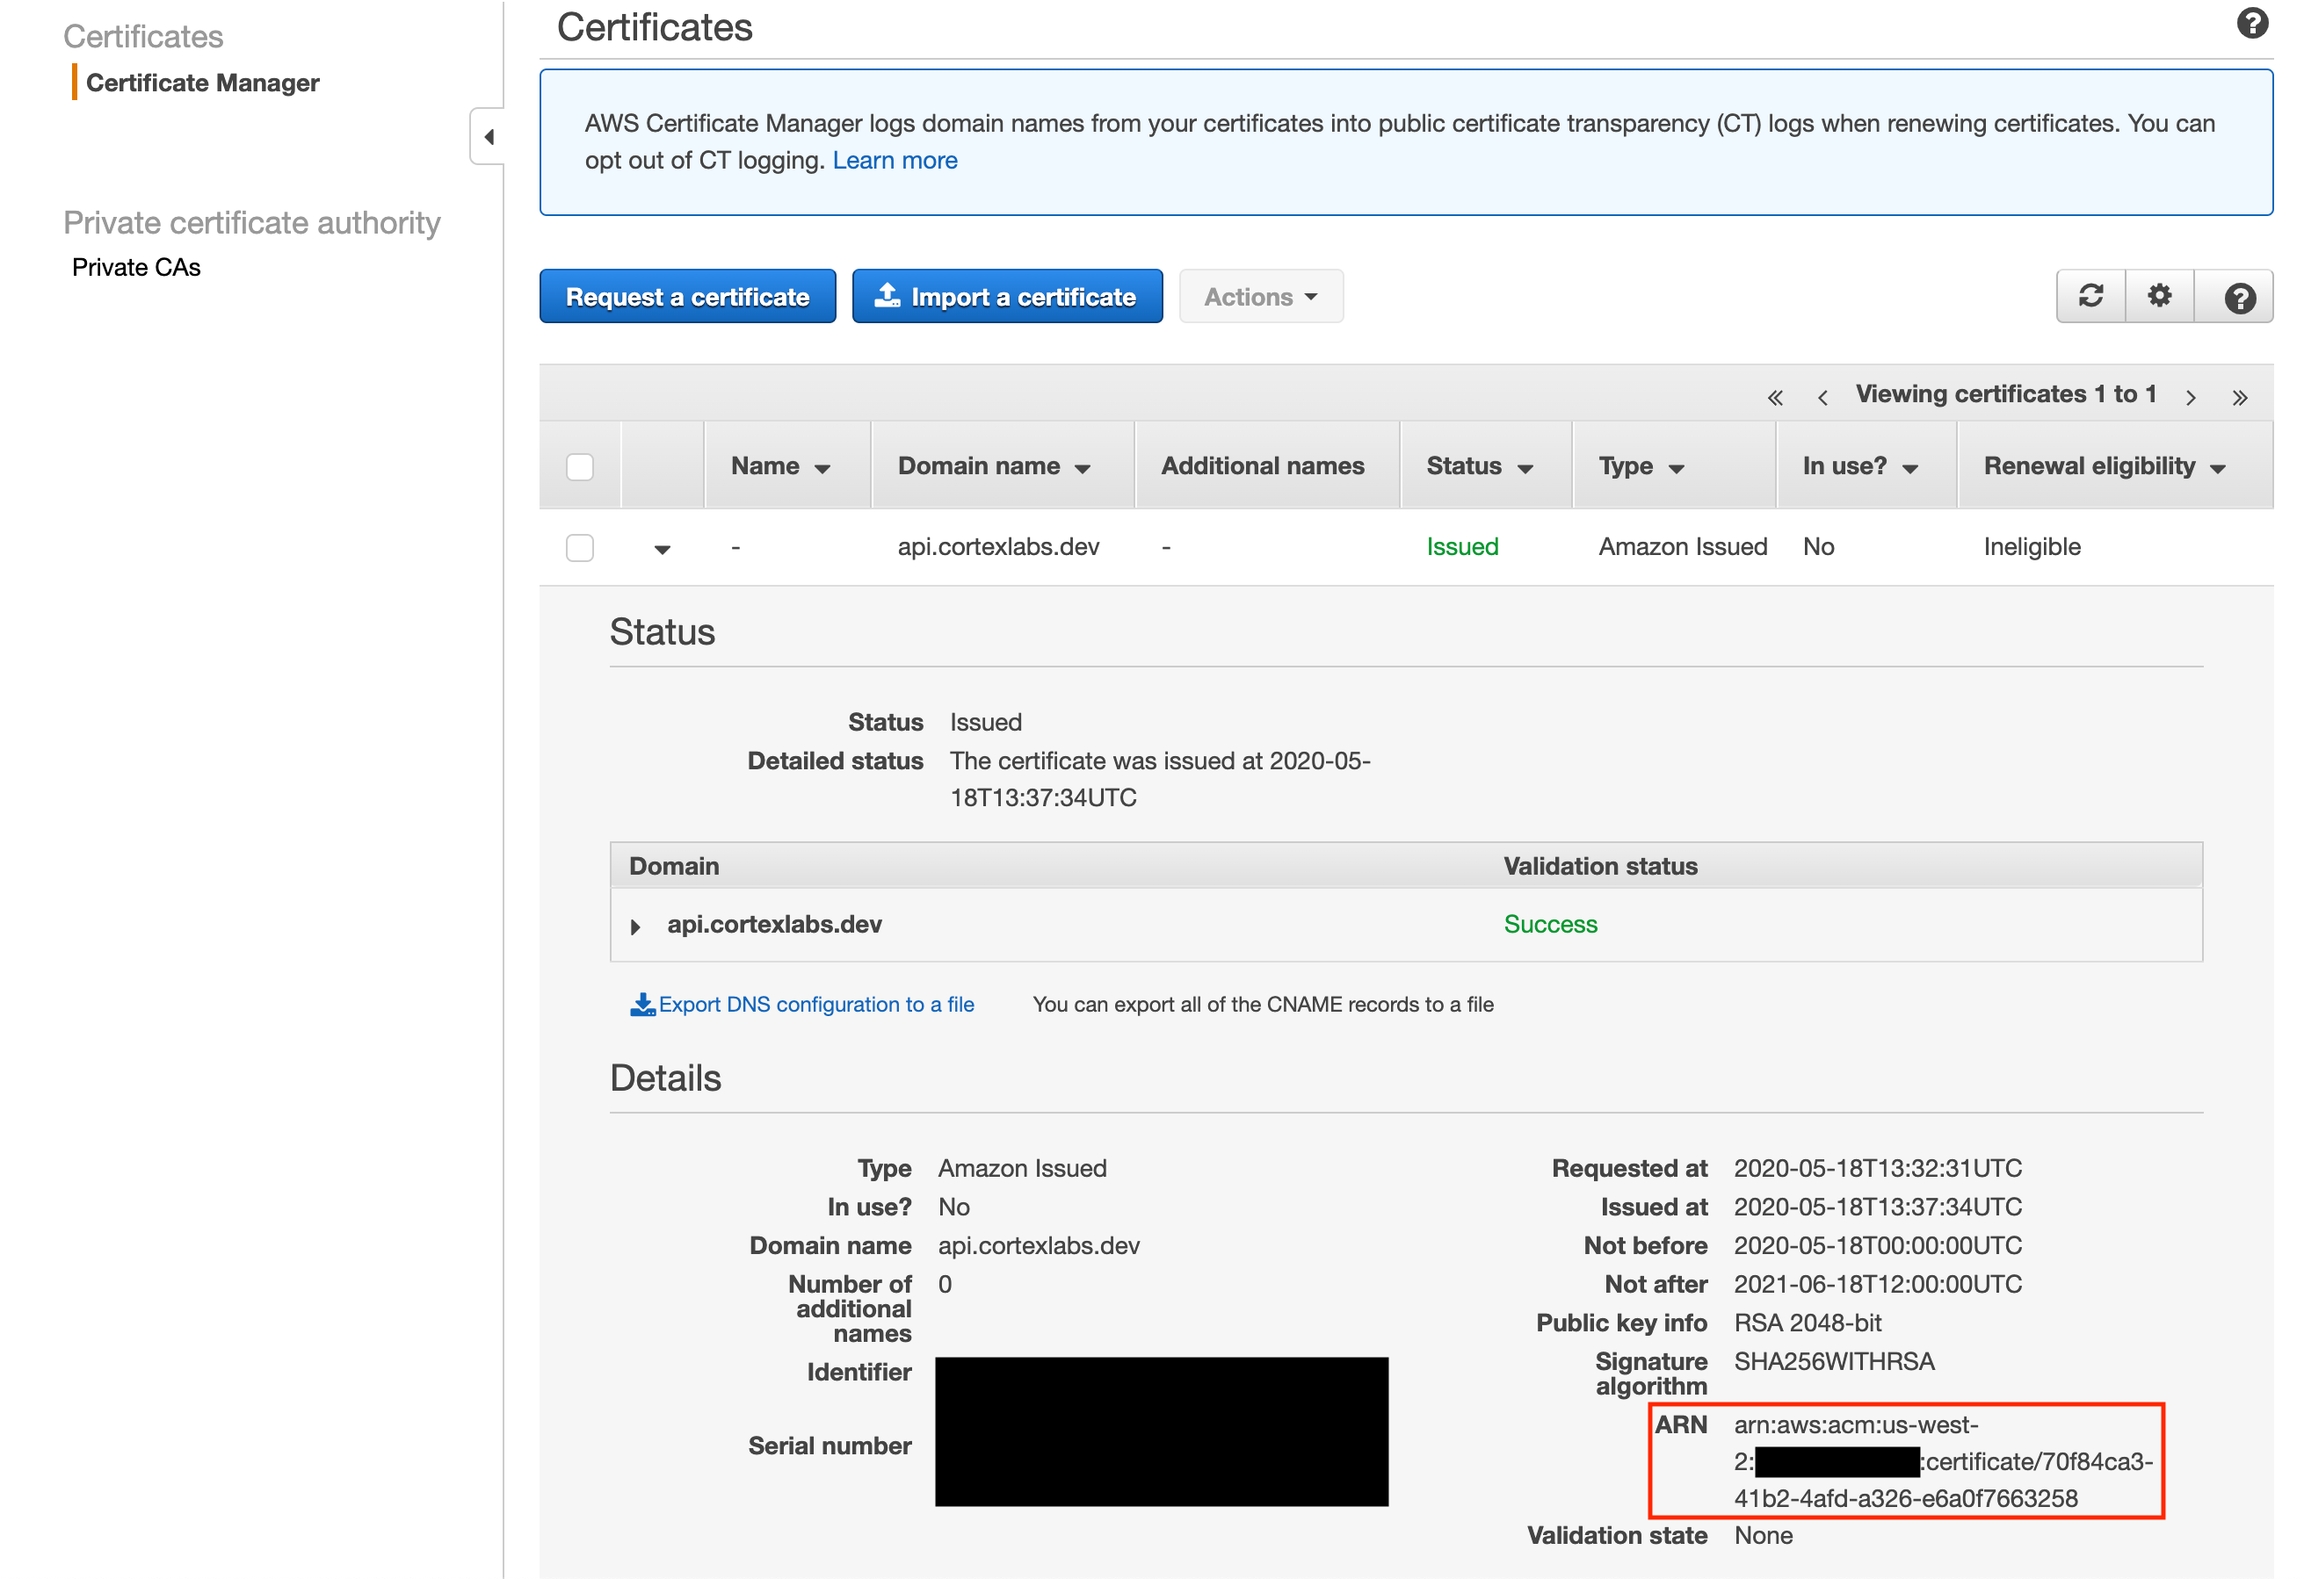
Wait for the Certificate Status to be "issued". This might take a few minutes.
Take note of the certificate's ARN. The certificate is ineligible for renewal because it is currently not being used. It will be eligible for renewal once it's used in Cortex.
Add the following field to your cluster configuration:
Create a Cortex cluster:
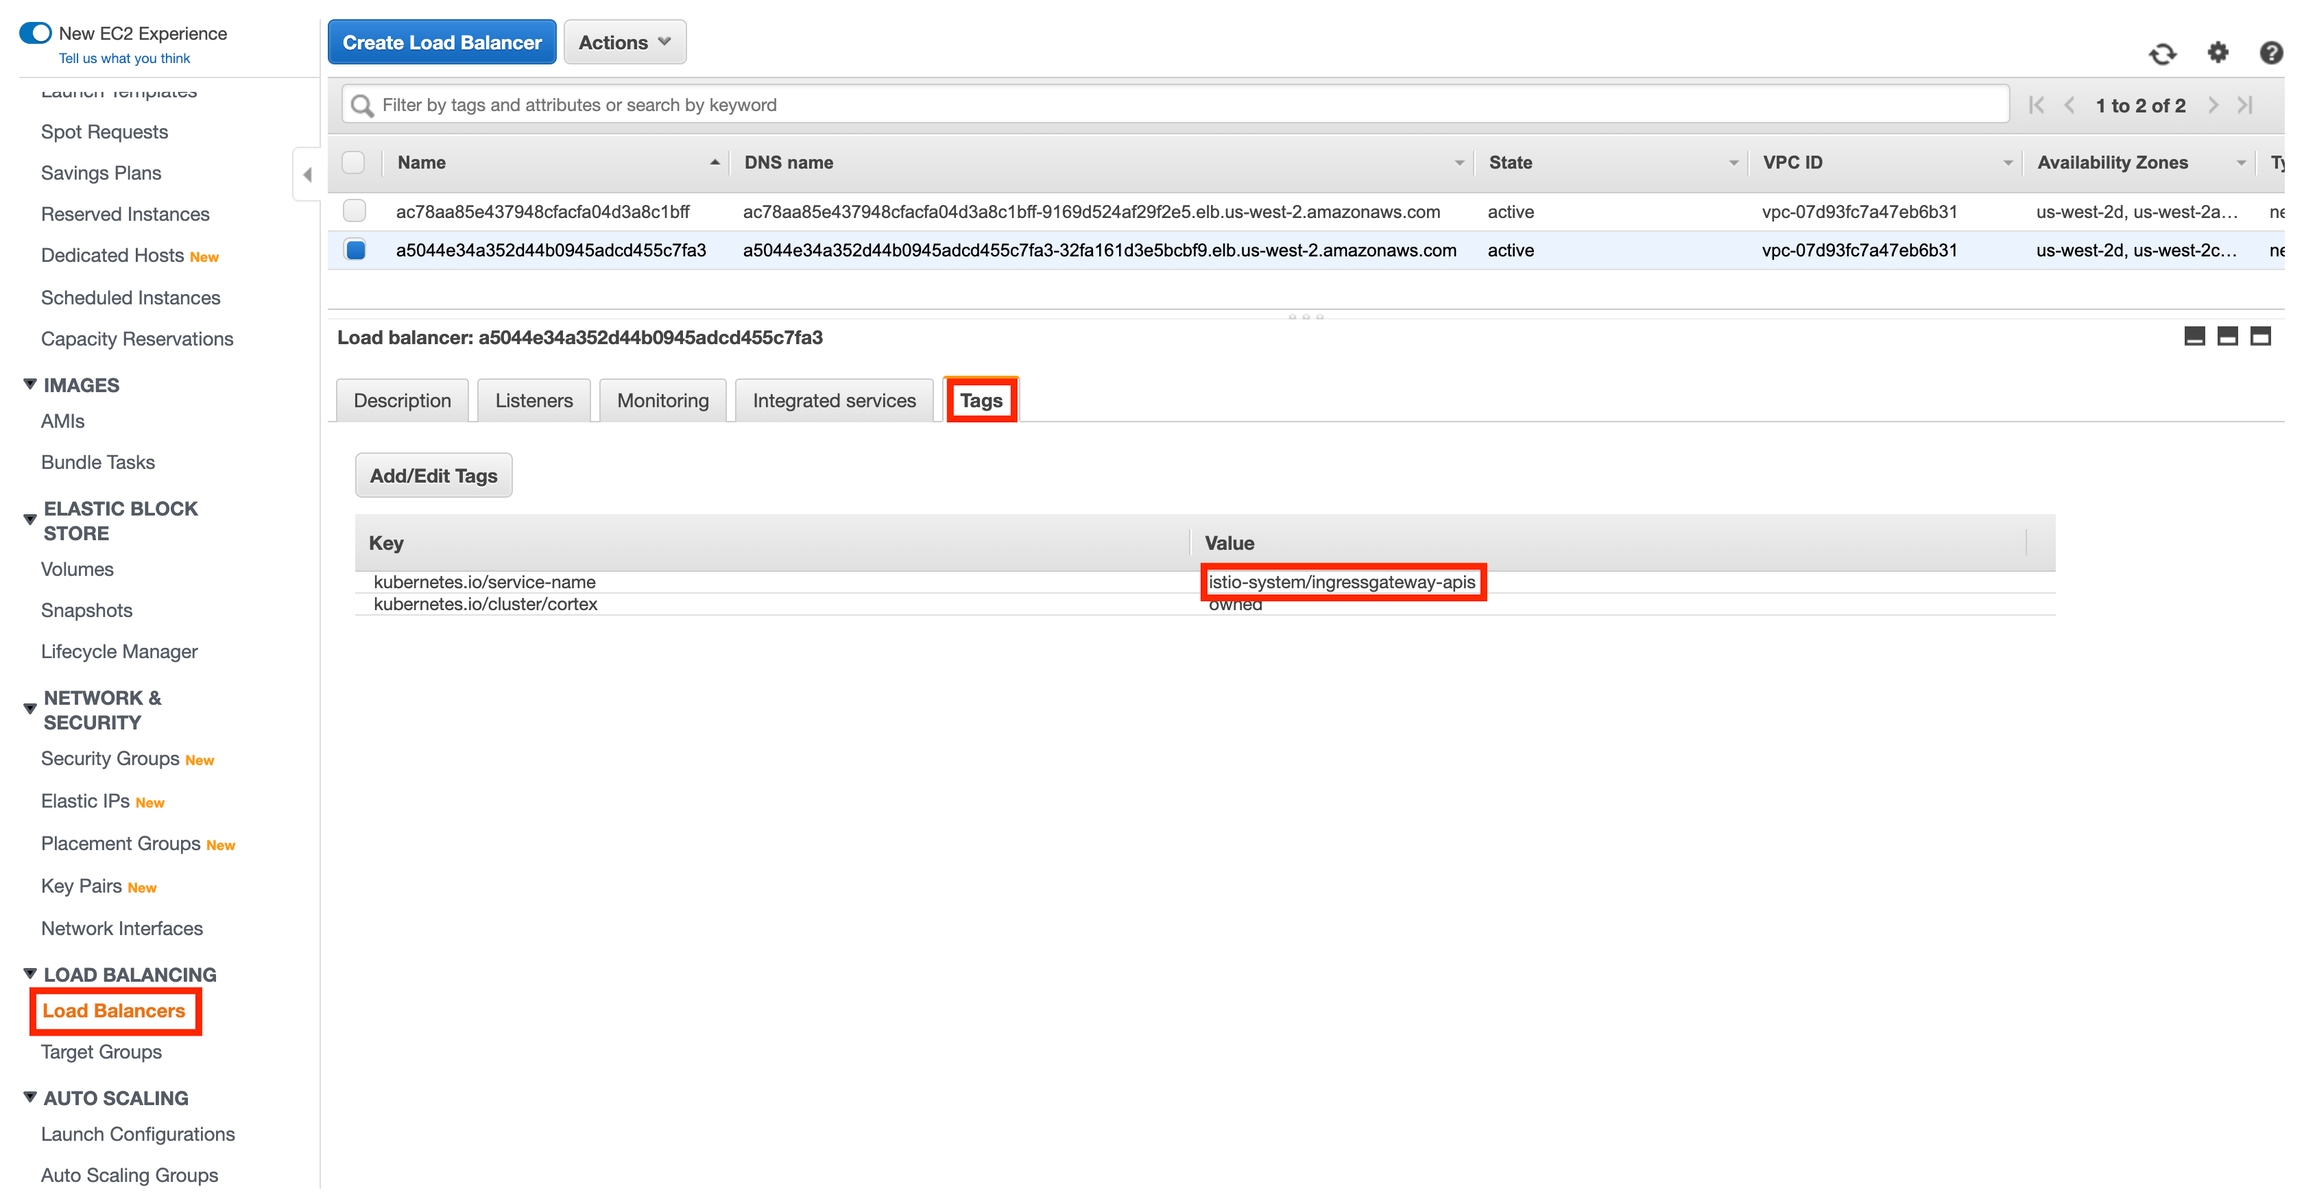
Navigate to your EC2 Load Balancer console and locate the Cortex API load balancer. You can determine which is the API load balancer by inspecting the kubernetes.io/service-name tag.
Take note of the load balancer's name.
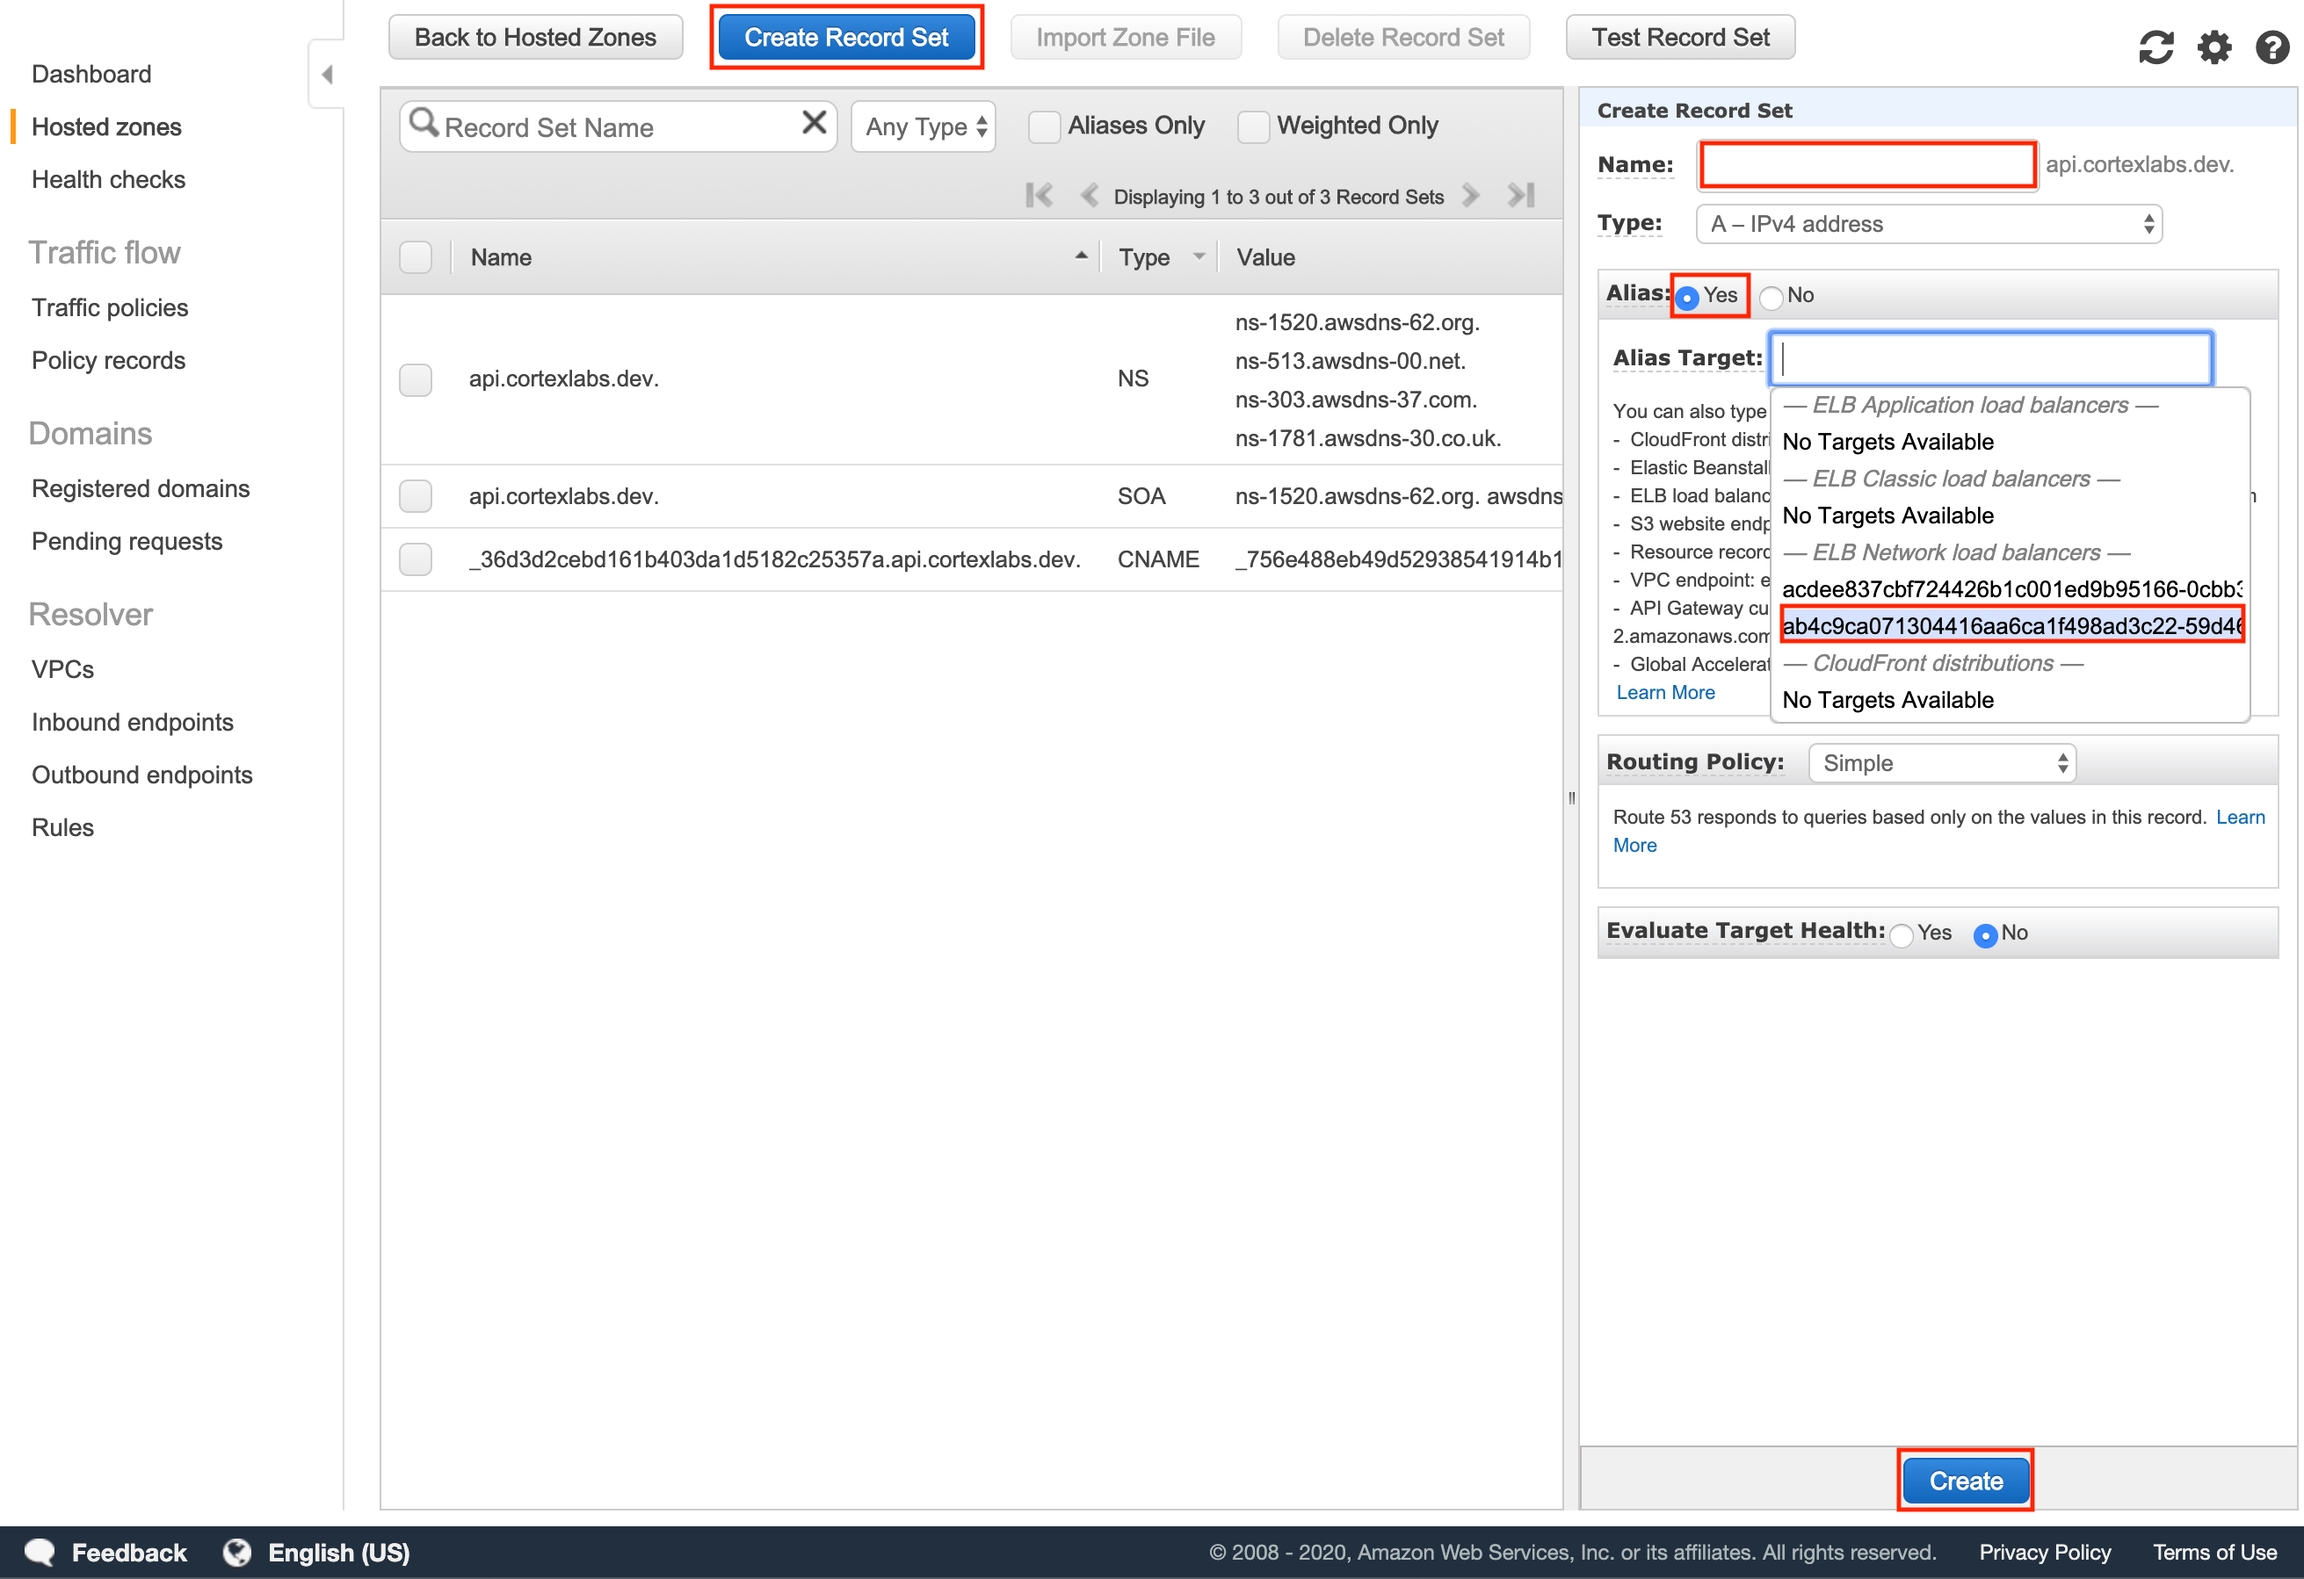
Go back to the Route 53 console and select the hosted zone you created earlier. Click "Create Record Set", and add an Alias record that routes traffic to your Cortex cluster's API load balancer (leave "Name" blank).
Wait a few minutes to allow the DNS changes to propagate. You may now use your subdomain in place of your API load balancer endpoint in your client. For example, this curl request:
Would become:
You could run into connectivity issues if you make a request to your API without waiting long enough for your DNS records to propagate after creating them (it usually takes 5-10 mintues). If you are updating existing DNS records, it could take anywhere from a few minutes to 48 hours for the DNS cache to expire (until then, your previous DNS configuration will be used).
To test connectivity, try the following steps:
Deploy an api.
Make a request to the your api (e.g. curl https://api.cortexlabs.dev/my-api or paste the url into your browser if your API supports GET requests).
If you run into an error such as curl: (6) Could not resolve host: api.cortexlabs.dev wait a few minutes and make the request from another device that hasn't made a request to that url in a while.
Spin down your Cortex cluster.
Delete the hosted zone for your subdomain in the Route 53 console:
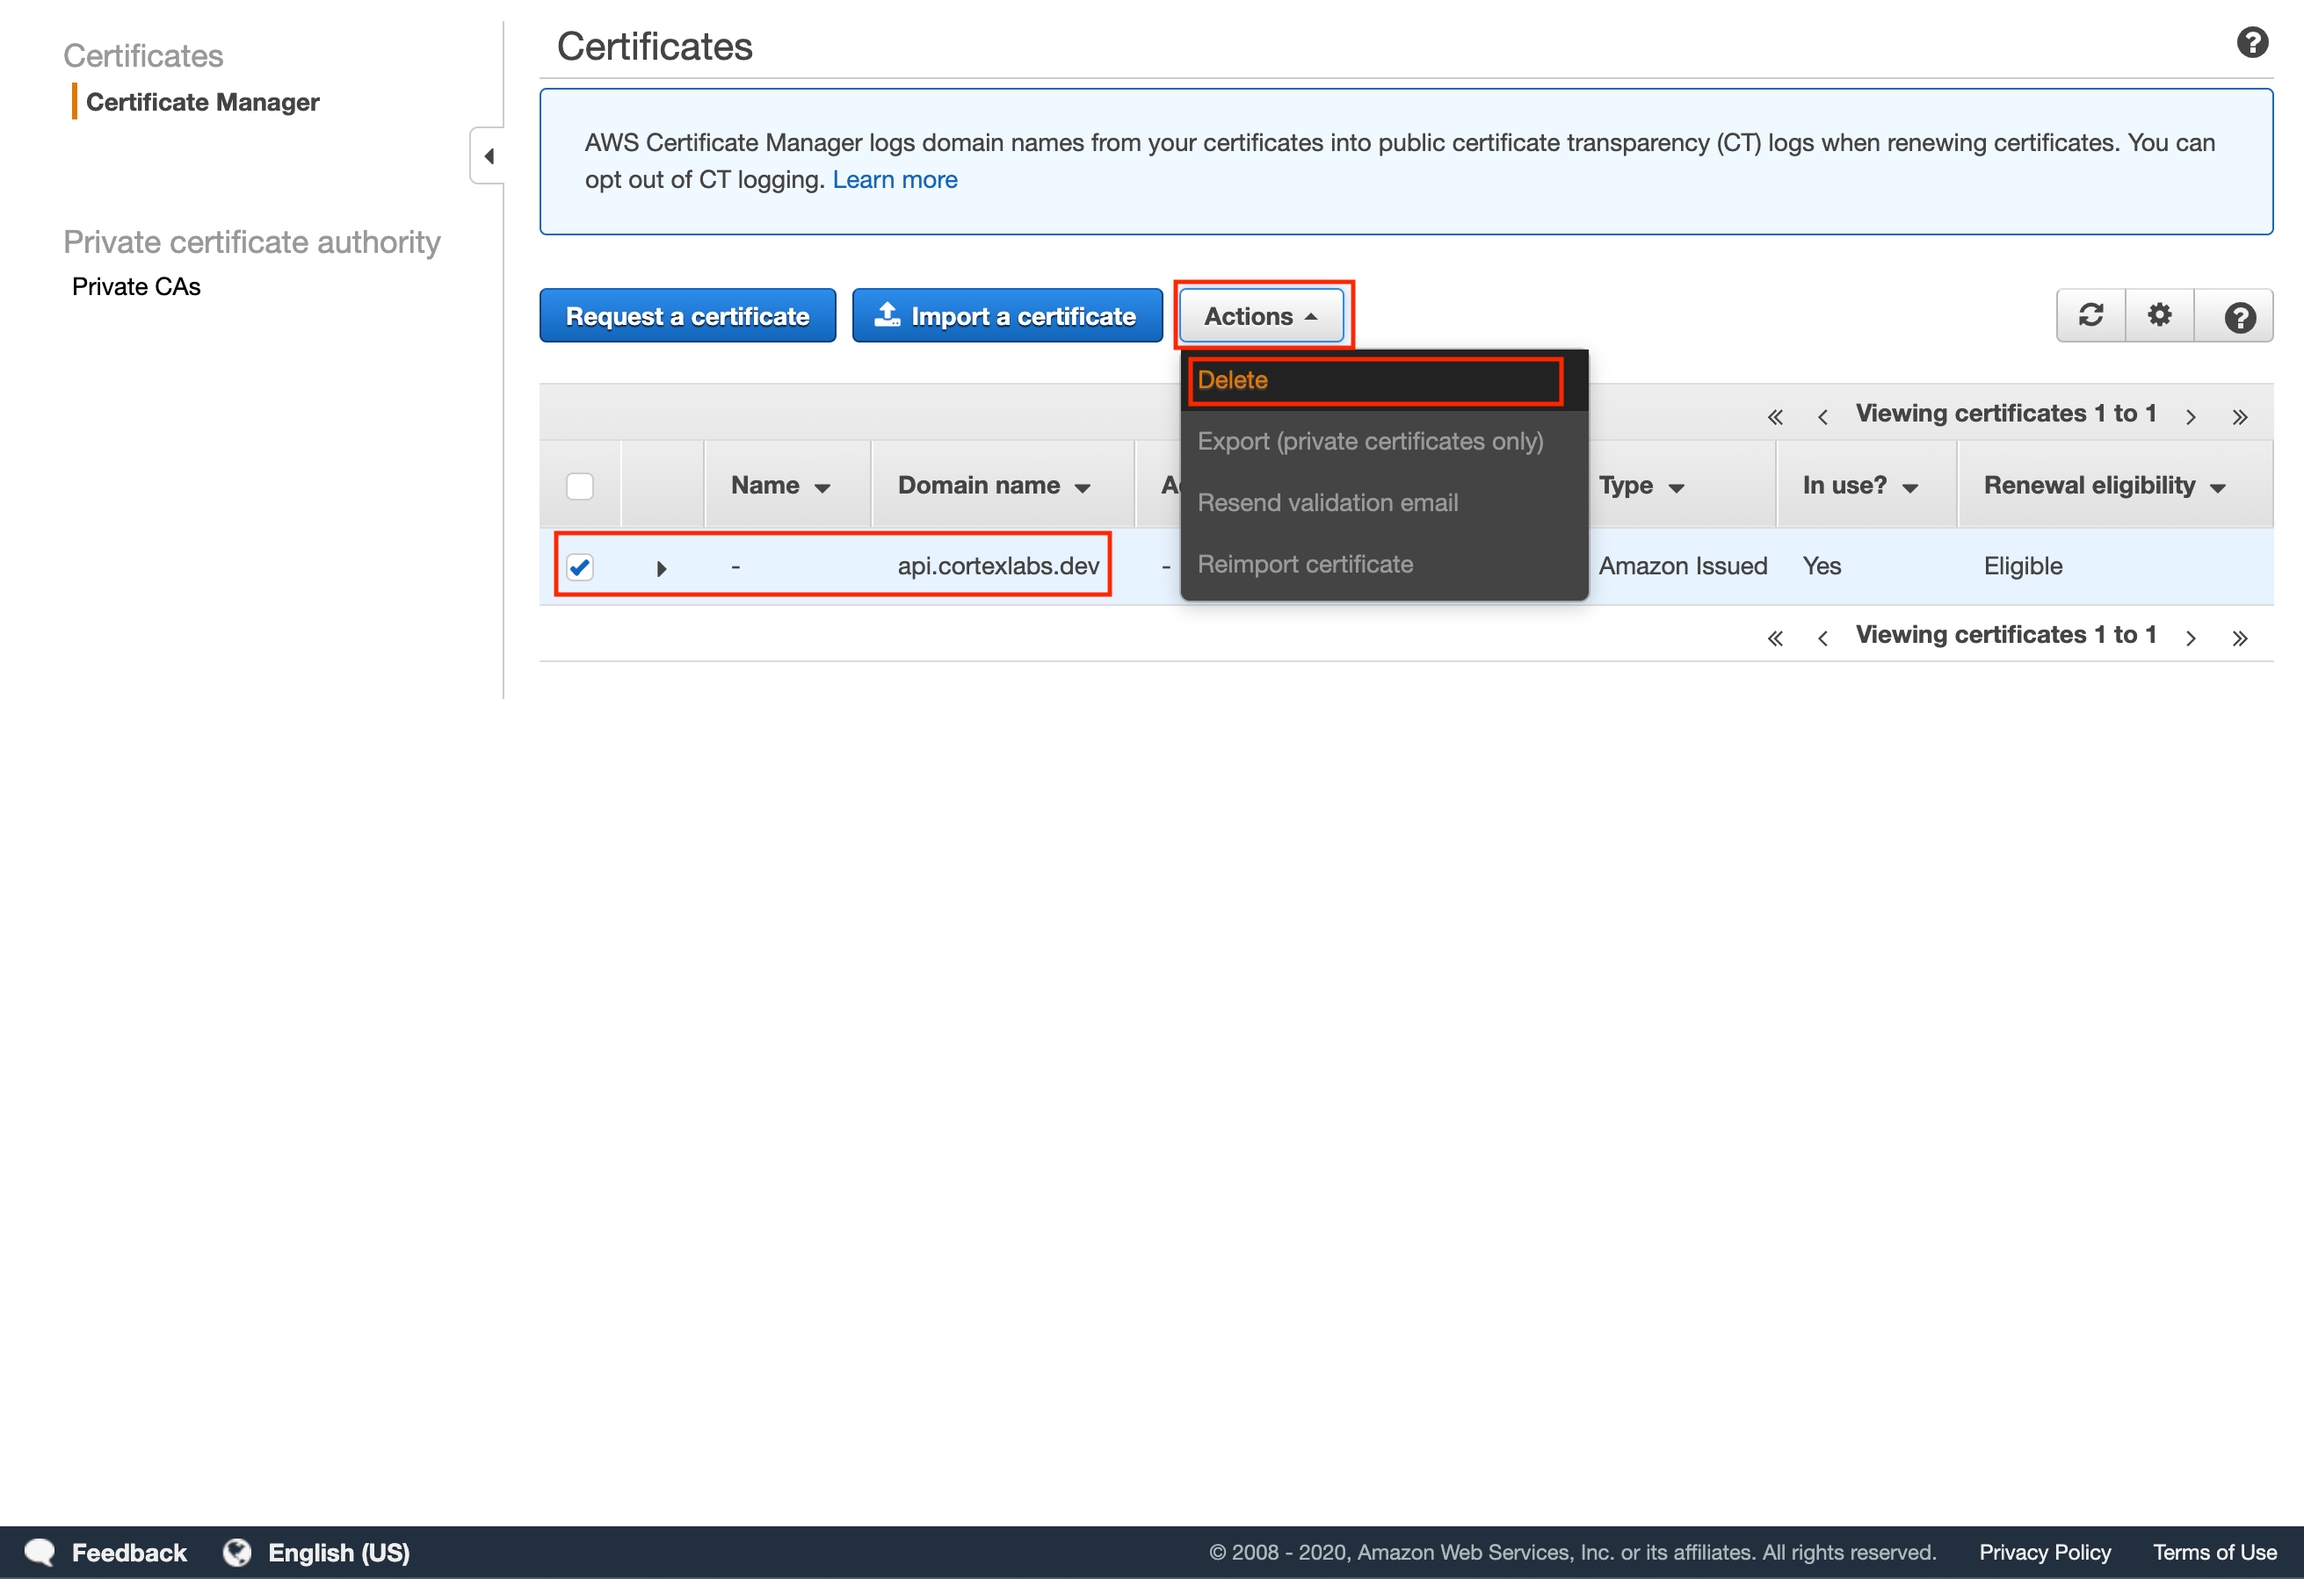
If you created an SSL certificate, delete it from the ACM console: